Building a Virginal: The Keyboard Frame
March 5, 2023
Roscoe, N.Y.
Yesterday was my first full day in assembling a Zuckermann Troubadour Virginal kit, and I succeeded in putting together all the wooden parts of the keyboard frame, but stopping short of laying down the felt cushions and getting all the keys to work.
The keyboard frame is not the first step described in the 73-page Construction and Maintenance Manual that Zuckermann supplies. The keyboard doesn’t start until page 30, but Ed Kottick (the designer of the Troubadour Virginal and the author of the manual) clearly says “You can work on the keyboard at any time.”
Building the virginal includes several big jobs that are done only once — building the case, assembling the sound board, building the keyboard frame — but others that must be done 55 times because that’s the number of keys there are. Normally, the repetitive jobs come towards the end of the project, particularly when the virginal must be strung with wire and the plucking plectrum of each key adjusted for a good sound (this is known as voicing). For variety, I decided to mix up the one-time jobs and the repetitive jobs, which is why I began with the keyboard.
One of my goals in building this virginal is understanding everything about it. I want to know the purpose of every part, and the rationale of every step, and, of course, I have a ridiculous impulse to convey what I’ve learned to the world at large.
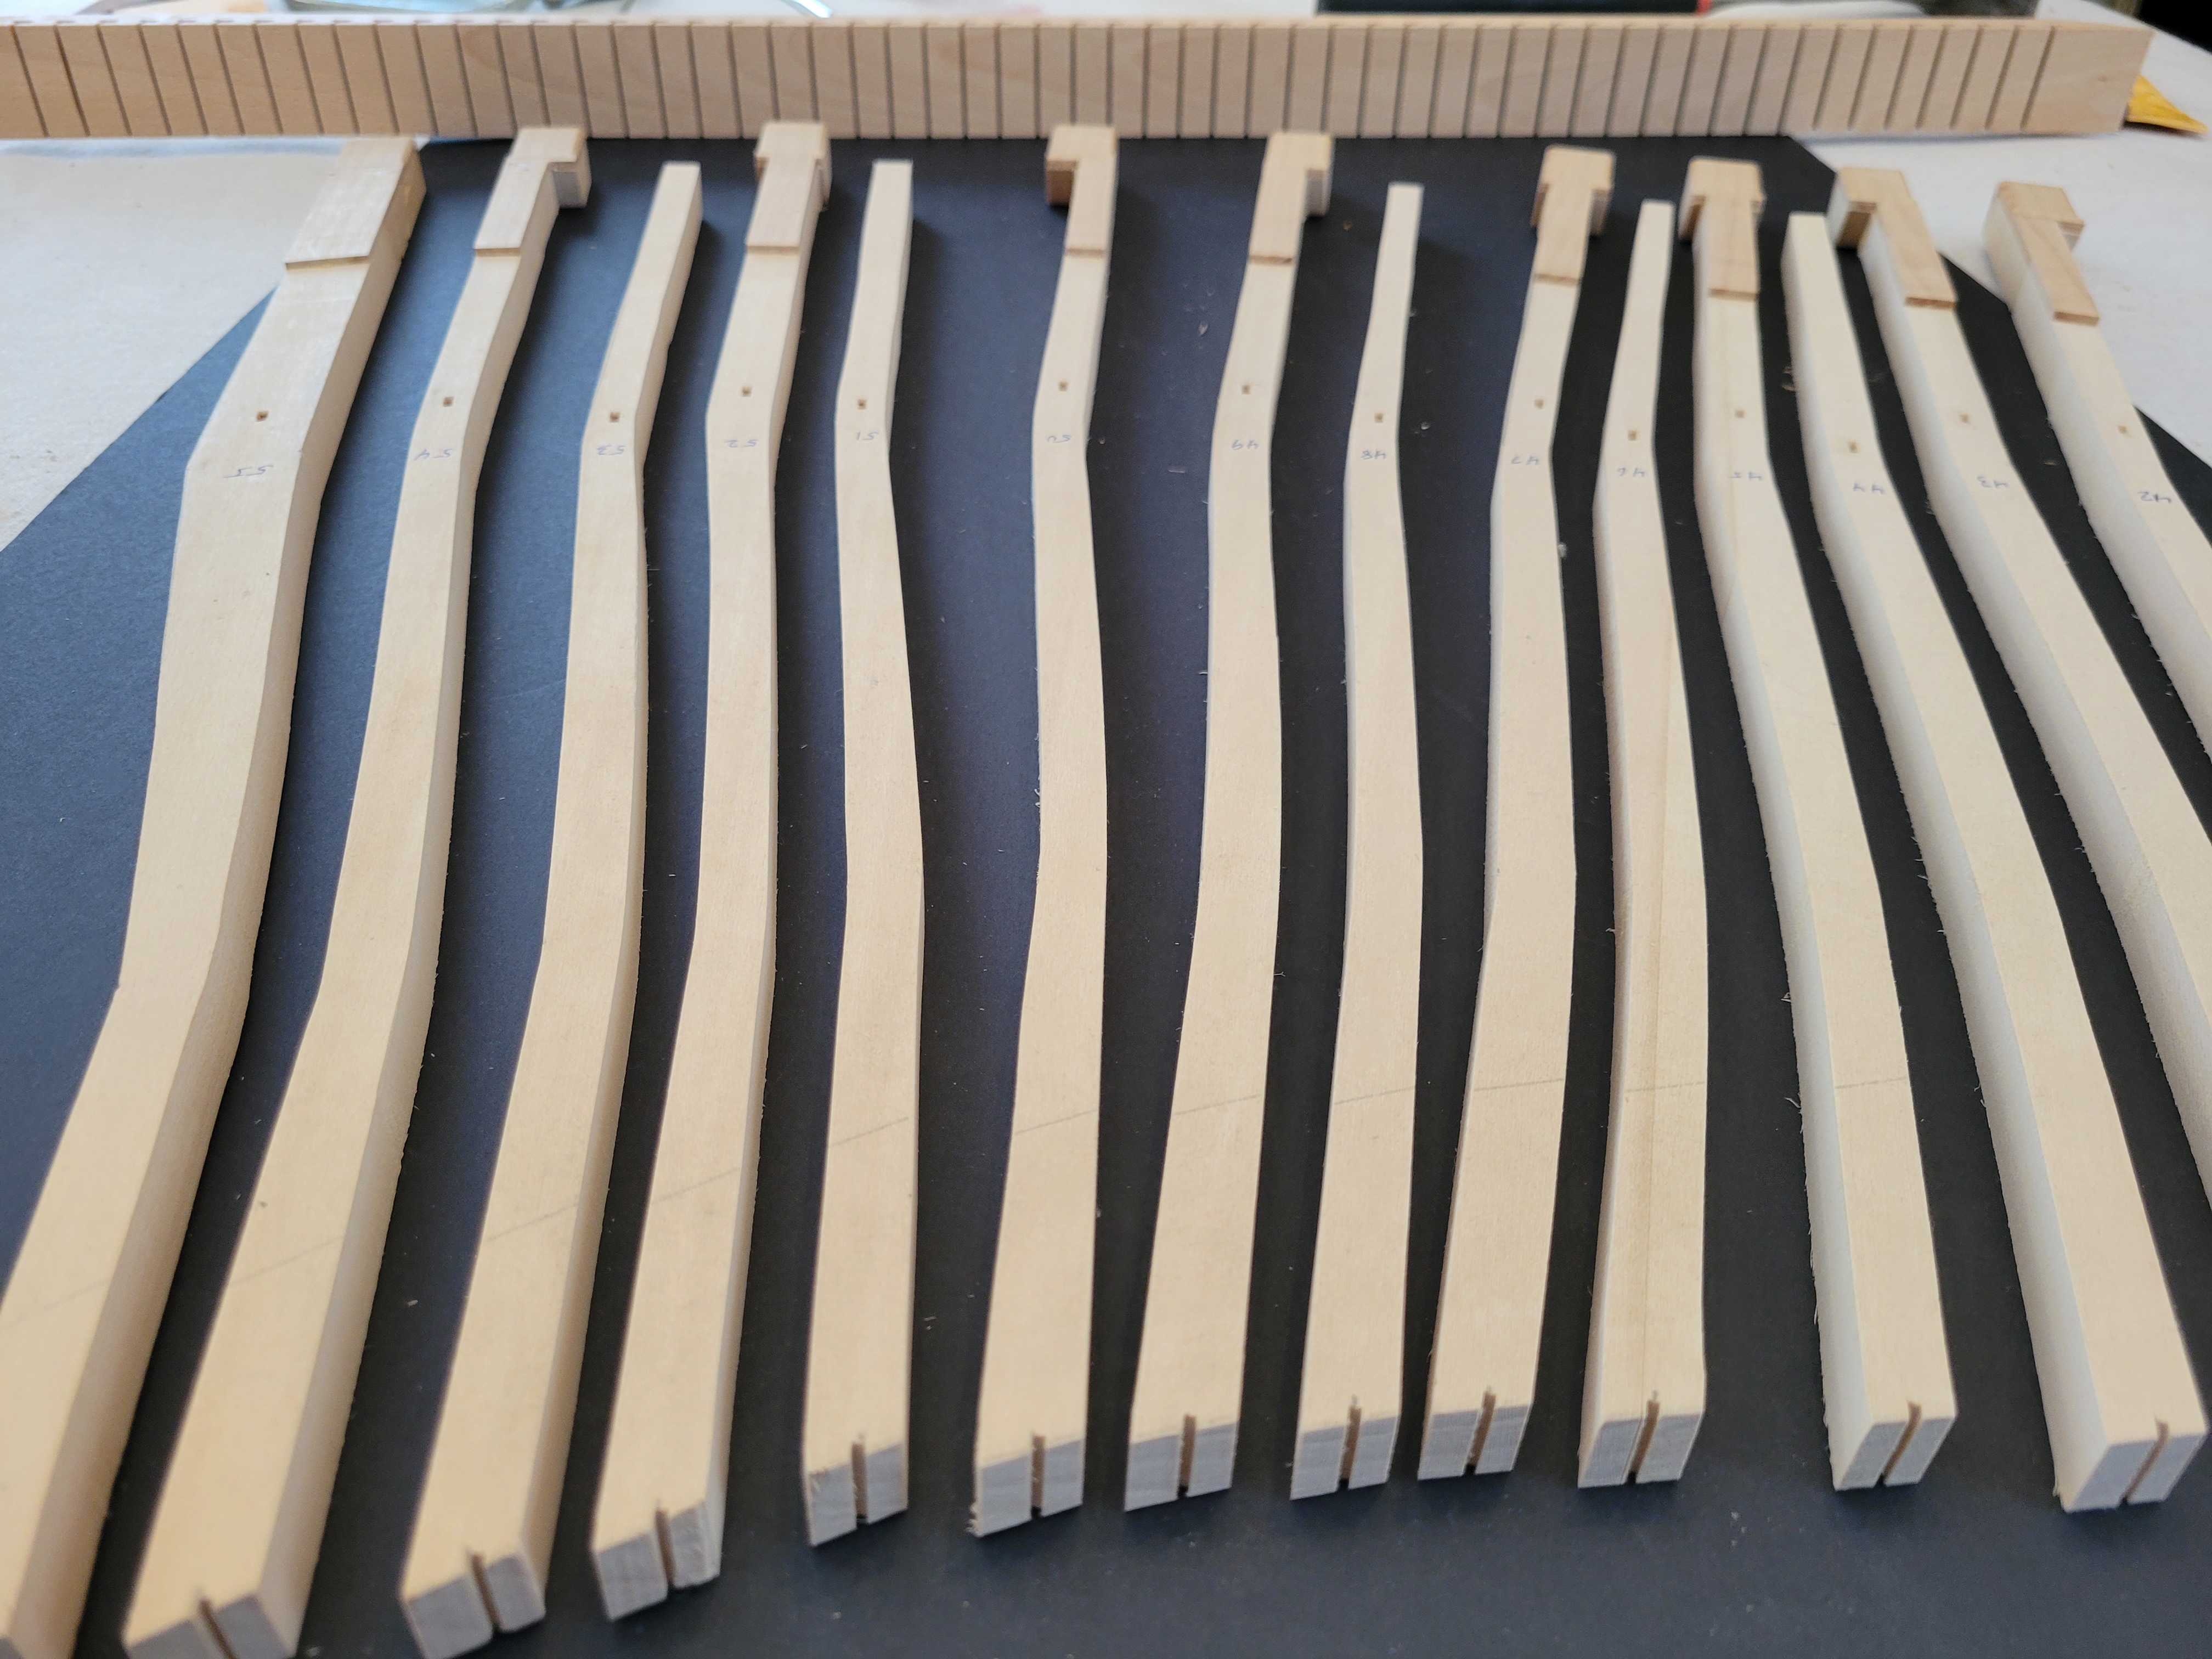
In a conventional harpsichord, each key’s string (i.e., wire) runs parallel to the key. This means that each key can be the same length. In a virginal, the strings are perpendicular to each key. The bass strings are closer to the keyboard and the treble strings are further away. This means that the keys must be different lengths:
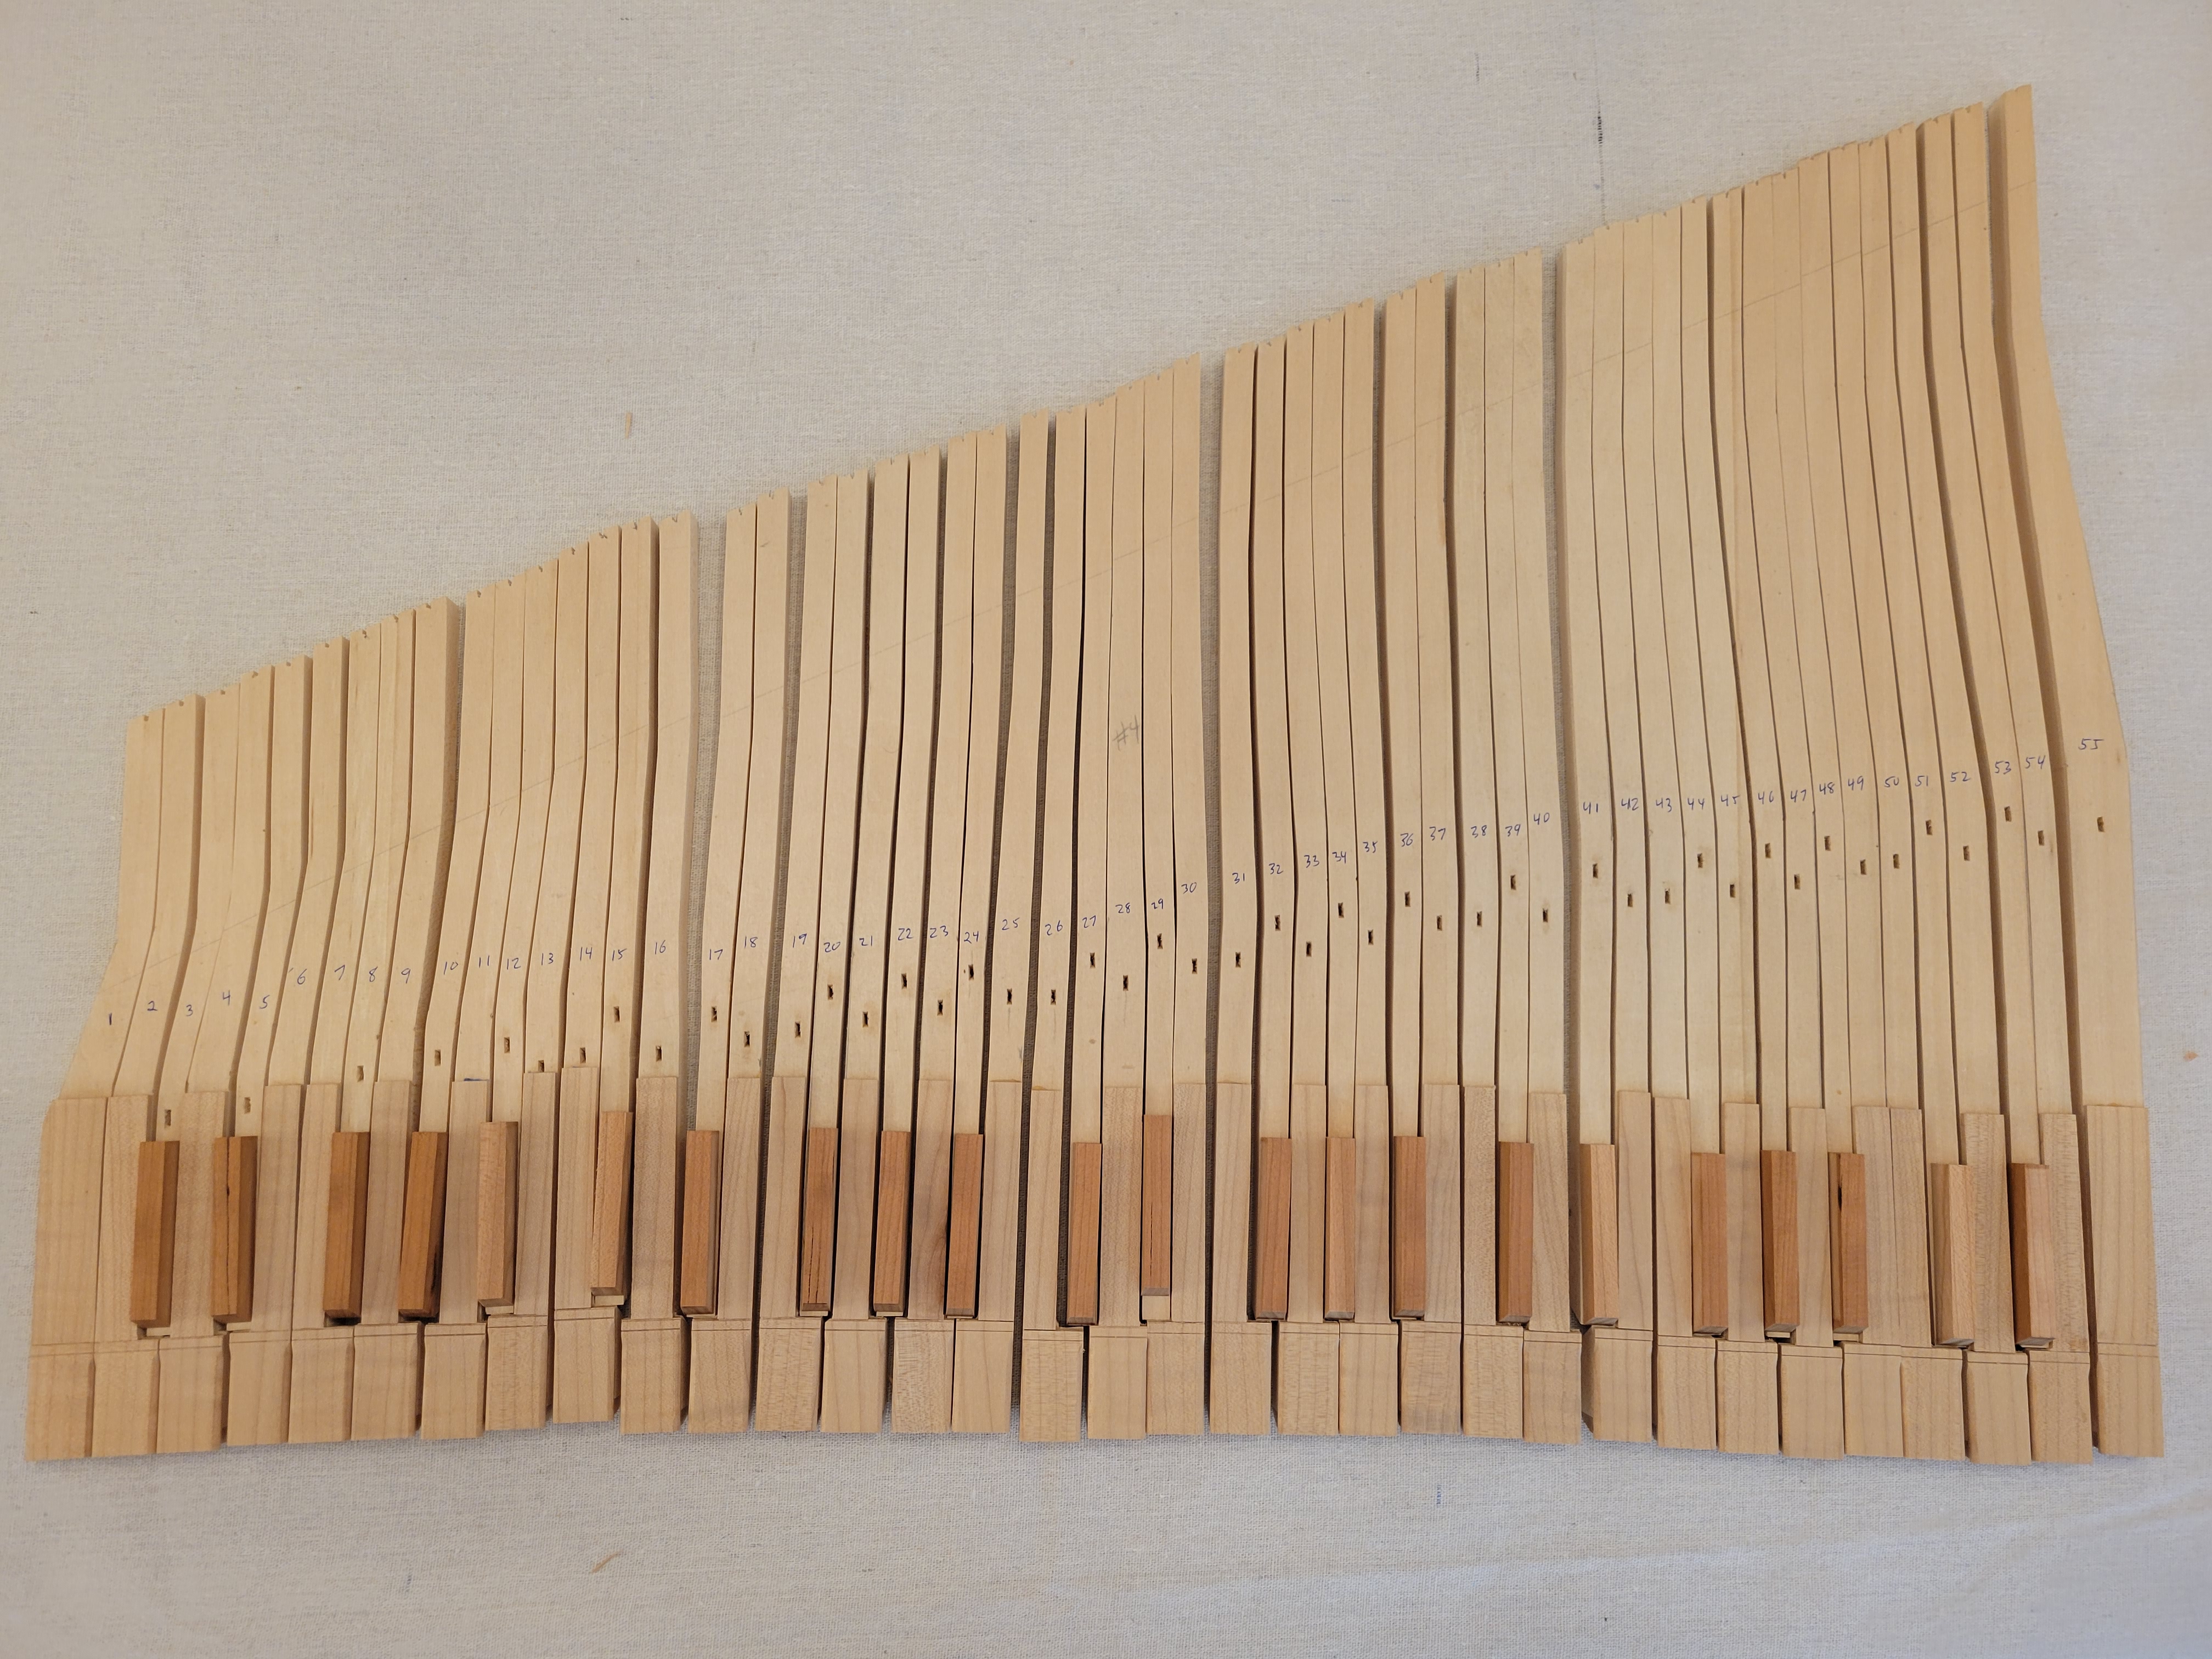
This fact has other implications: Each key must pivot at a different point. Otherwise the back end of the key would rise higher for the treble keys than the bass keys. You can see the pre-cut pivot holes (actually more like slots on the top of the key) in that photo. (I’ve numbered the keys from 1 to 55 above those slots.) There are also implications for balancing the keys, but that comes somewhat later.
The keyboard frame holds all the keys together. This consists of six pre-cut parts:

From top to bottom are the rack, which has vertical slots for each key; the back rail; the balance rail which has holes for each key; and the front rail. The two pieces at the left and right are called stiles.
As you press the key down against the front rail, it pivots like a seesaw on the balance rail, and the backend rises up from the back rail. This in turn pushes a jack up, which plucks the string. (But that comes much later.) The rack prevents the key from moving from side to side. Each key gets a pin that slides up and down in the rack.
The first step is to glue five of those pieces together using wood glue and clamps, making sure the front rail and stiles meet each other at right angles:
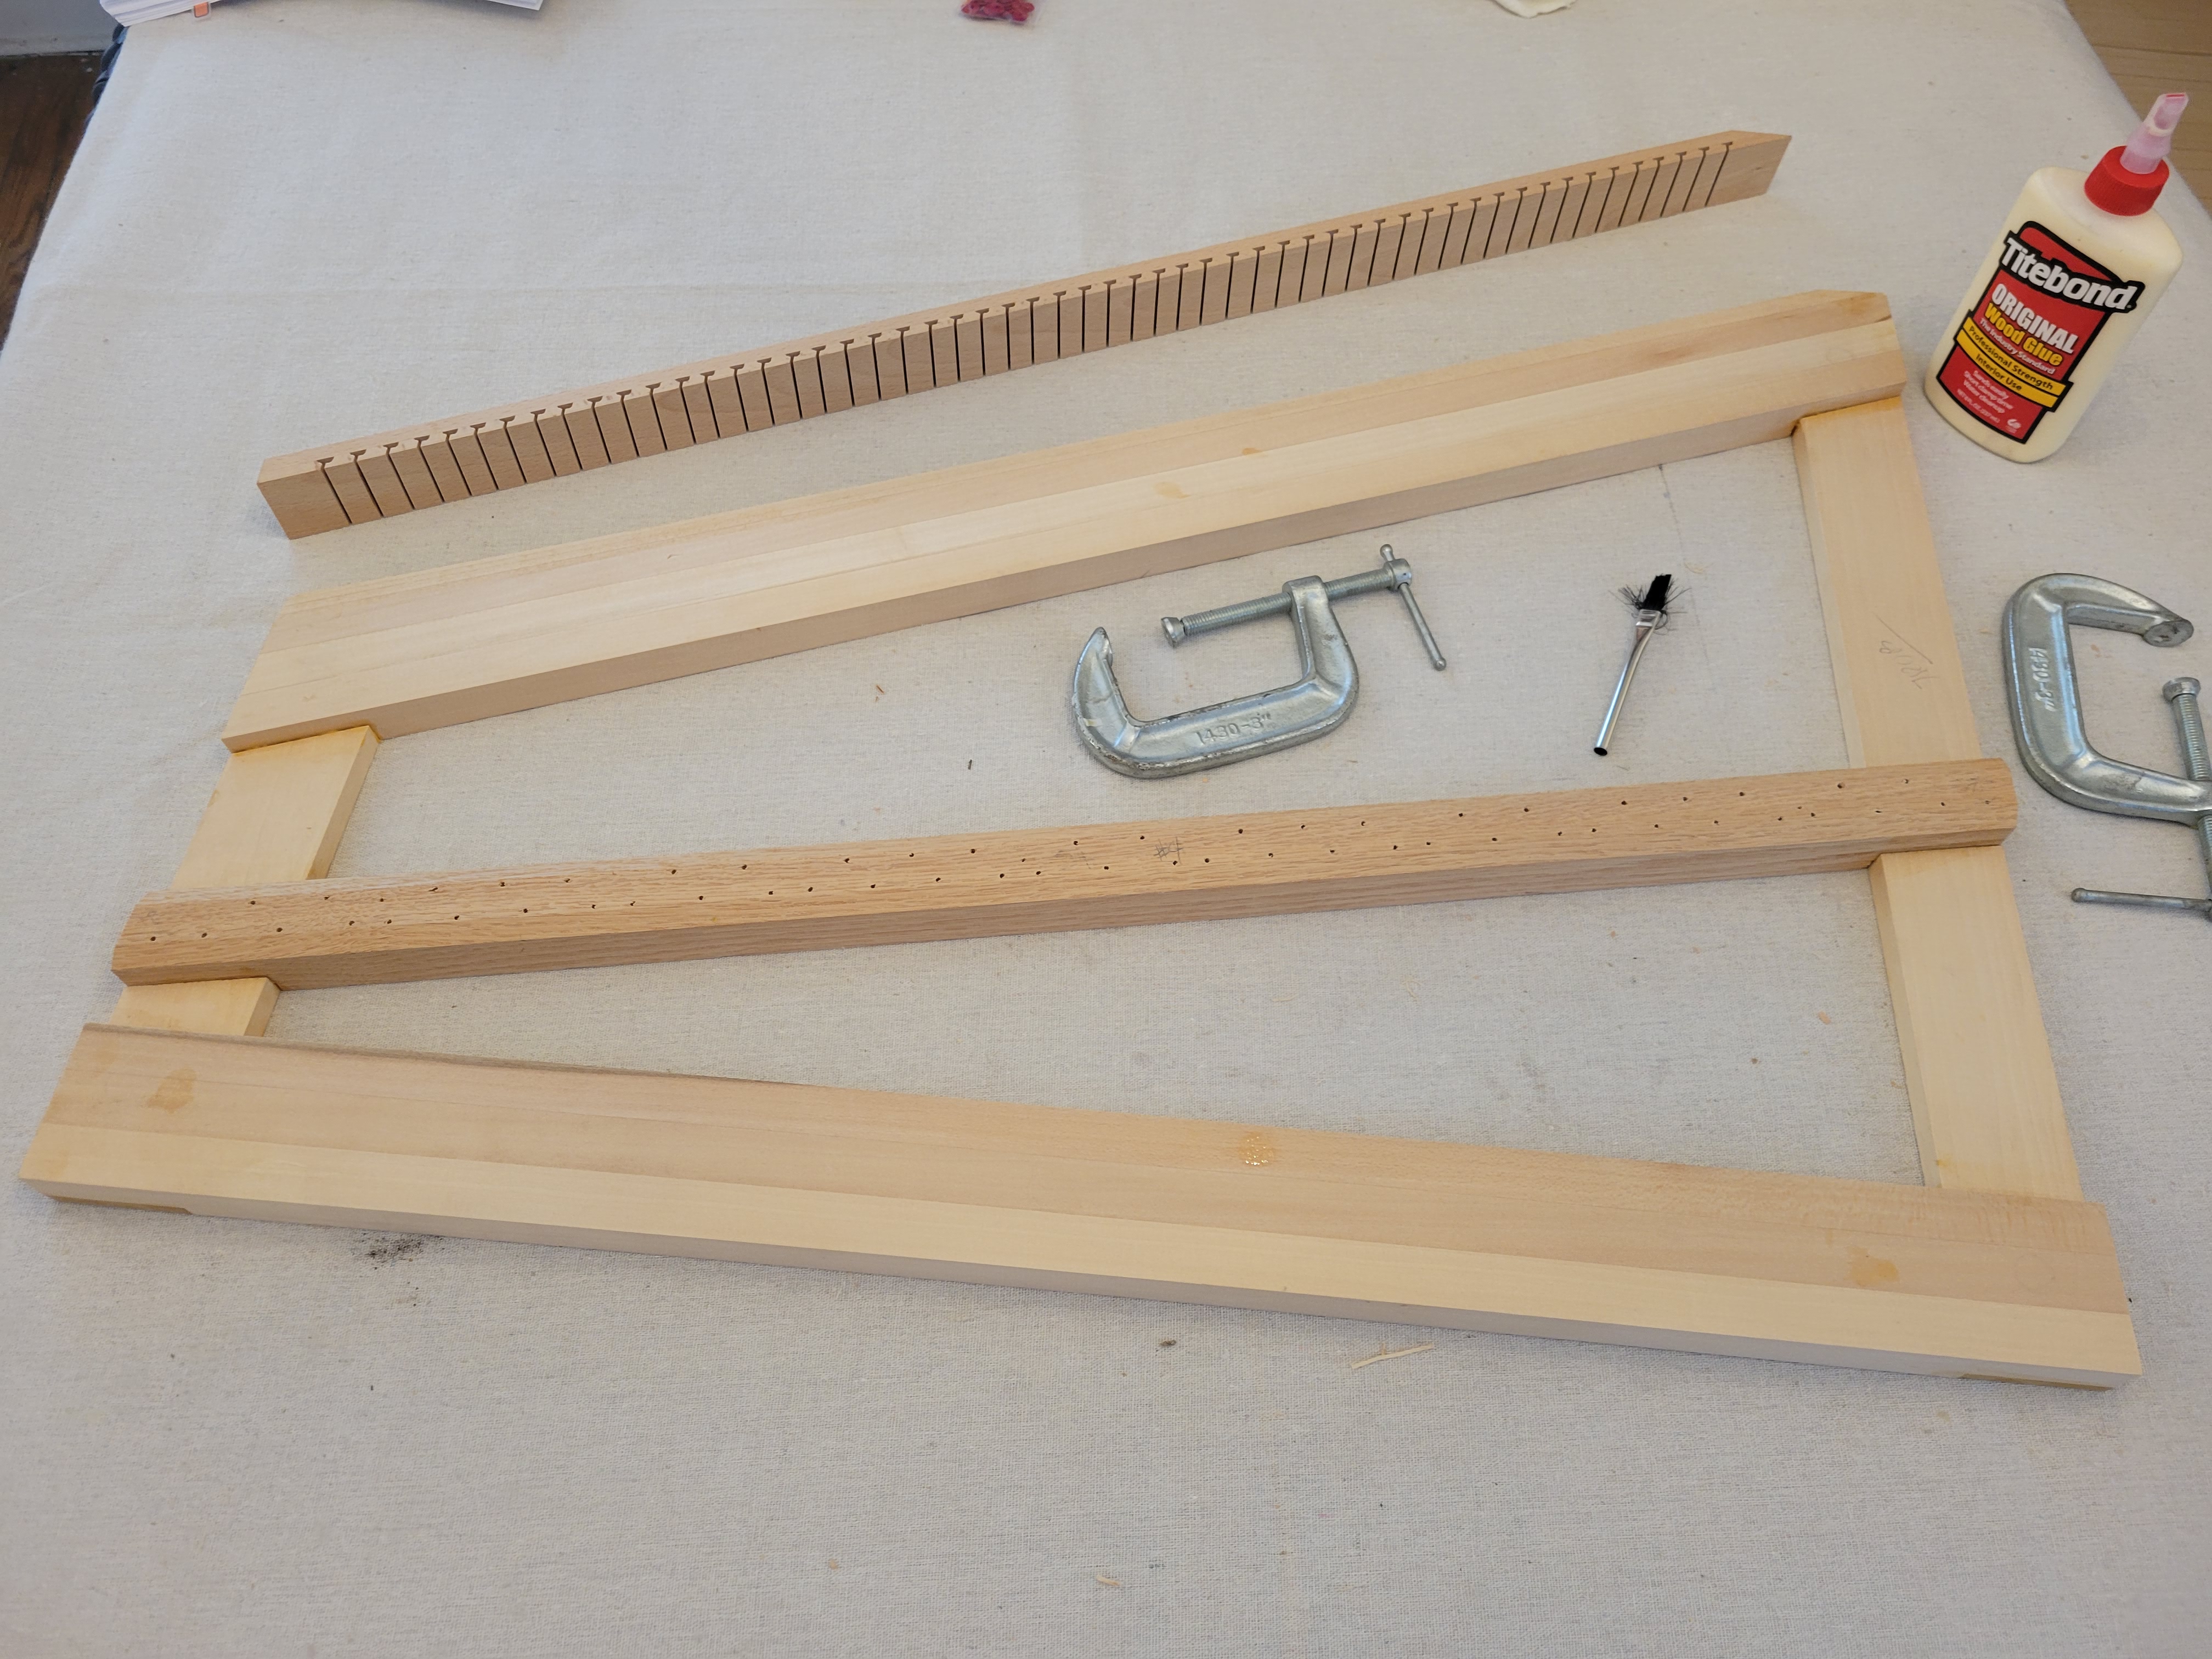
The perspective of this photo doesn’t show it but that is a right angle in the lower-right corner!
The rack is not attached at this point because it must be aligned with the keys.
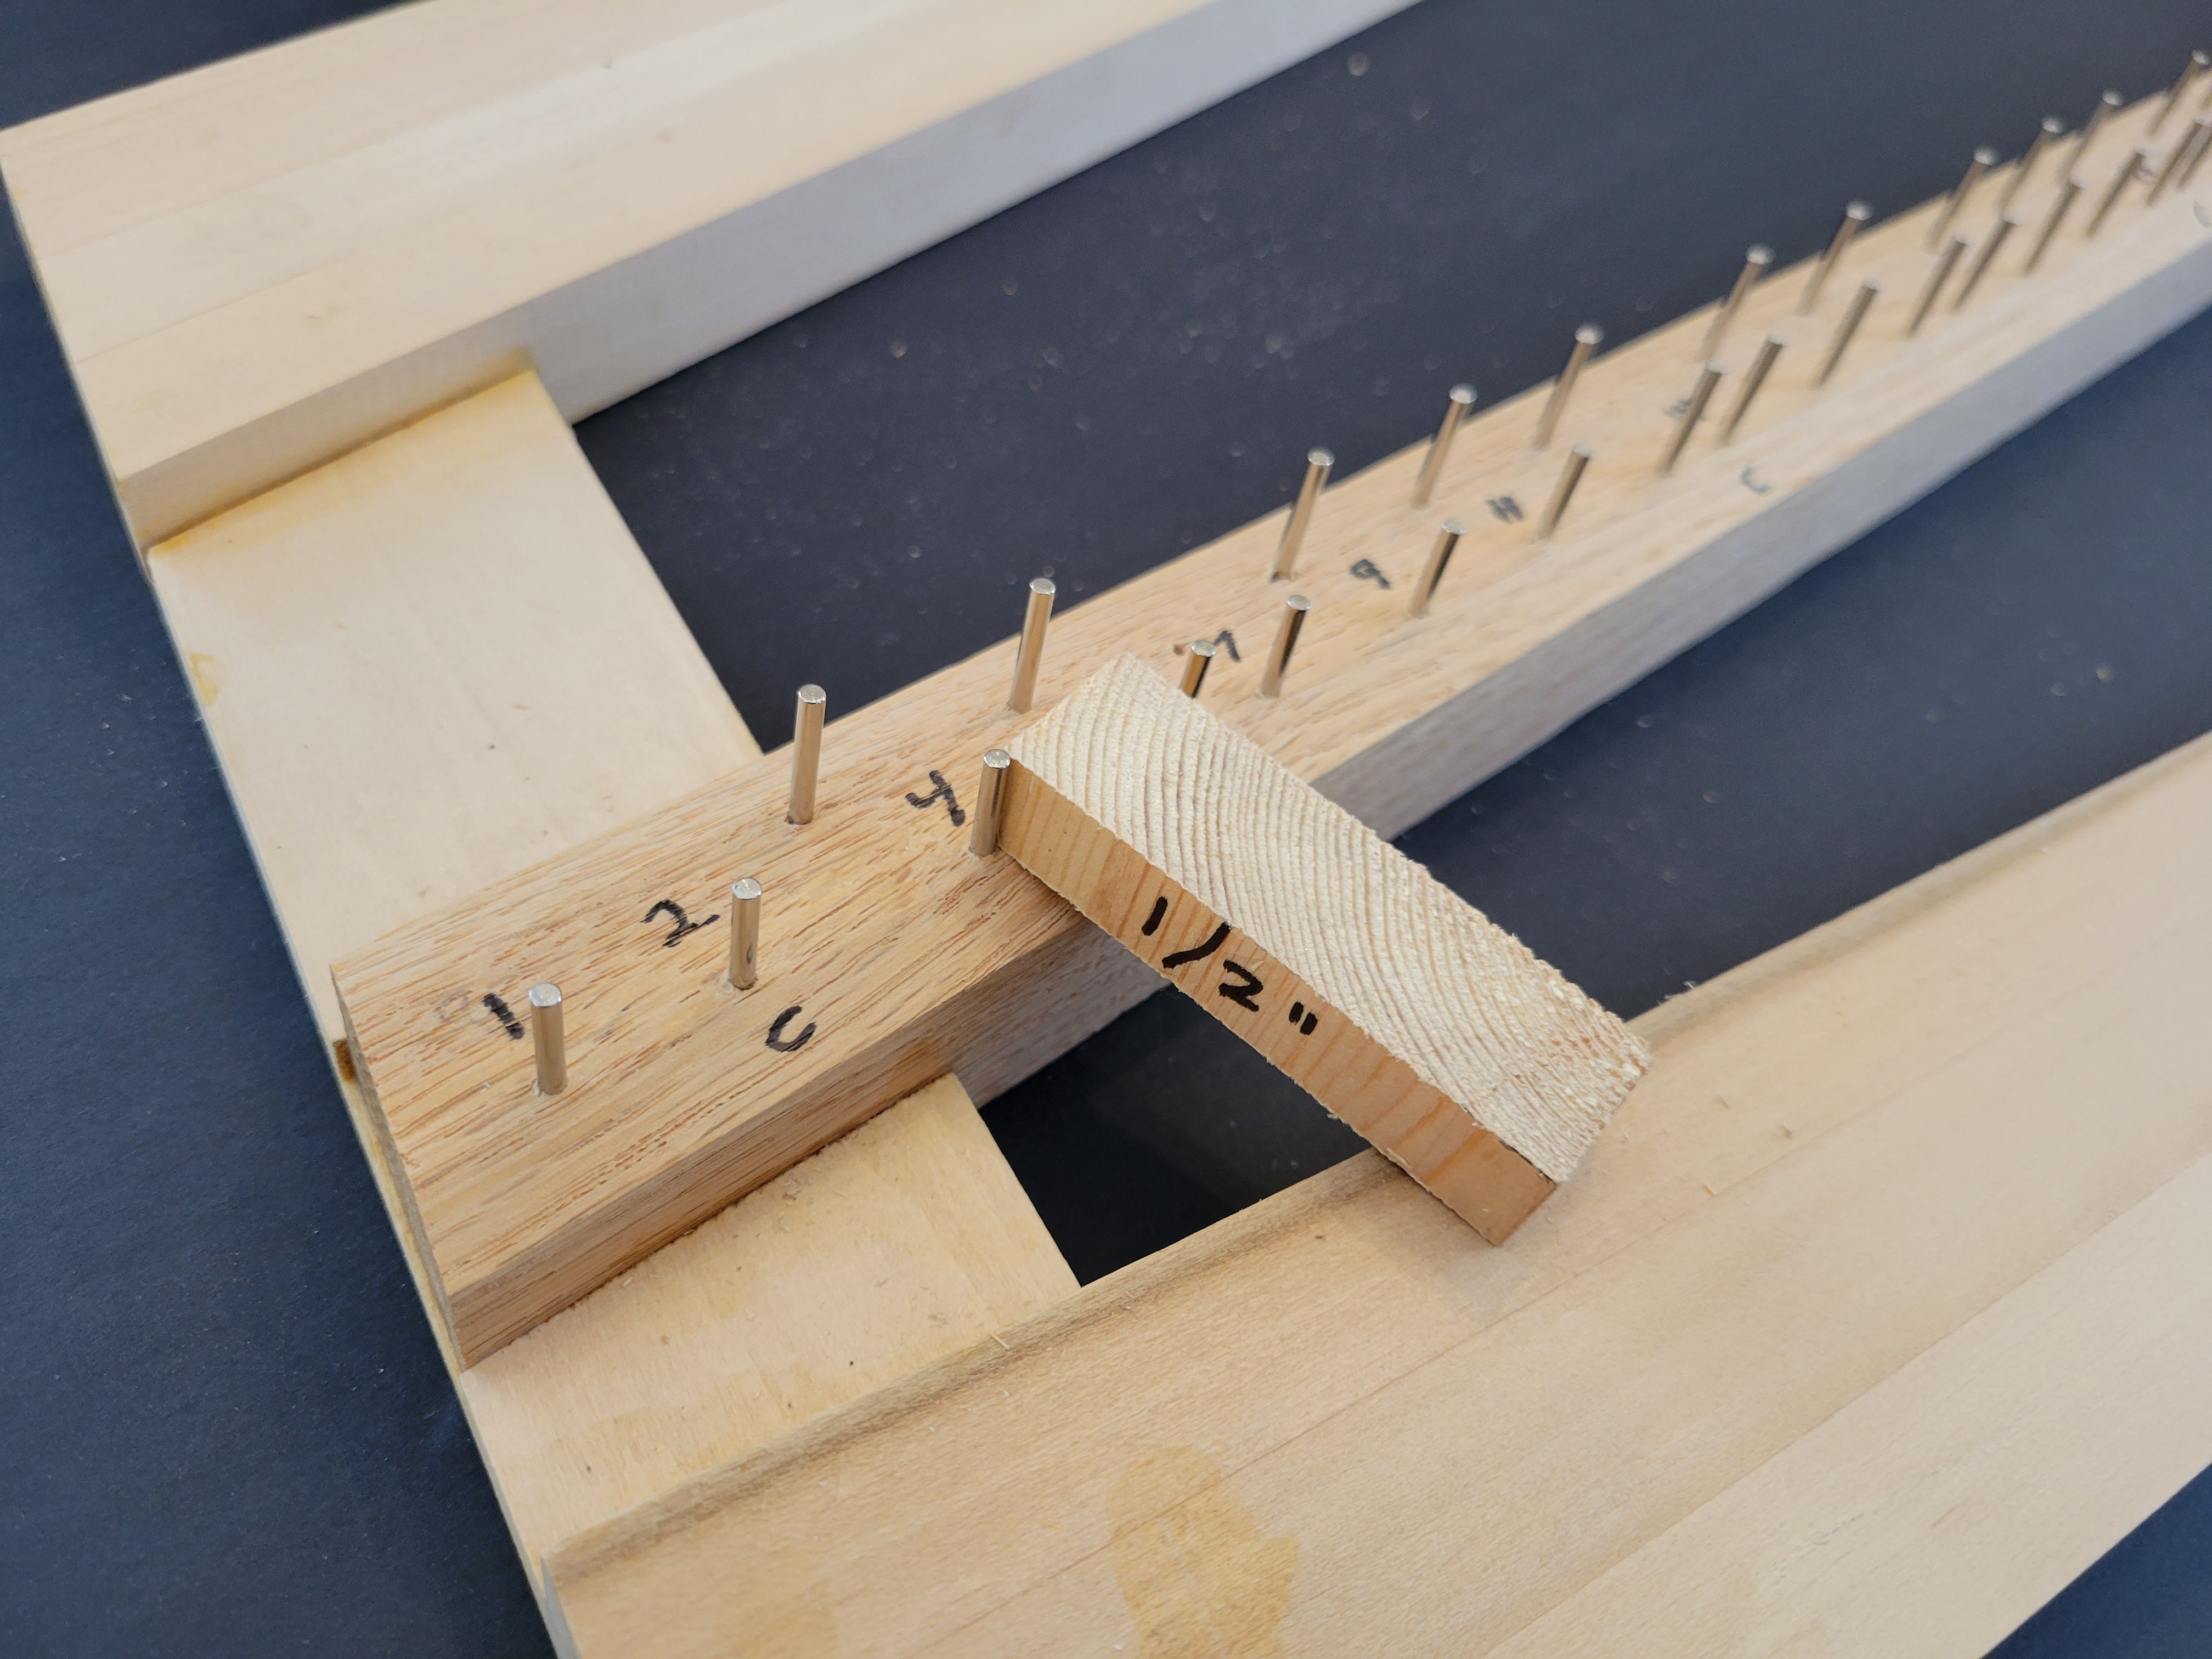
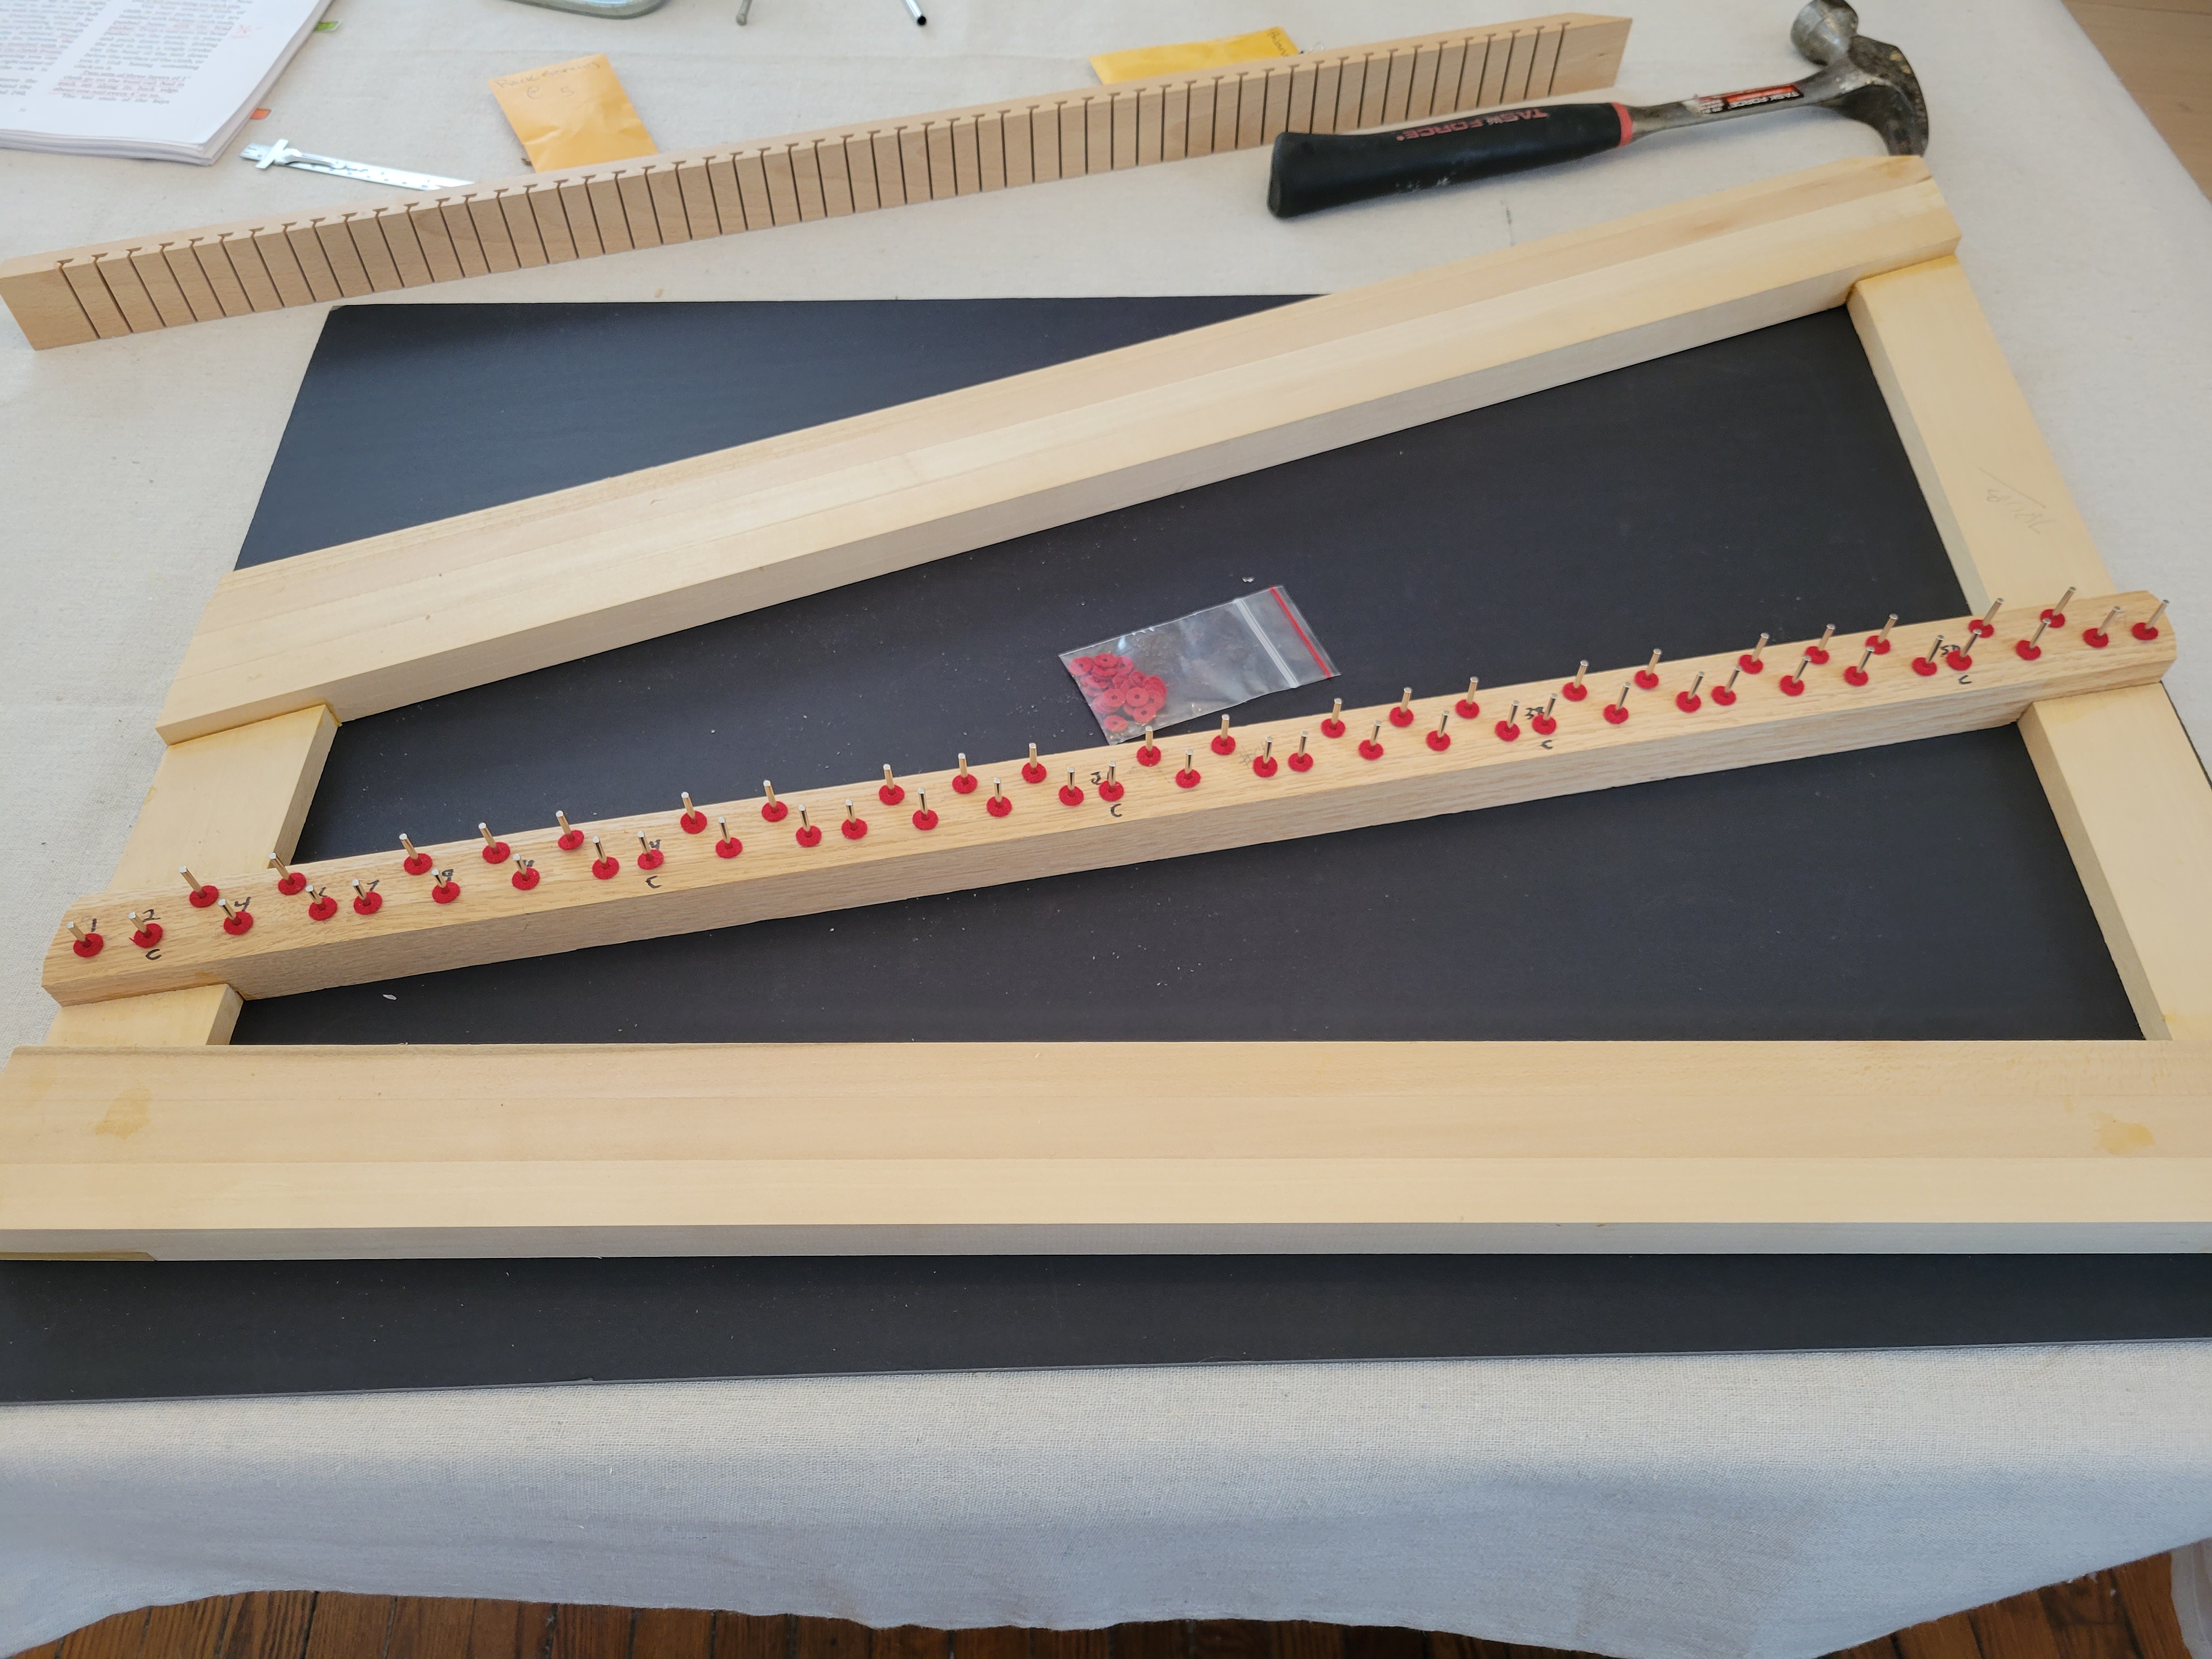
The next step is to hammer balance pins into the balance rail. They go in the pivot holes in the keys. The balance pins are 3/32 inch in diameter with a pointy end for easy hammering. They’re supposed to stick up 5/8 inch above the balance rail so I made a little guide to help with the hammering:
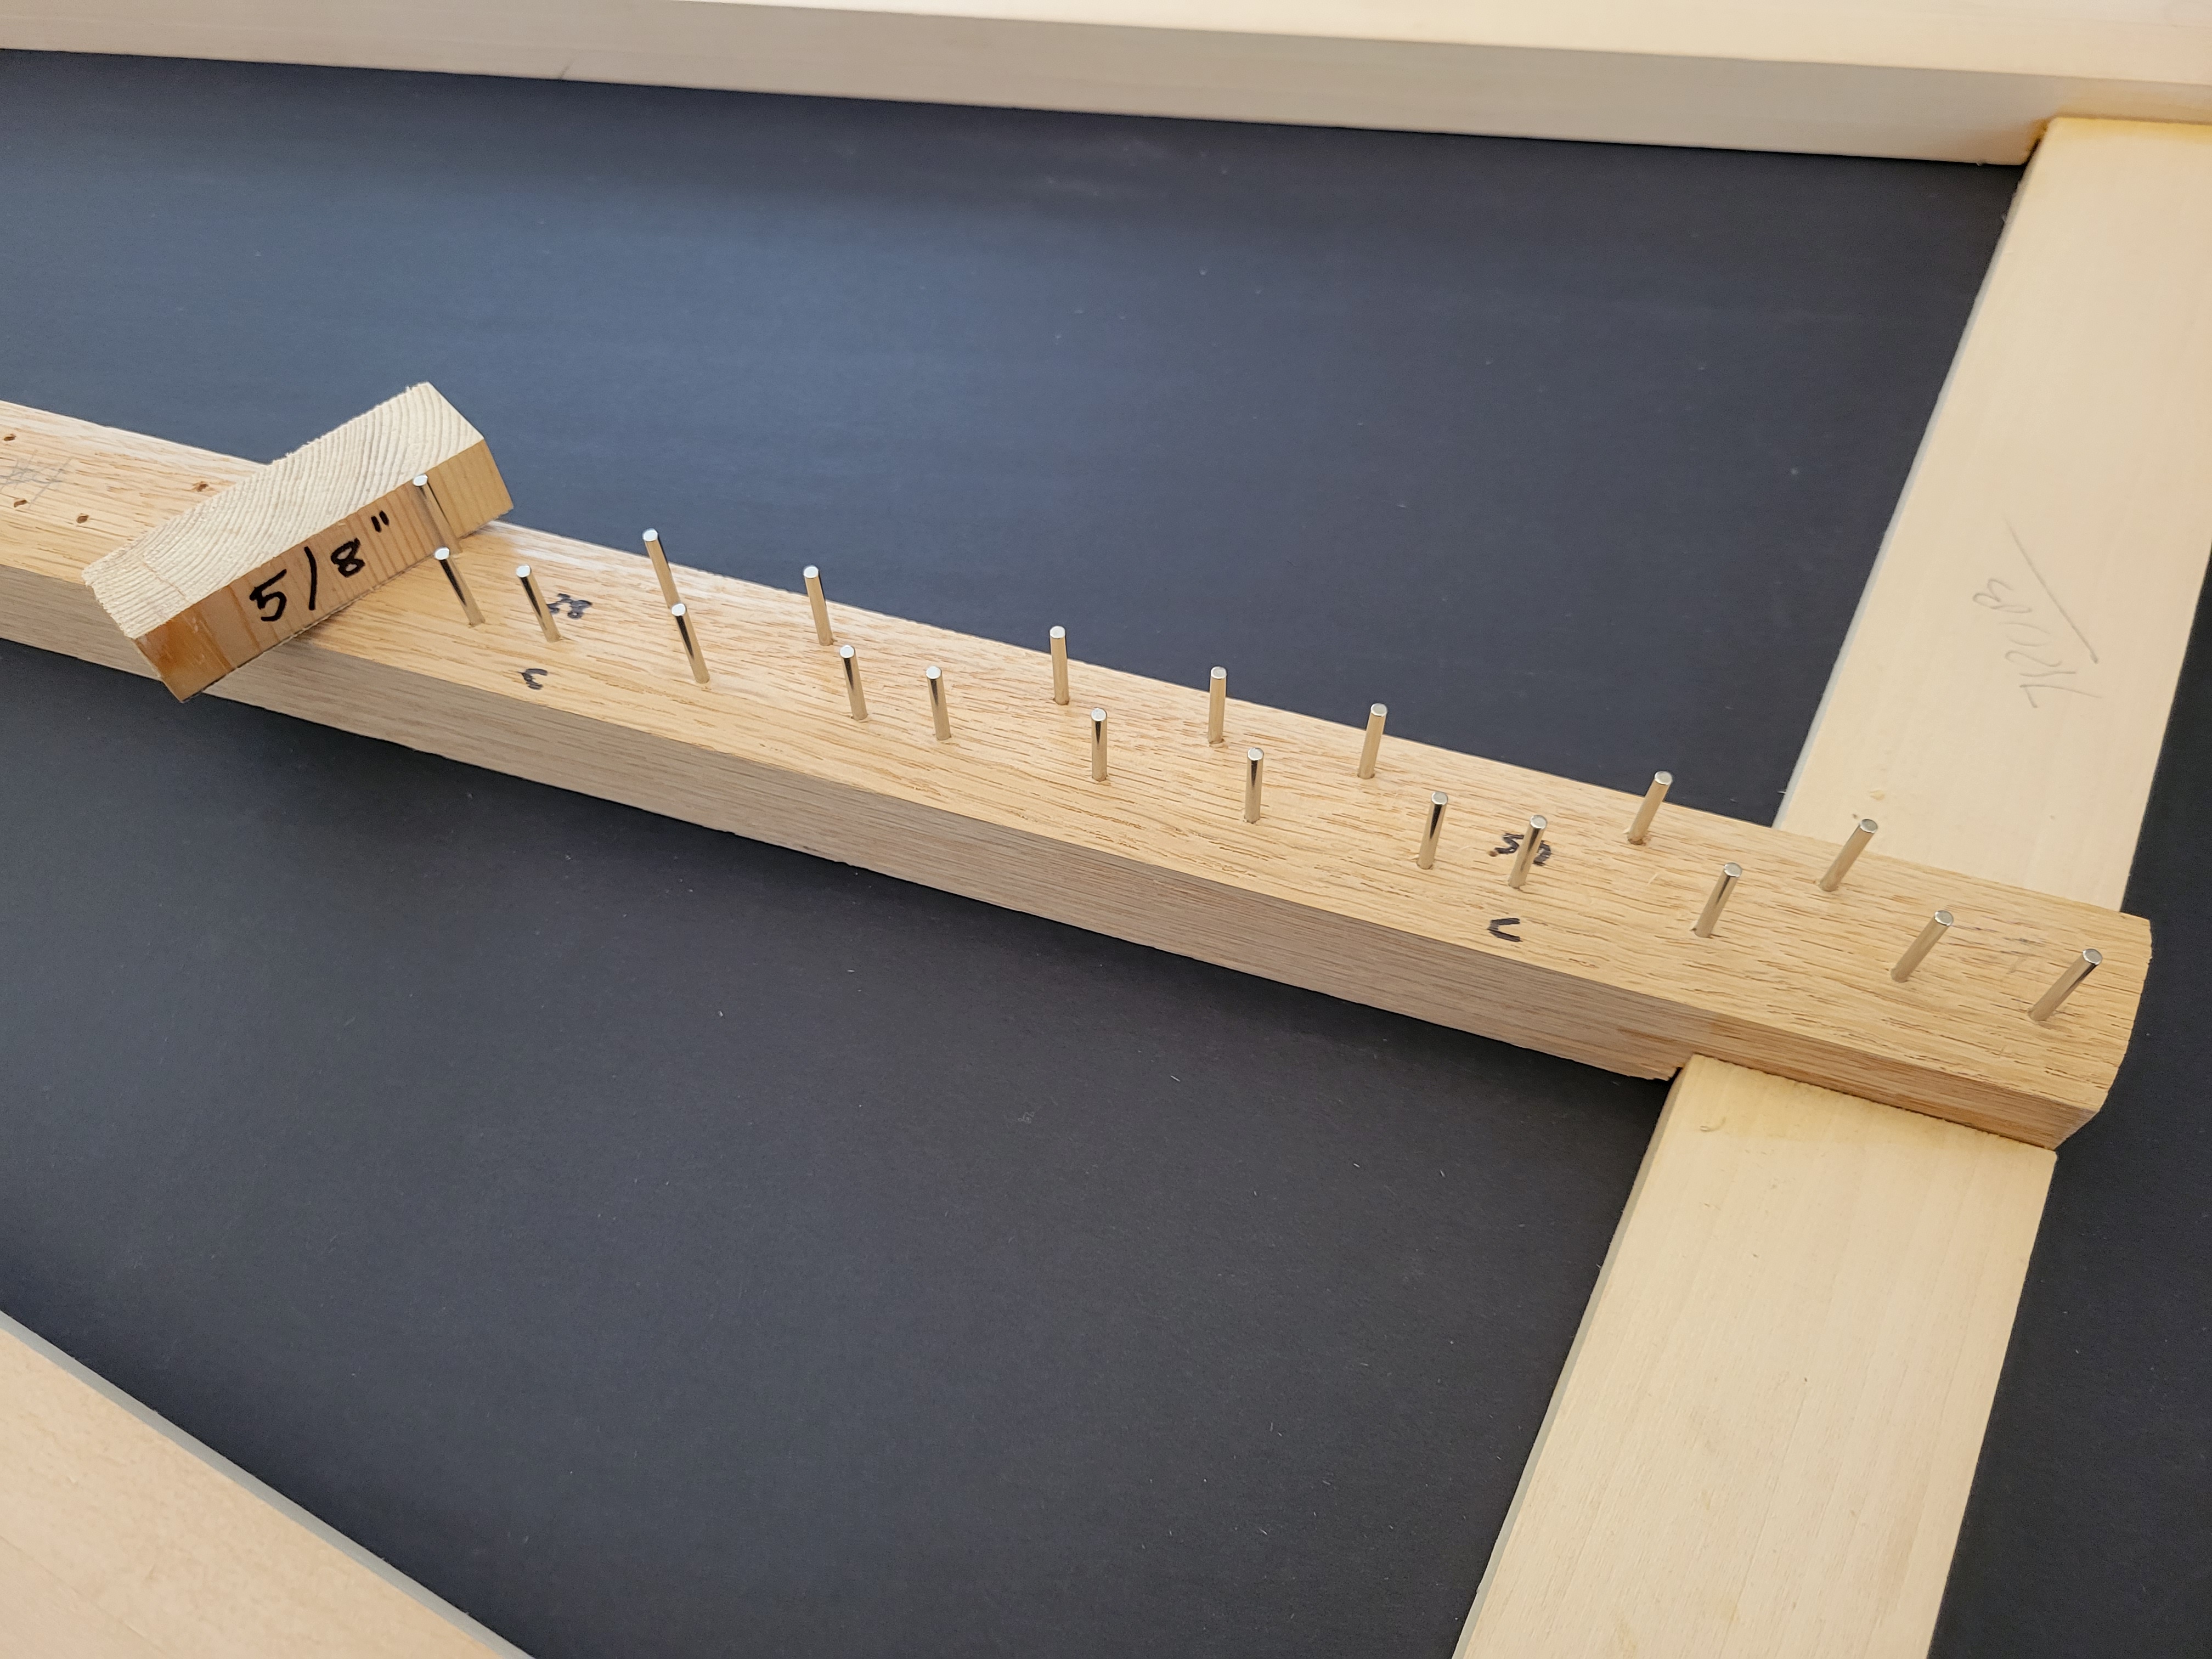
On the bass end, some of the keys (specifically keys 1, 2, 4, 7, 9, and 11) have balance holes below the key caps, so these must be pounded in another 1/8 inch:
Each balance pin gets a pretty little felt punching for the key to rest on:
Other strips of felt are used to keep the wooden parts of the keyboard quiet. The only sound you want to hear from a virginal is the plucking of the strings.
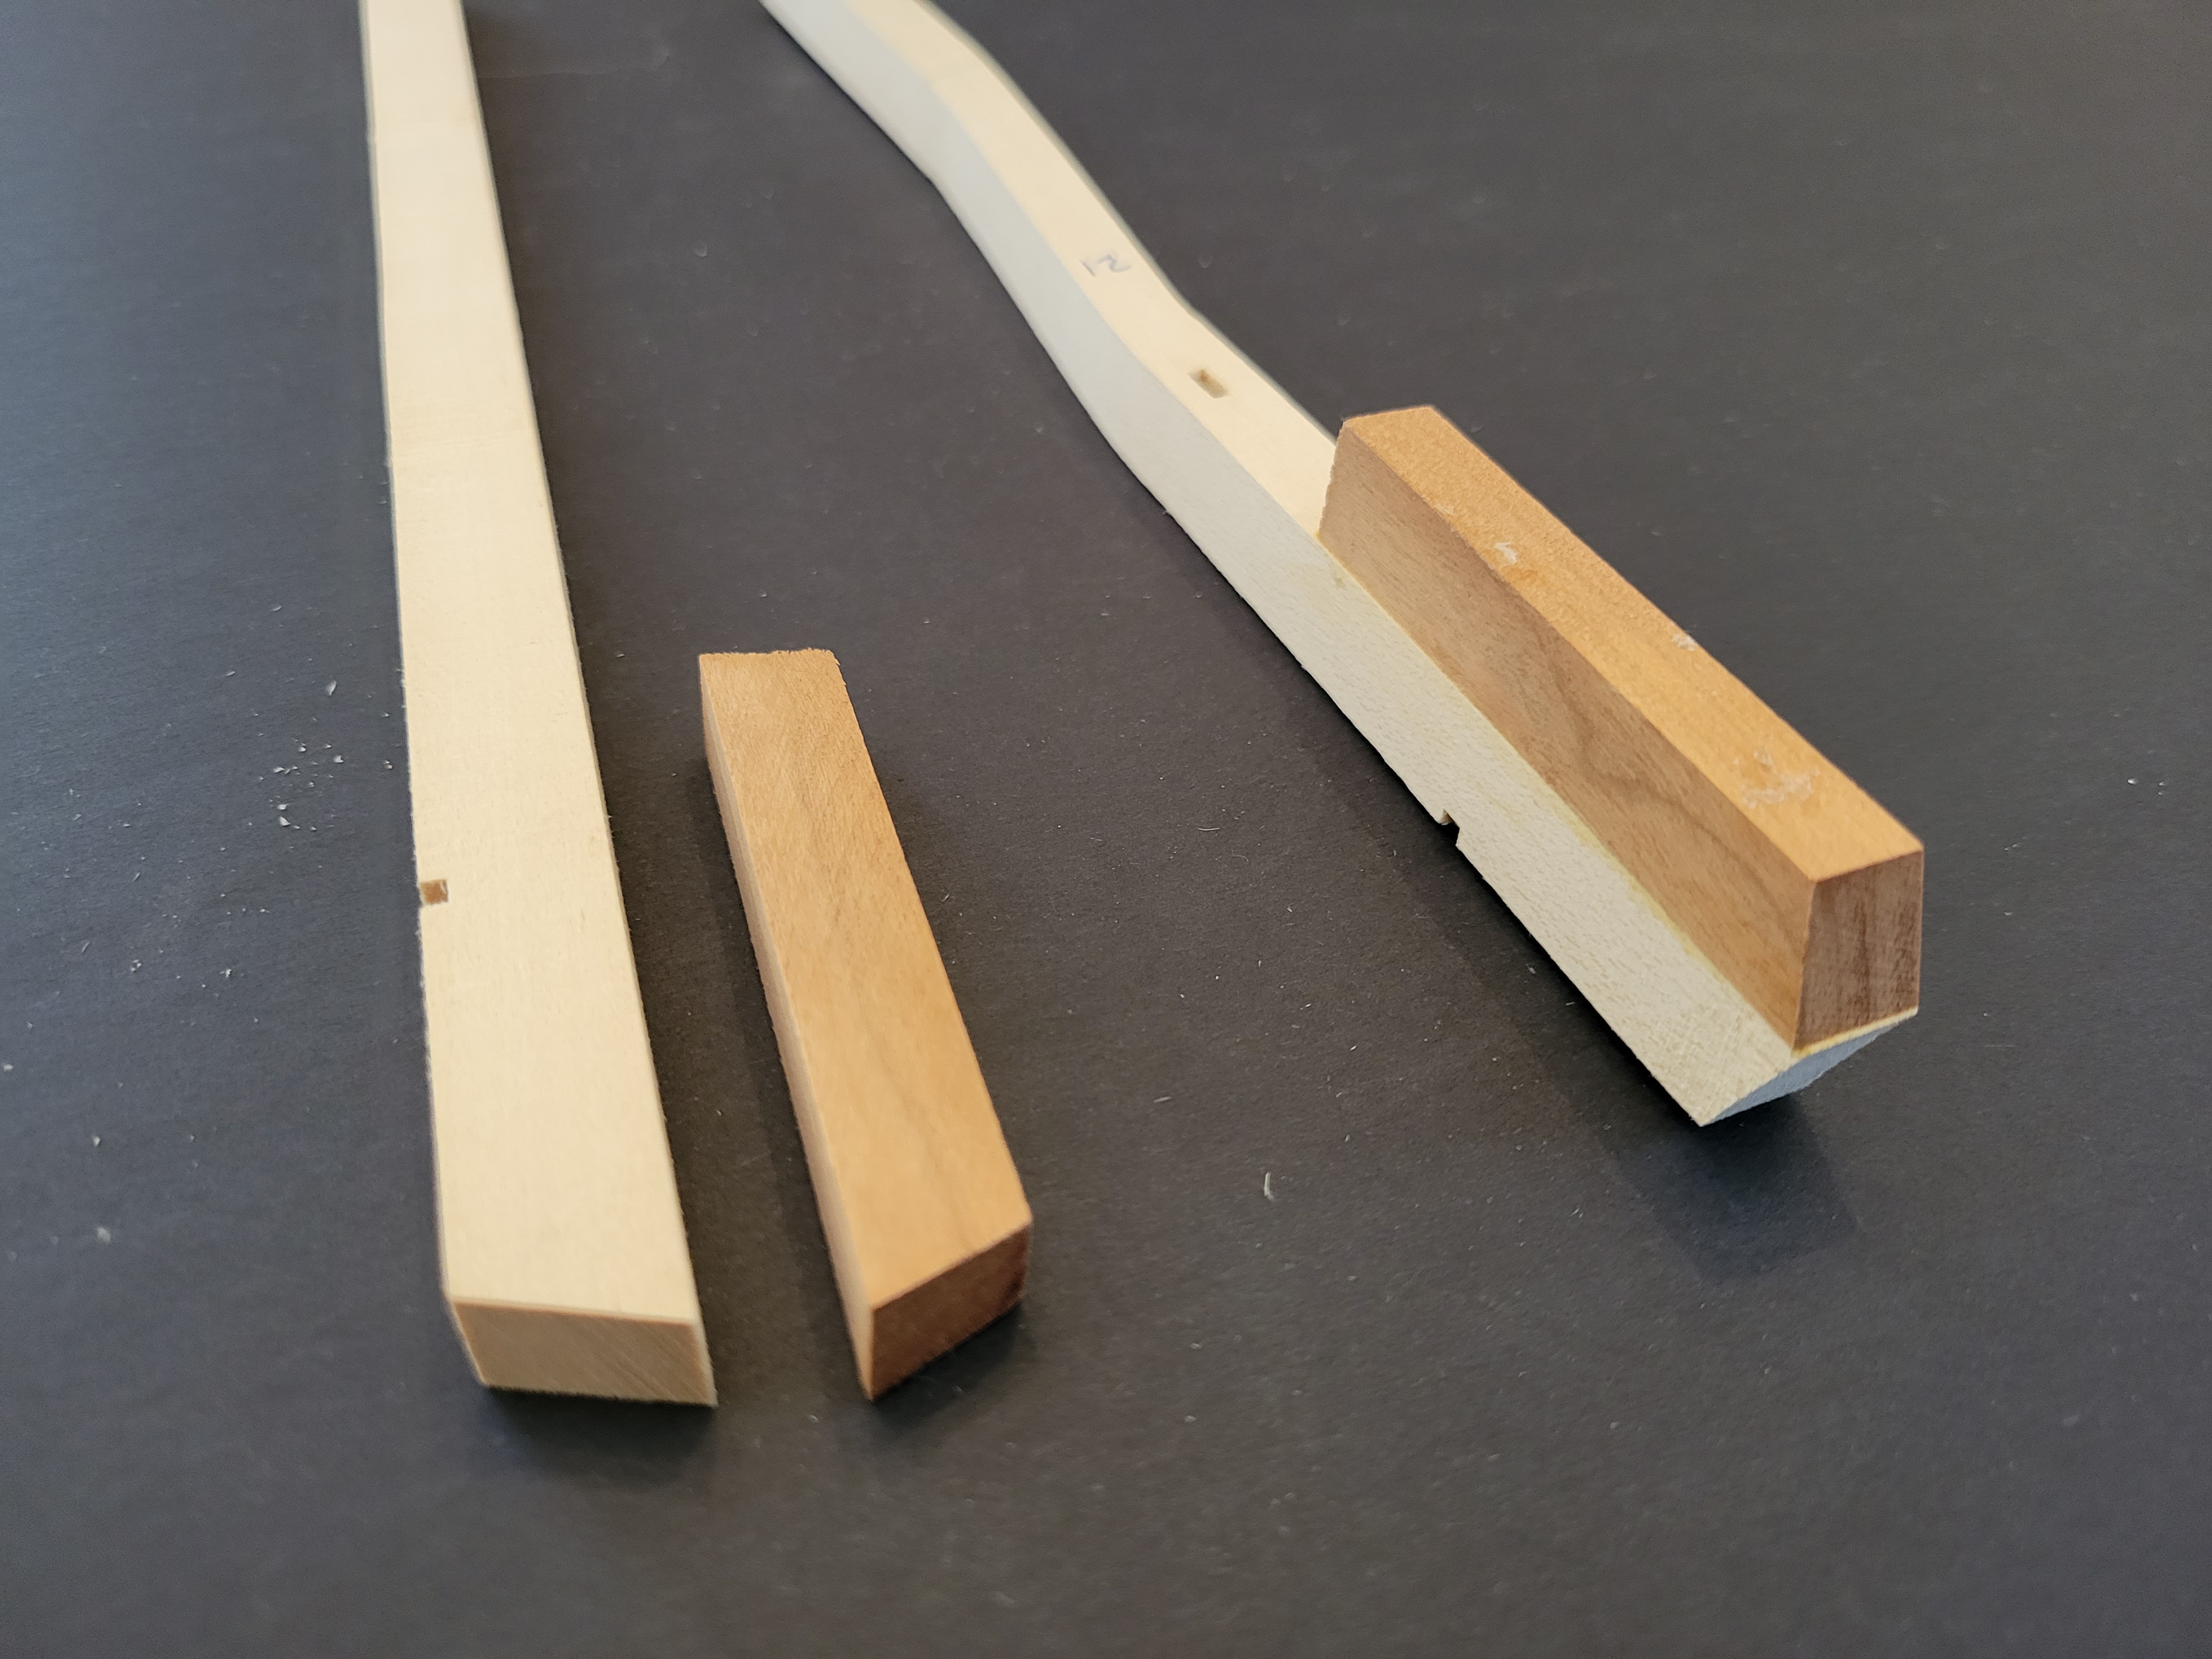
Each key contains a little vertical slot at the back end:
My understanding is that the keys were cut from a single piece of wood. These slots were made at the same time that the slots were made in the rack, which means they align. Some of the slots in the rack are unevenly space, but that’s not a problem if the slots in the keys are spaced the same way.
A hole is drilled in the end of each key perpendicular to the slot, and a 1/16 inch guide pin is pushed in:
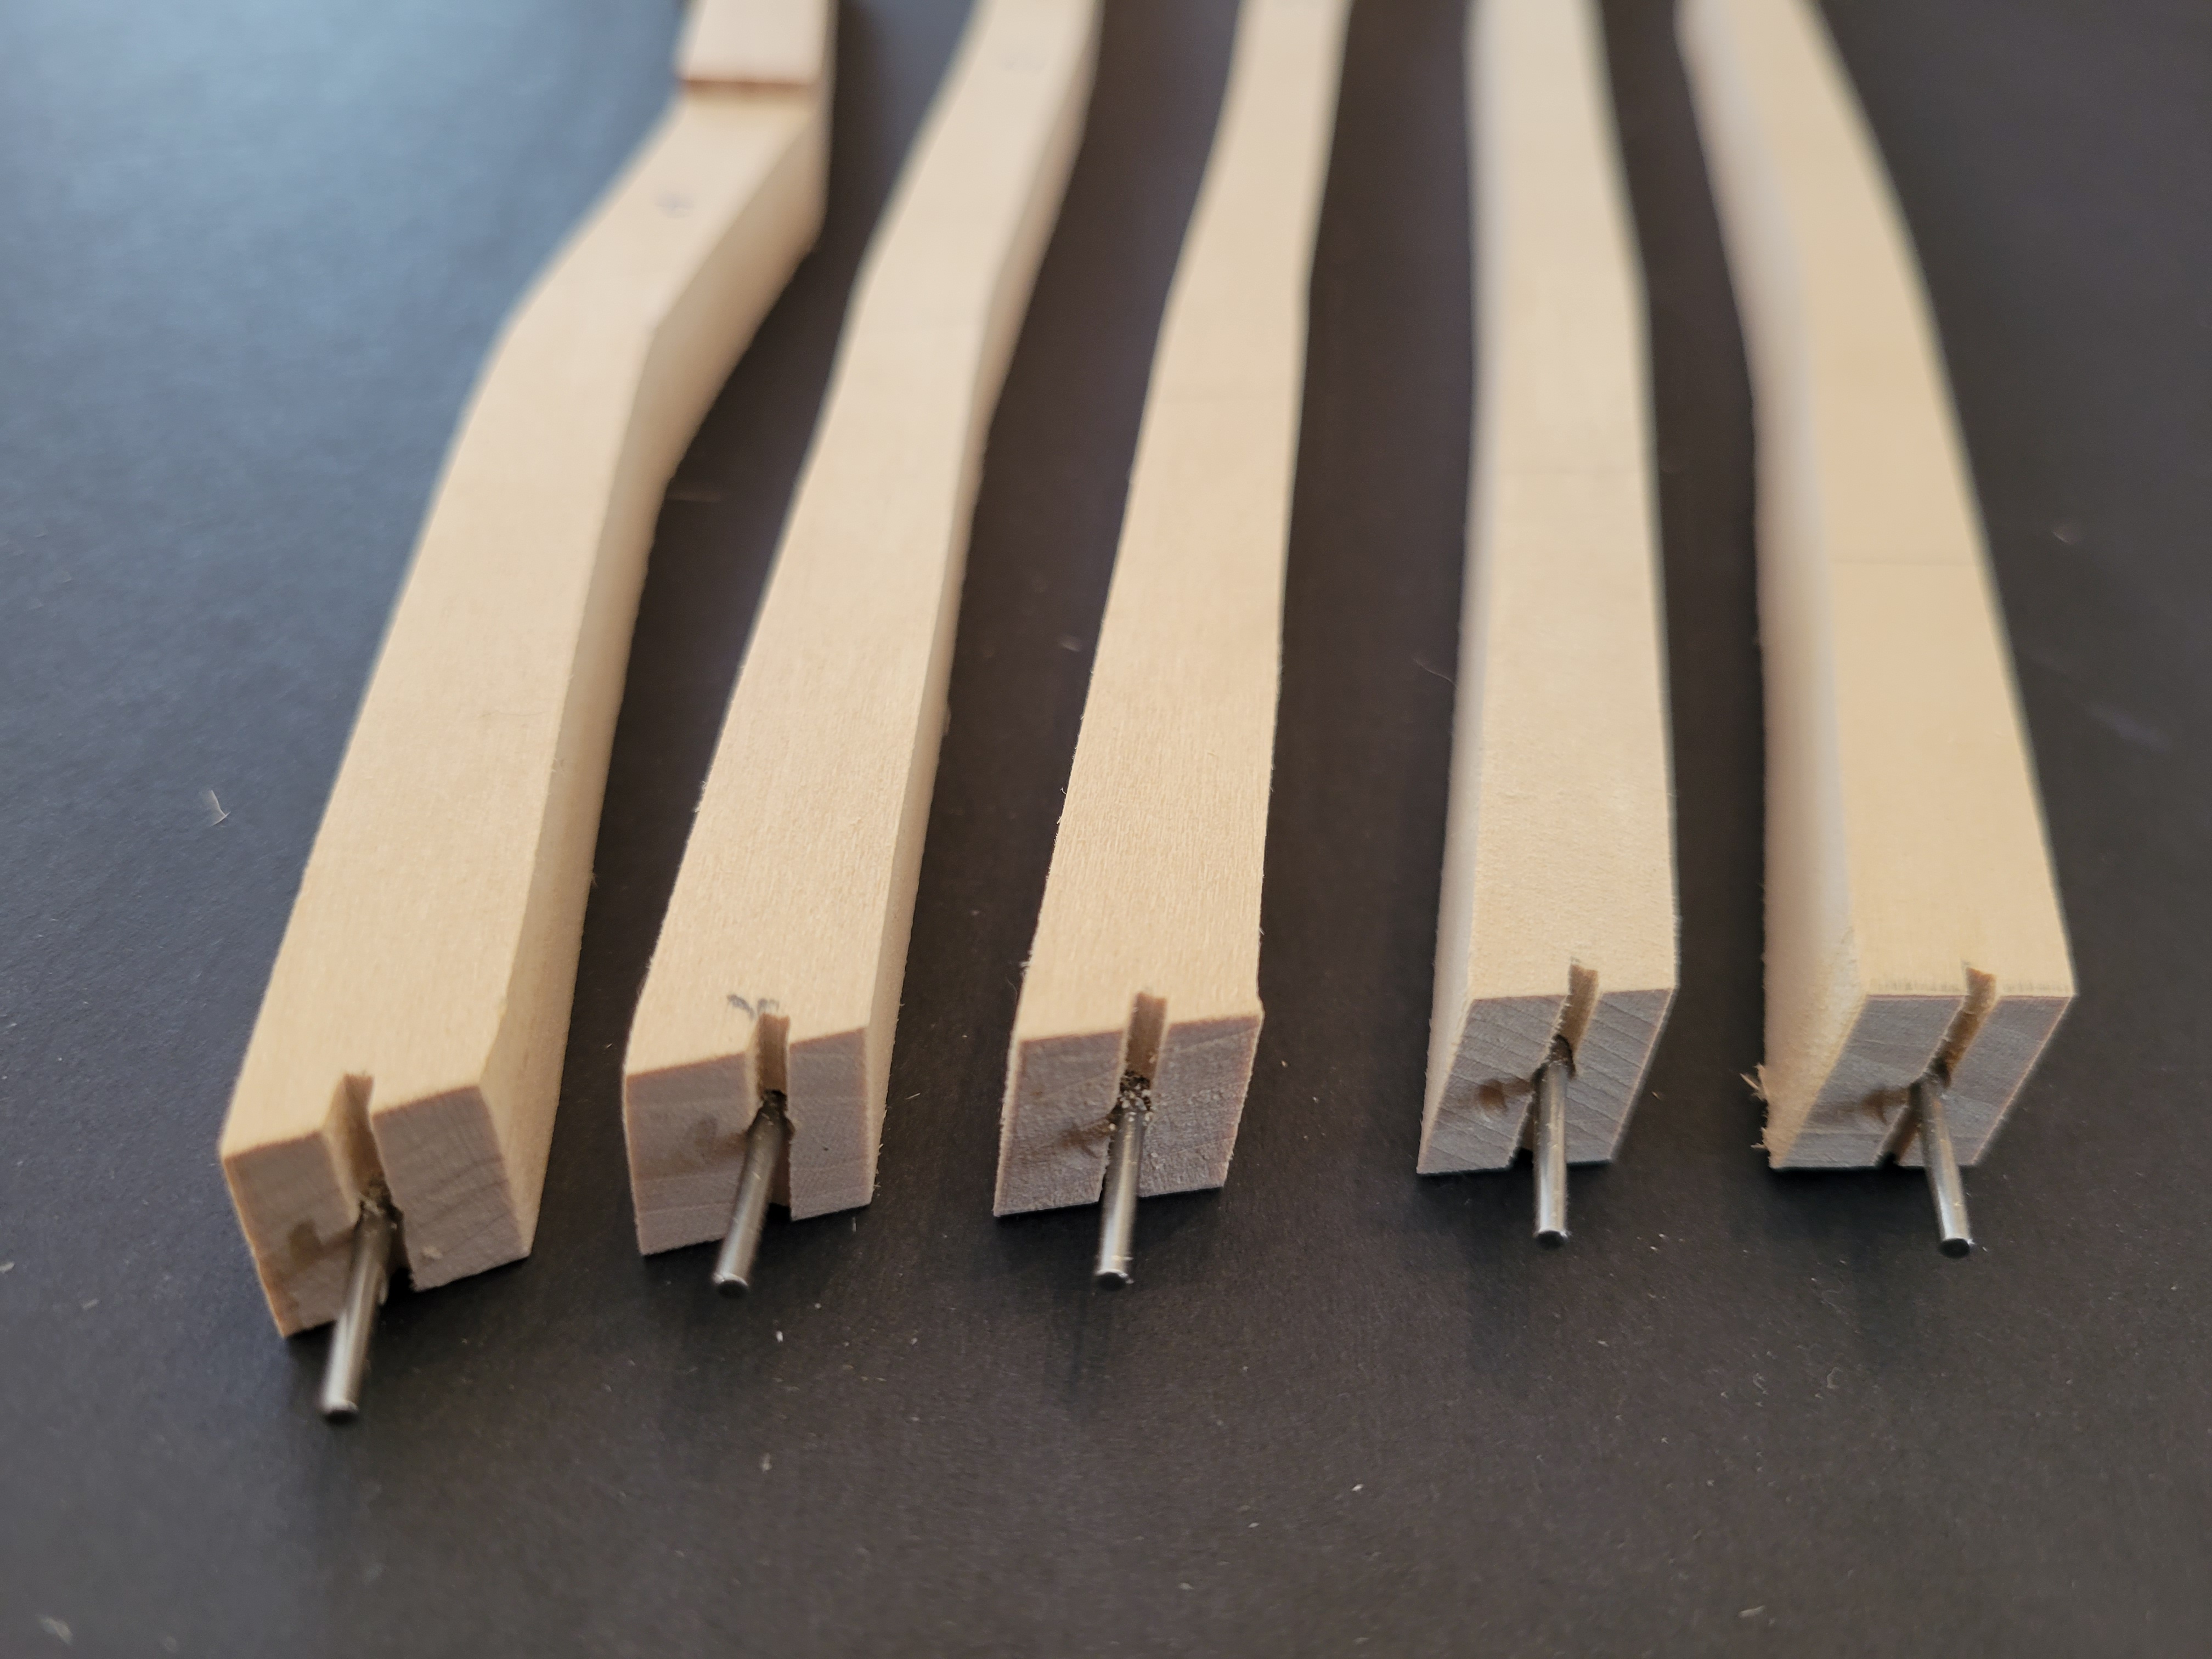
The guide pins are the same as the hitch pins that are later used to anchor one end of each key’s string. (The other end is attached to a tuning peg.) If the guide pins don’t go in exactly straight (which was the case with some of mine), they can be easily bent with pliers.
I also chose at this time to glue the sharps onto 30 of the keys:
I then tried out several keys on the keyboard frame:

This was not as easy as it looks. At first, everything is prohibitively tight. The holes for the balance pins are filled with wood fibers, and I found myself drilling through the hole with a 3/32 inch bit, even though the manual didn’t tell me to do this. What the manual does tell you is what to do about tight guide pins at the end of the keys. My instinct was to widen the slots in the rack. But no. You’re supposed to file the sides of the guide pins to make them thinner. I was skeptical but it worked.
I got several of the keys to swivel and glide very smoothly. They made a rewarding clacking sound as I tried them out. But that’s not the goal just yet. The sole purpose of this experimental partial positioning of the keys is to properly position the rack. The rack can be shifted left or right until the keys are parallel to the sides of the keyboard frame:
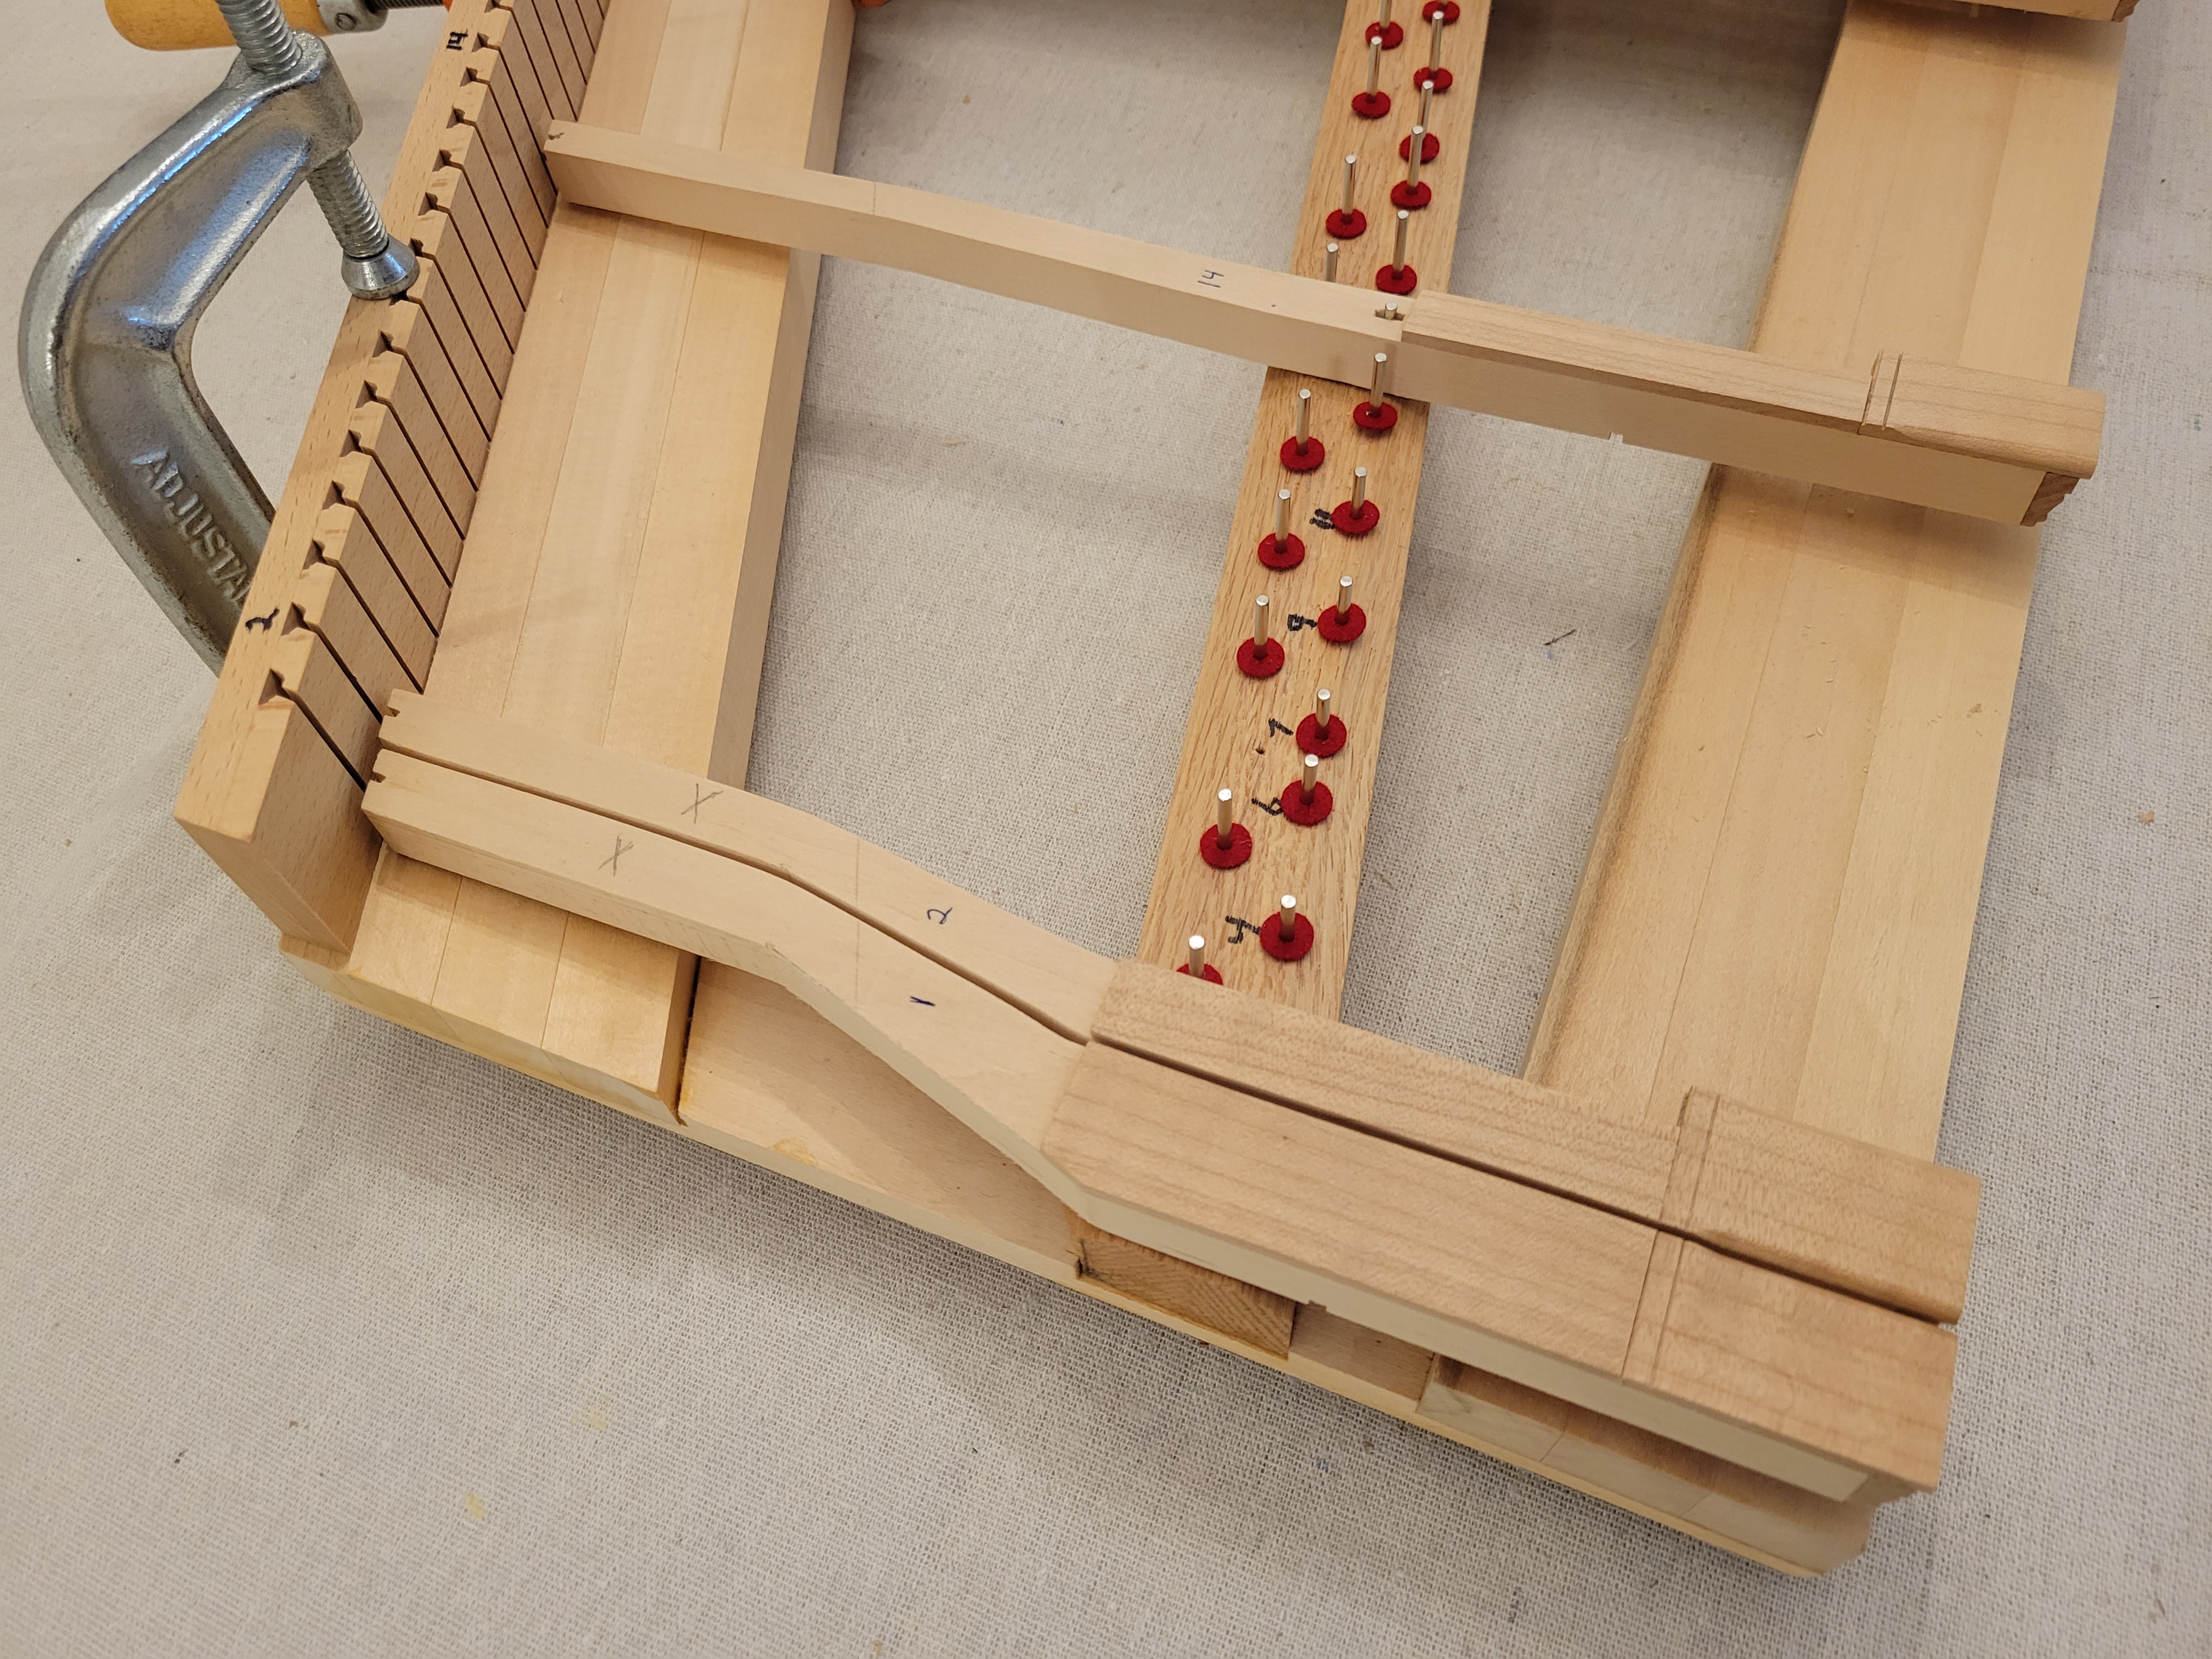
When the position has been determined, the rack is clamped into place, the keyboard frame is turned over, and the rack is attached to the back rail with four wood screws. Here’s the view from the bottom:
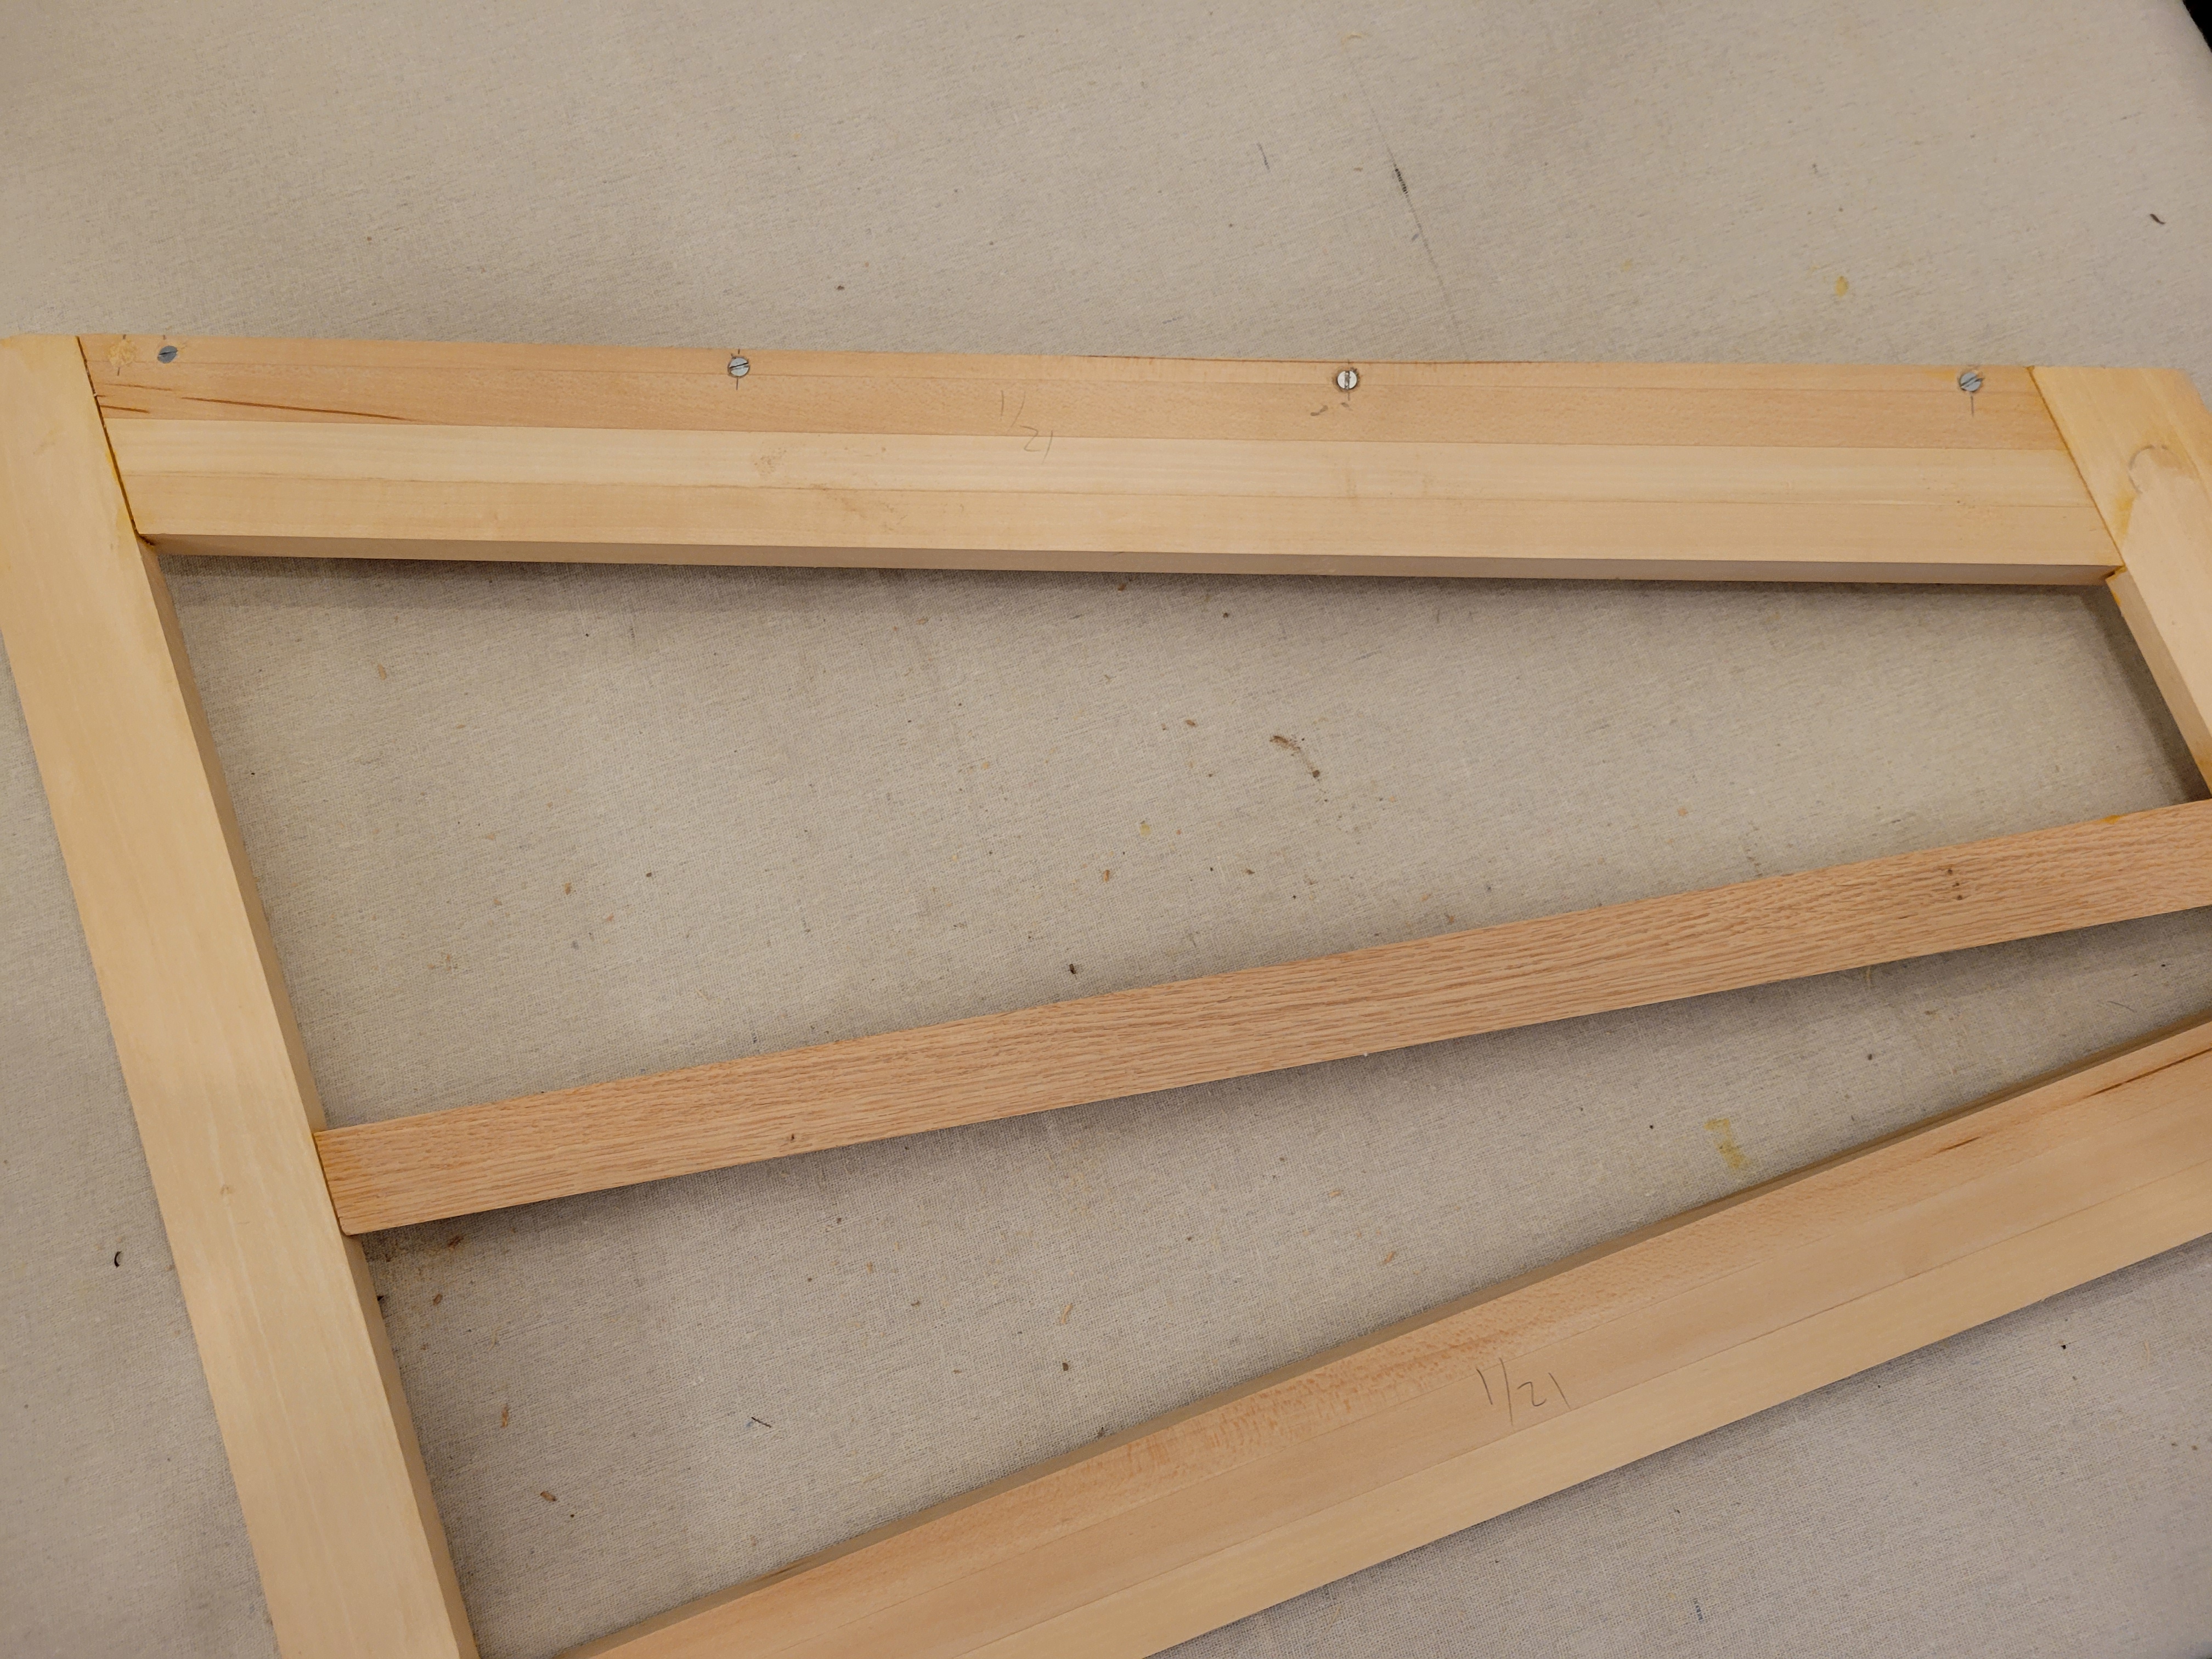
A countersink bit is used so that the screw head is below the surface of the wood. Later on, this keyboard frame must slide in and out of the case so the bottom must be flat.
It was a long day, and by the end I was a bit punchy. When you wonder why your drill isn’t working and discover that it’s going in reverse, it’s time to stop.
Unfortunately, I won’t be able to continue until next weekend. I’m building the virginal on the dining room table in our little house in the Catskills, and we still have lots of stuff to do in Manhattan and environs. This afternoon we’re driving down to Newark to see the New Jersey Symphony perform Mahler’s Third Symphony conducted by Xian Zhang; Monday afternoon I’m seeing a concert of the Jupiter Symphony Chamber Players; Tuesday is a dental appointment and in the evening, violinist Hilary Hahn performing Bach at Geffen Hall; Wednesday is the Montreal Symphony Orchestra at Carnegie Hall performing the Mahler Fifth (it’s Mahler Week!); Thursday we’re seeing black odyssey at the Classic Stage Company; and Friday we’re at Weill Recital Hall seeing mezzo-soprano Samantha Hankey in a fascinating recital of songs by Berg, Alma Mahler, Zemlinsky, Schoenberg, Richard Strauss, Ravel, and Satie.
But after that, we’re free for several days. We’ll drive back to the Catskills and the virginal construction will resume.