Building a Virginal: Preparing the Soundboard
April 5, 2023
New York, N.Y.
I’m trying to document every little task involved in constructing a Zuckermann Troubadour Virginal, but some of these jobs aren’t as glamorous as others. After installing the soundboard, some of this less glamorous work needs to be done to begin preparing the soundboard for stringing. I did this work on April 2, Construction Day No. 9.
The Troubadour Virginal kit includes over-sized strips of soundboard molding that must be cut and glued to the inside of the case around the perimeter of the soundboard. These involve miter joints, which can be challenging. We have a chop saw that can do miter cuts, but the soundboard molding was just too small and I had to cut it with a mini hacksaw and then use sandpaper to get the surfaces flat (or nearly so).
I was confident that the angles of the non-orthogonal joints of the case were documented in the life-size Mylar drawing of the virginal, and they were, but they were so small and faint that I had to check them with a protractor. For future reference, going clockwise around the sides and rear of the case, half the interior angles are 54°, 81°, 66°, and 69°. The full interior angles are 108°, 162°, 132°, and 138°. Add those plus the two right angles (90°) in the front of the case and the total is 720°, which is correct for a hexagon. As you circle around clockwise from the front, the interior angles are 90° plus 108° plus 162°, which total 360°, which means that the back panel is parallel to the front panel. Continue going clockwise: 132° plus 138° plus 90° equals 360° again.
I wasn’t thrilled with my miter cuts. Here’s the right side, which is probably the least embarassing:
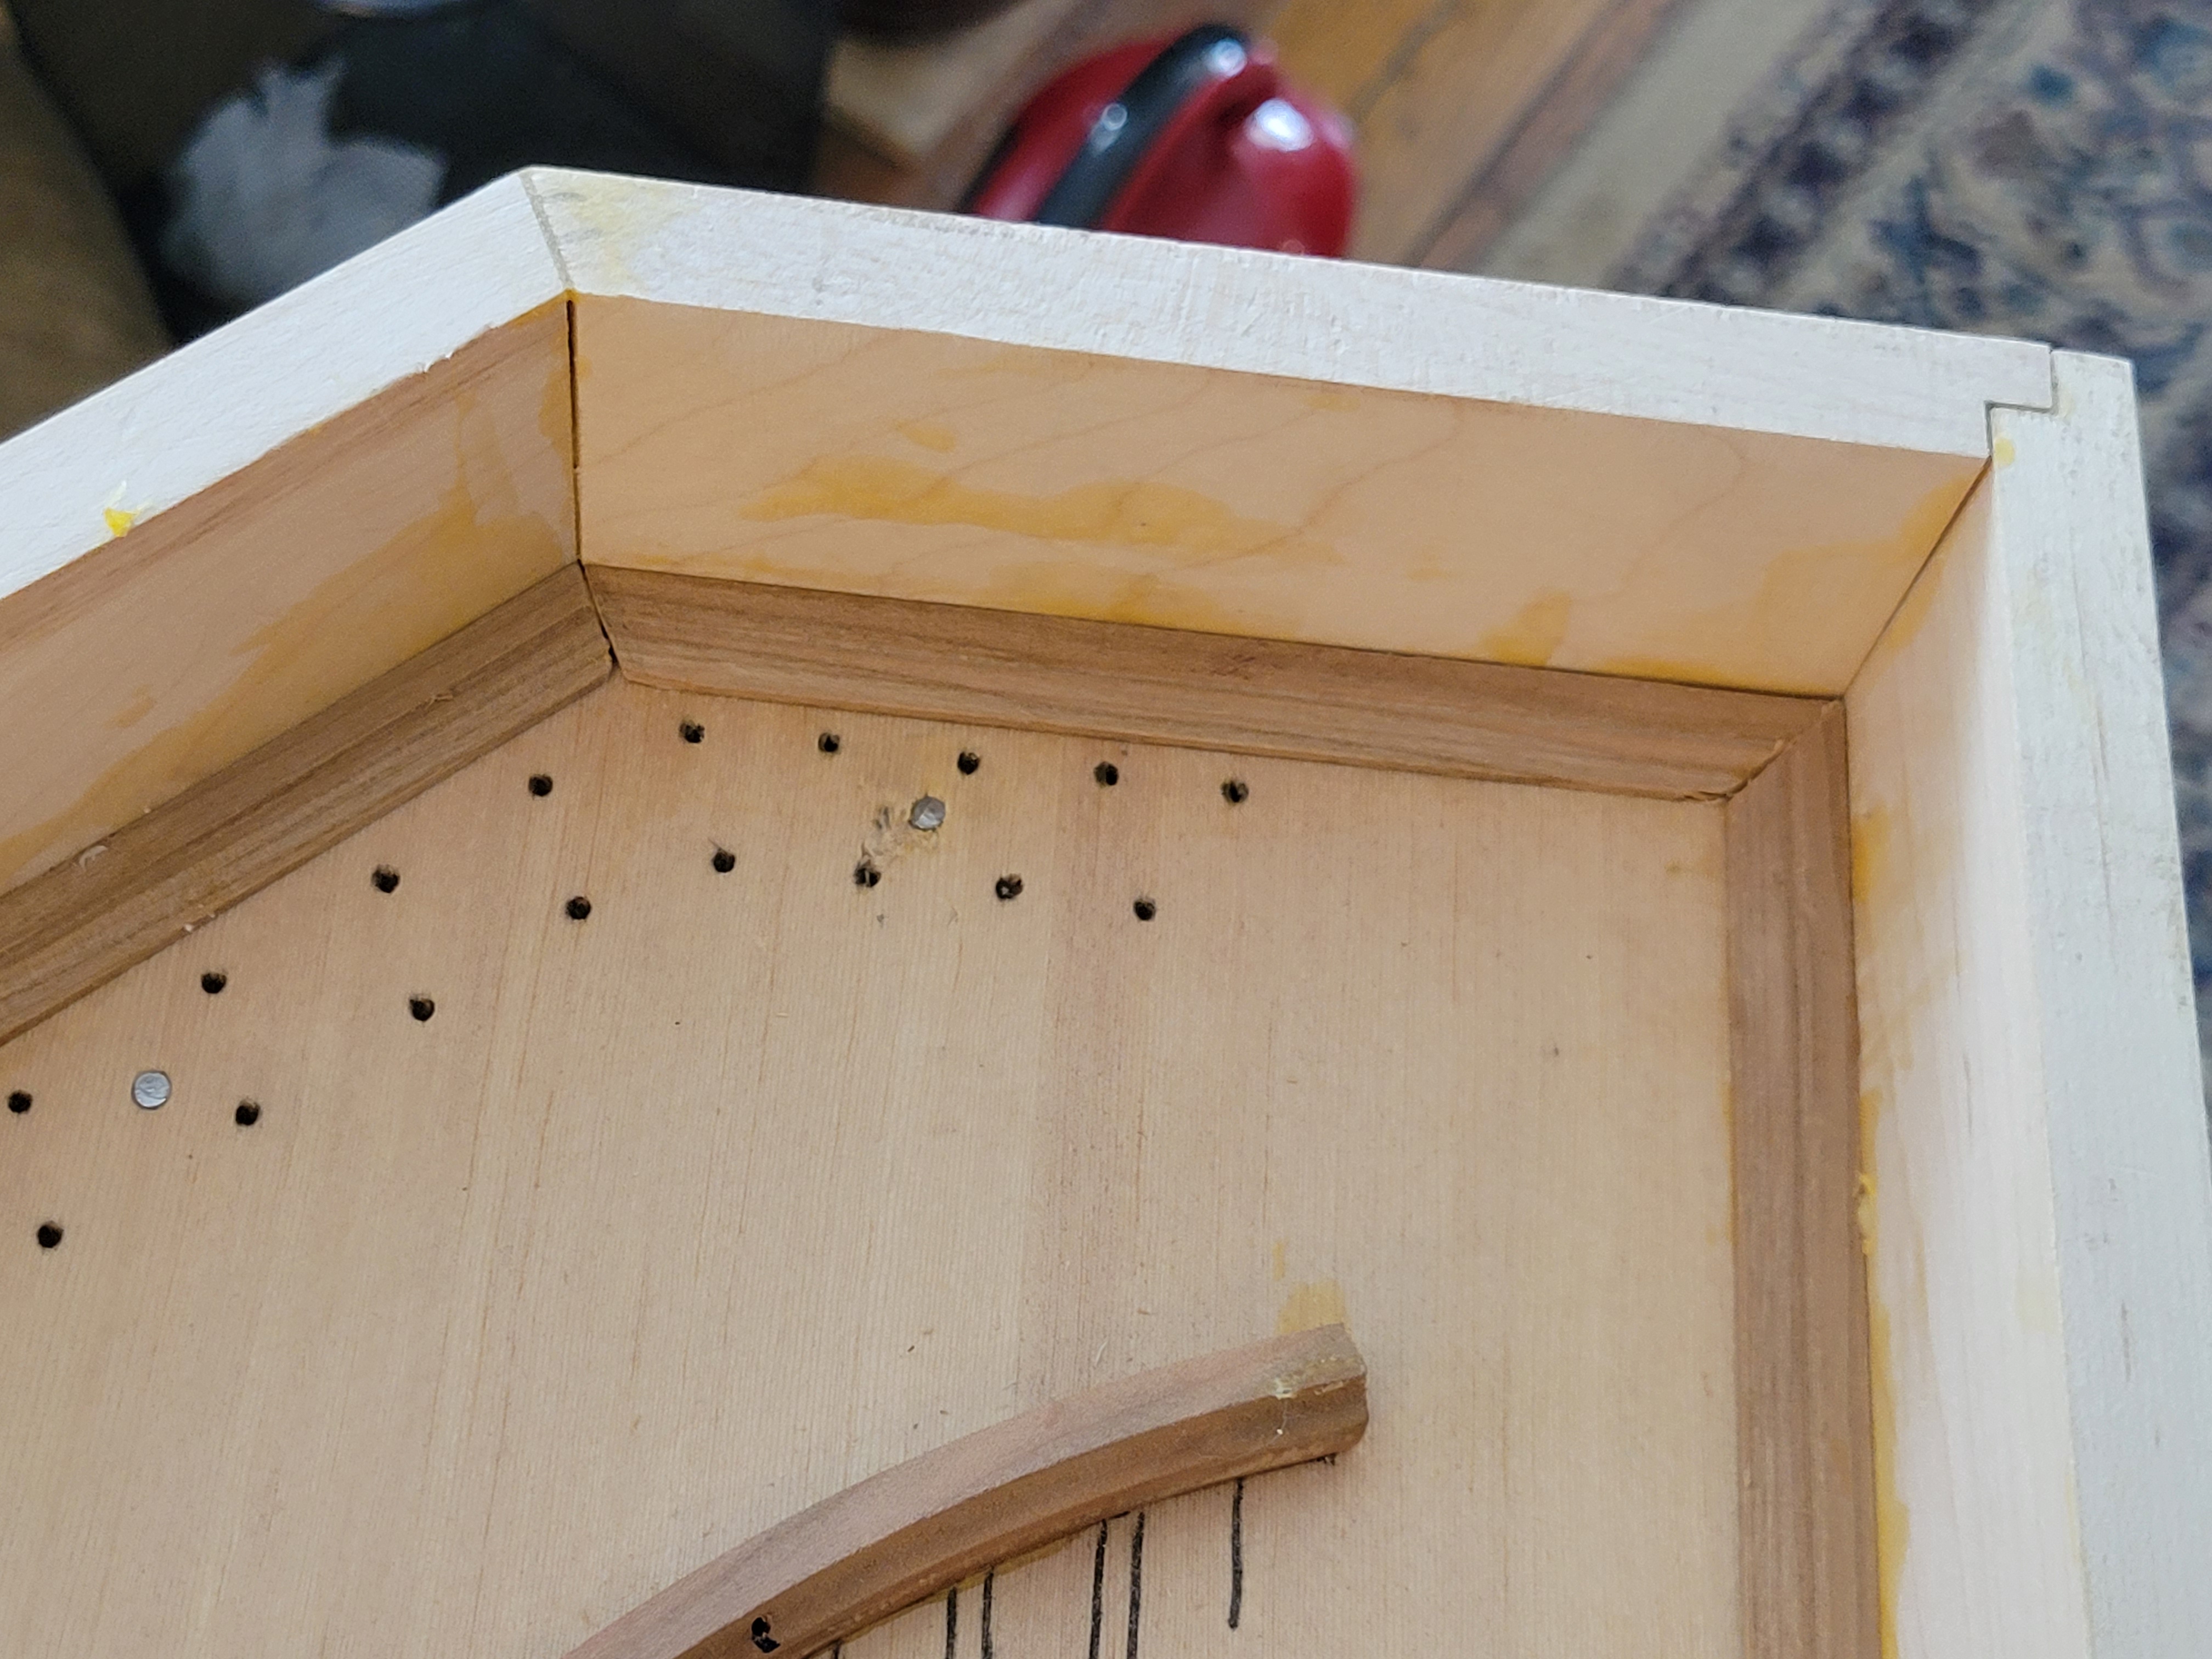
Those black dots are from carbon paper that I used to transfer drilling targets from the Mylar drawing. These are holes that must be drilled for the tuning pins.
I’ve long been accustomed to working with drill bits sized in increments of 1/64". But the Troubadour Virginal kit includes a #25 drill bit specifically for the holes for the tuning pins. This drill bit is 0.1495” in diameter, about halfway between a 9/64” bit and a 5/32” bit. That’s what I used to drill 55 holes 1” deep through the right side of the soundboard into the wrestplank:
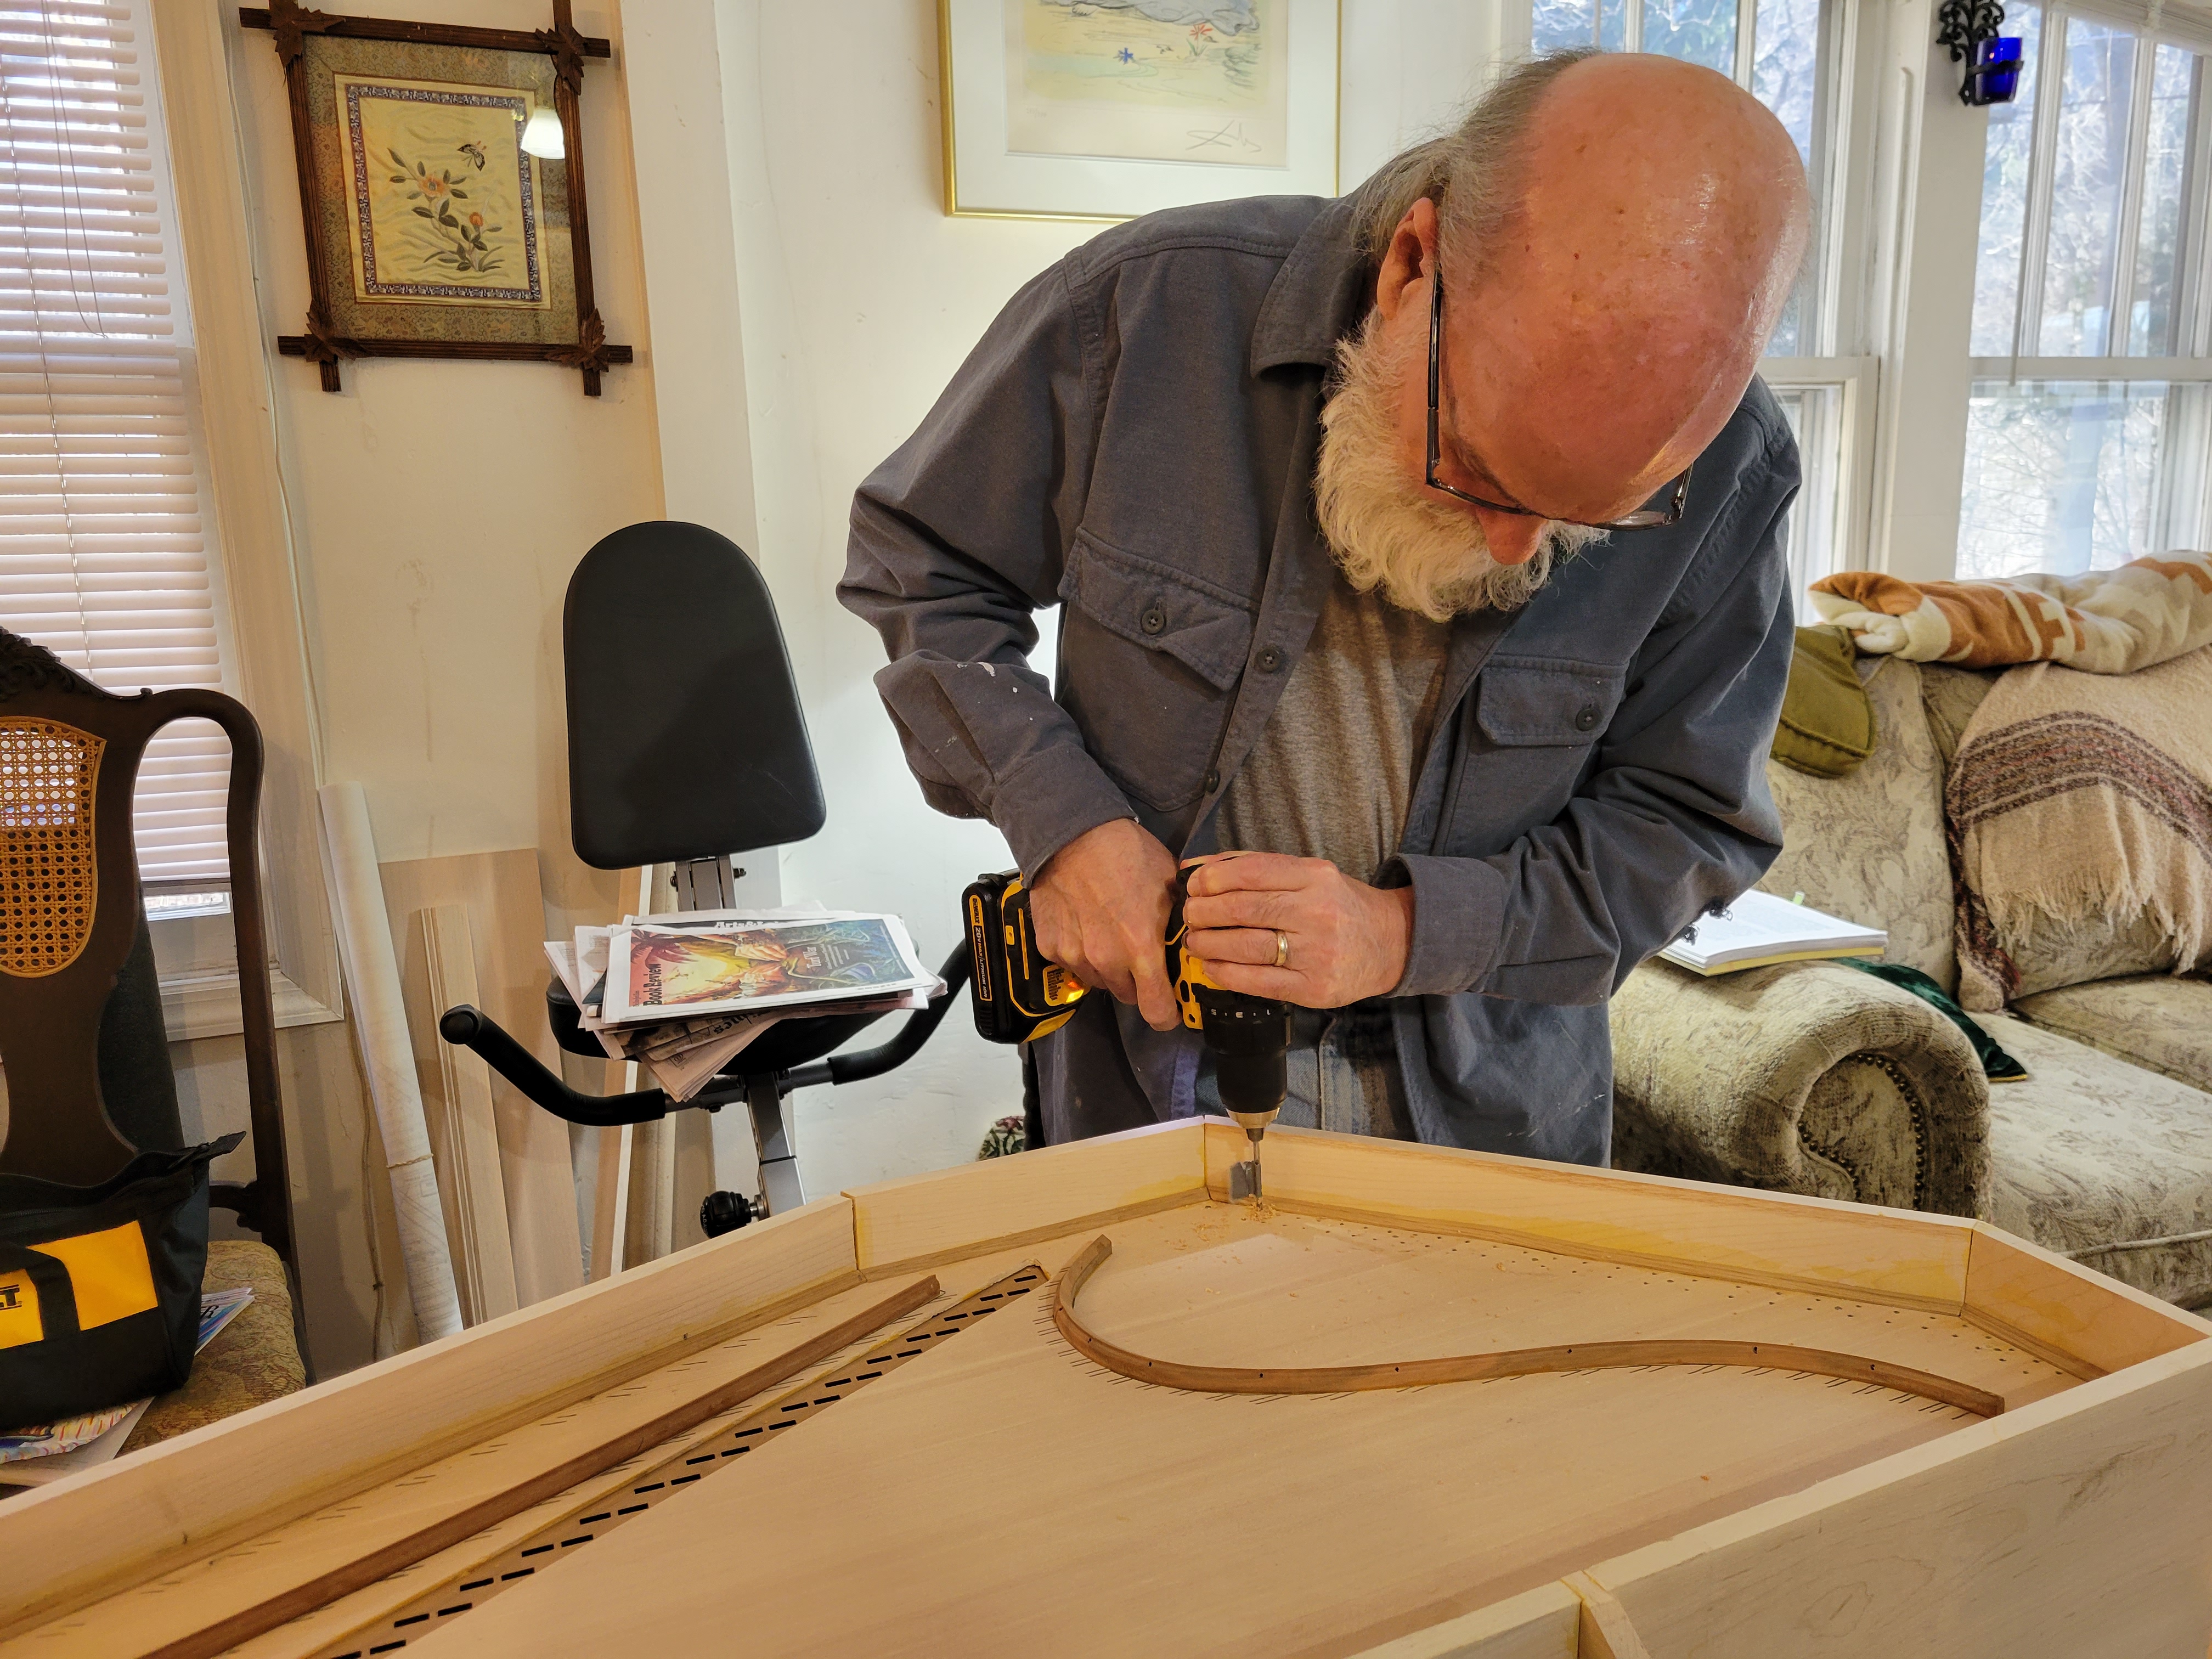
This job takes some time because the wrestplank is oak, and the drill bit must be cleaned of wood gunk and cool down between each hole. The Troubadour Virginal Construction Manual advises that the holes for the tuning pegs be angled 2° from the vertical, but to me, a 2° tilt from the vertical is visually indistinguishable from a 0° tilt, so I don’t think I was very successful.
It’s tempting to start pounding the tuning pegs in, but that job comes later.
The Troubadour Virginal kit also includes a long 1/16” drill bit specifically for drilling 55 holes on the left and left-back soundboard molding for the hitchpins, which hold one end of the string. These holes are drilled in front of a little step in the soundboard molding into the liner:
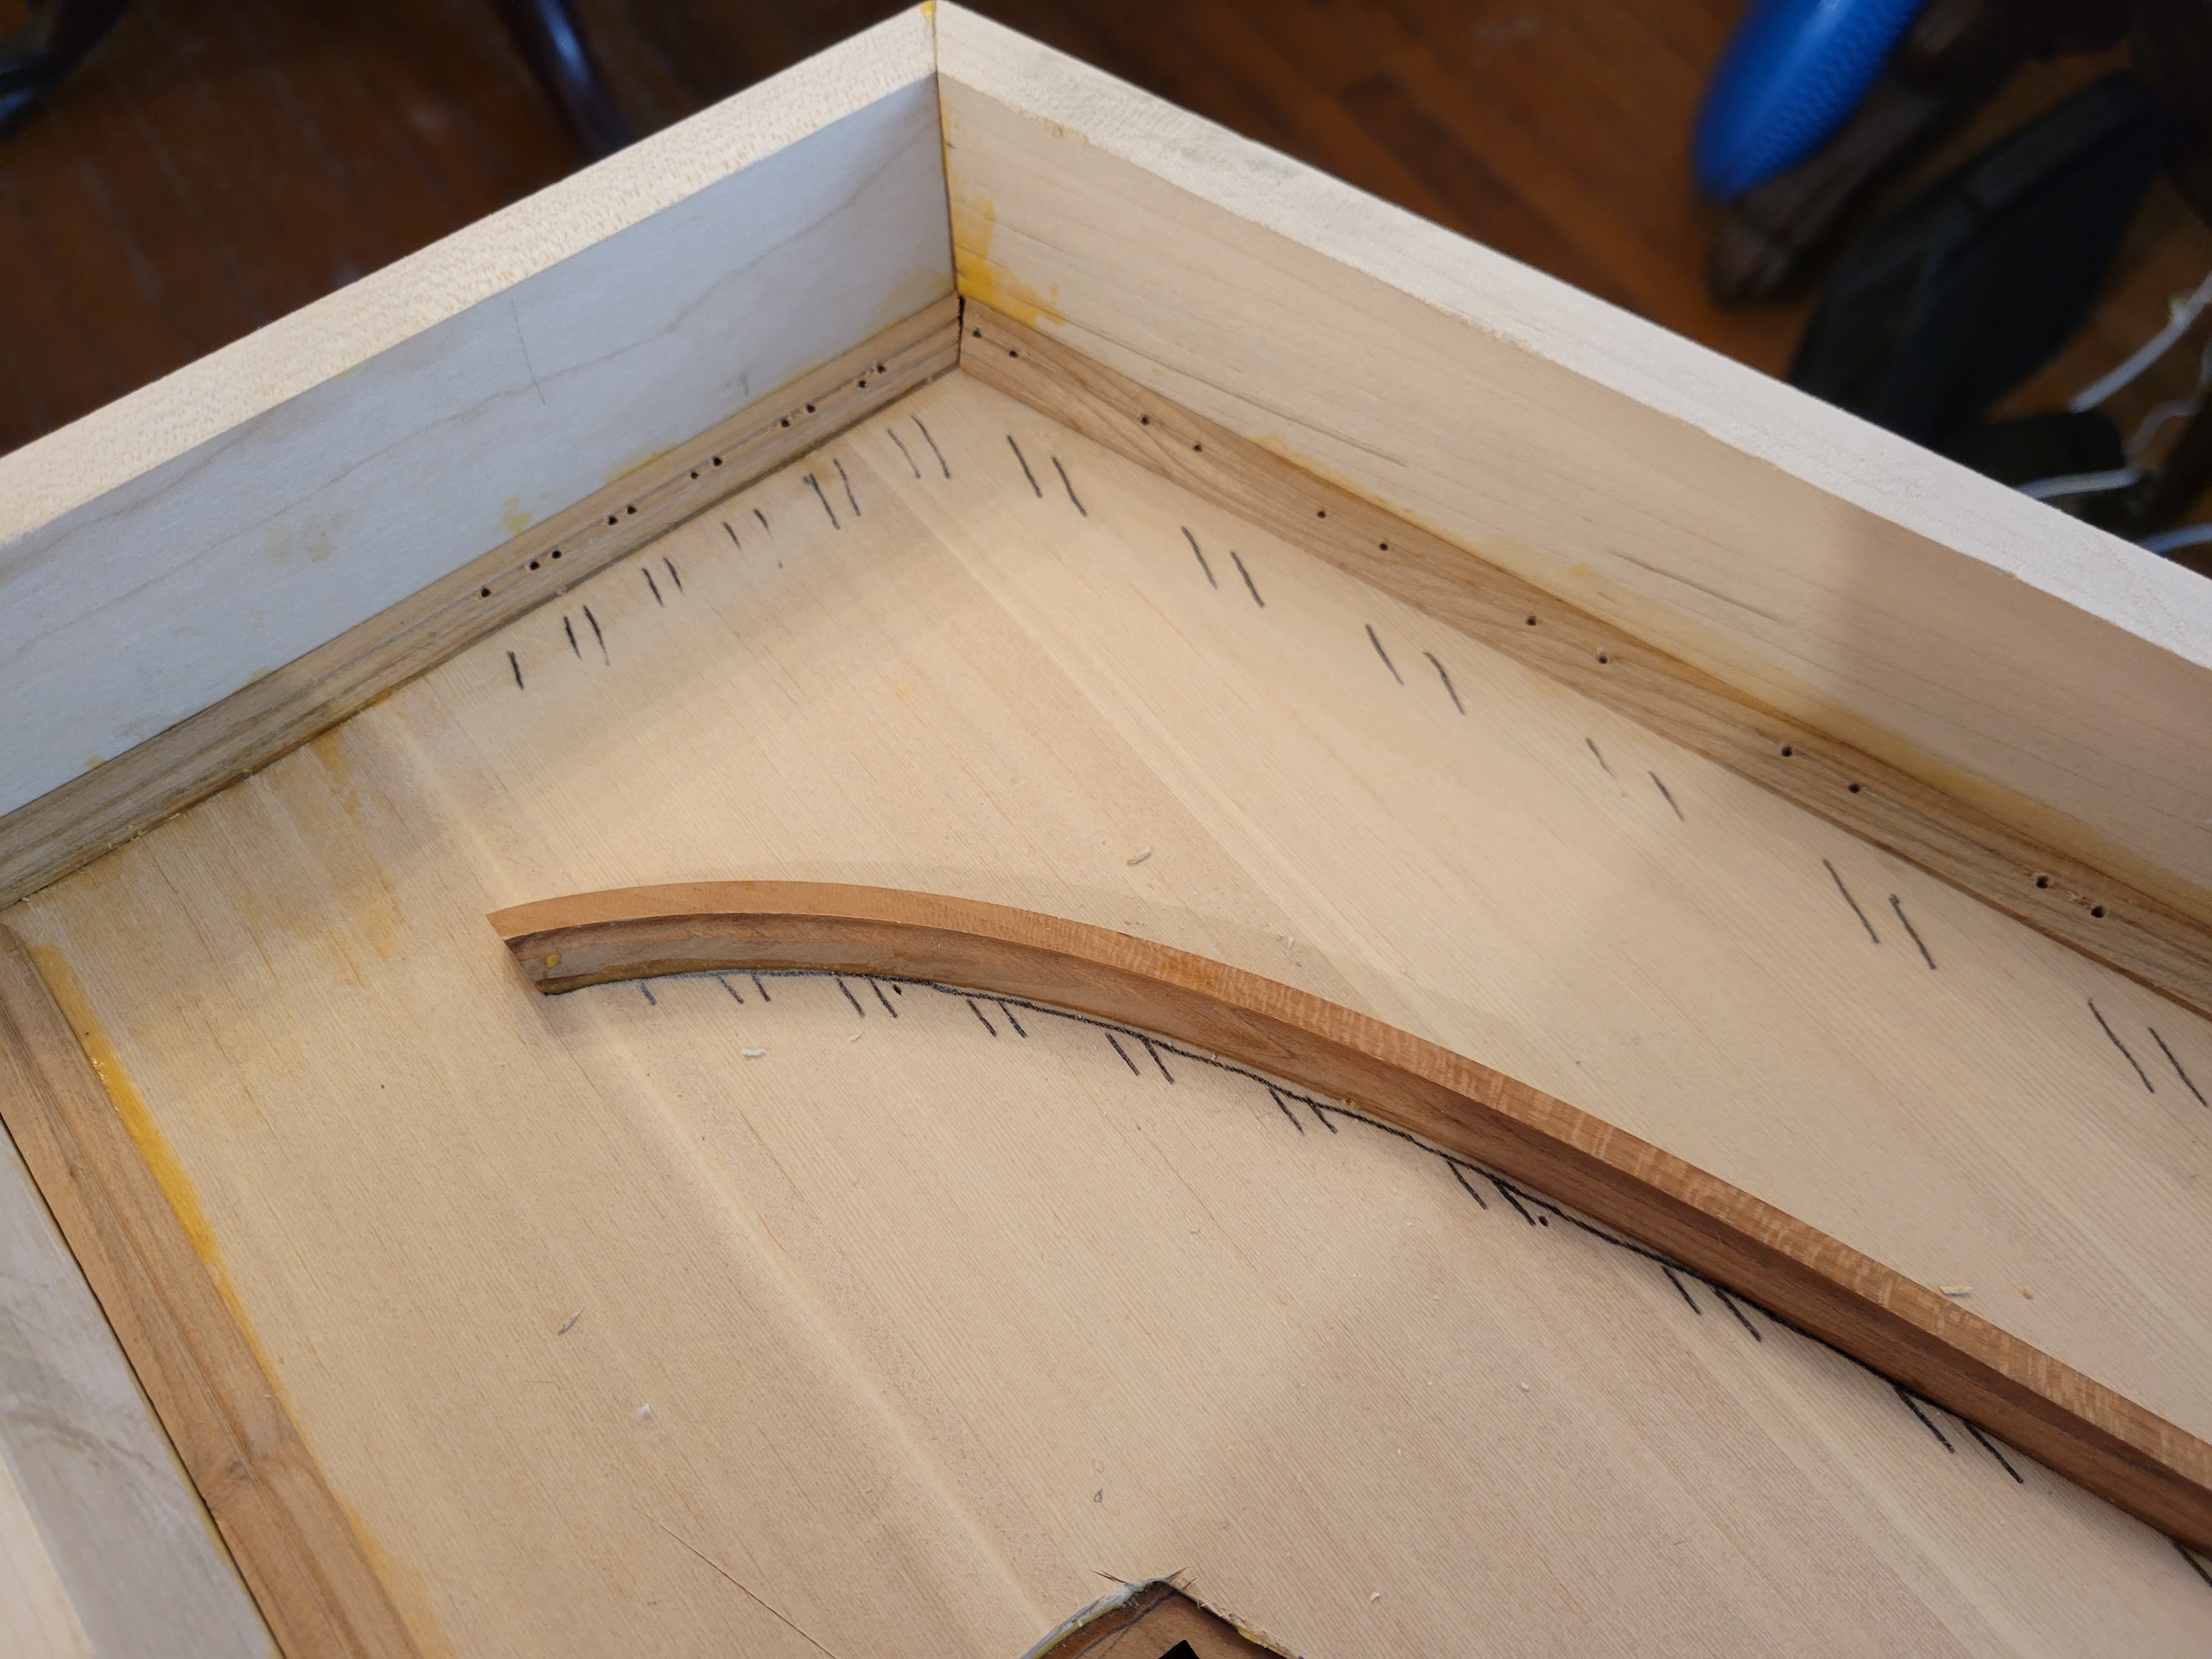
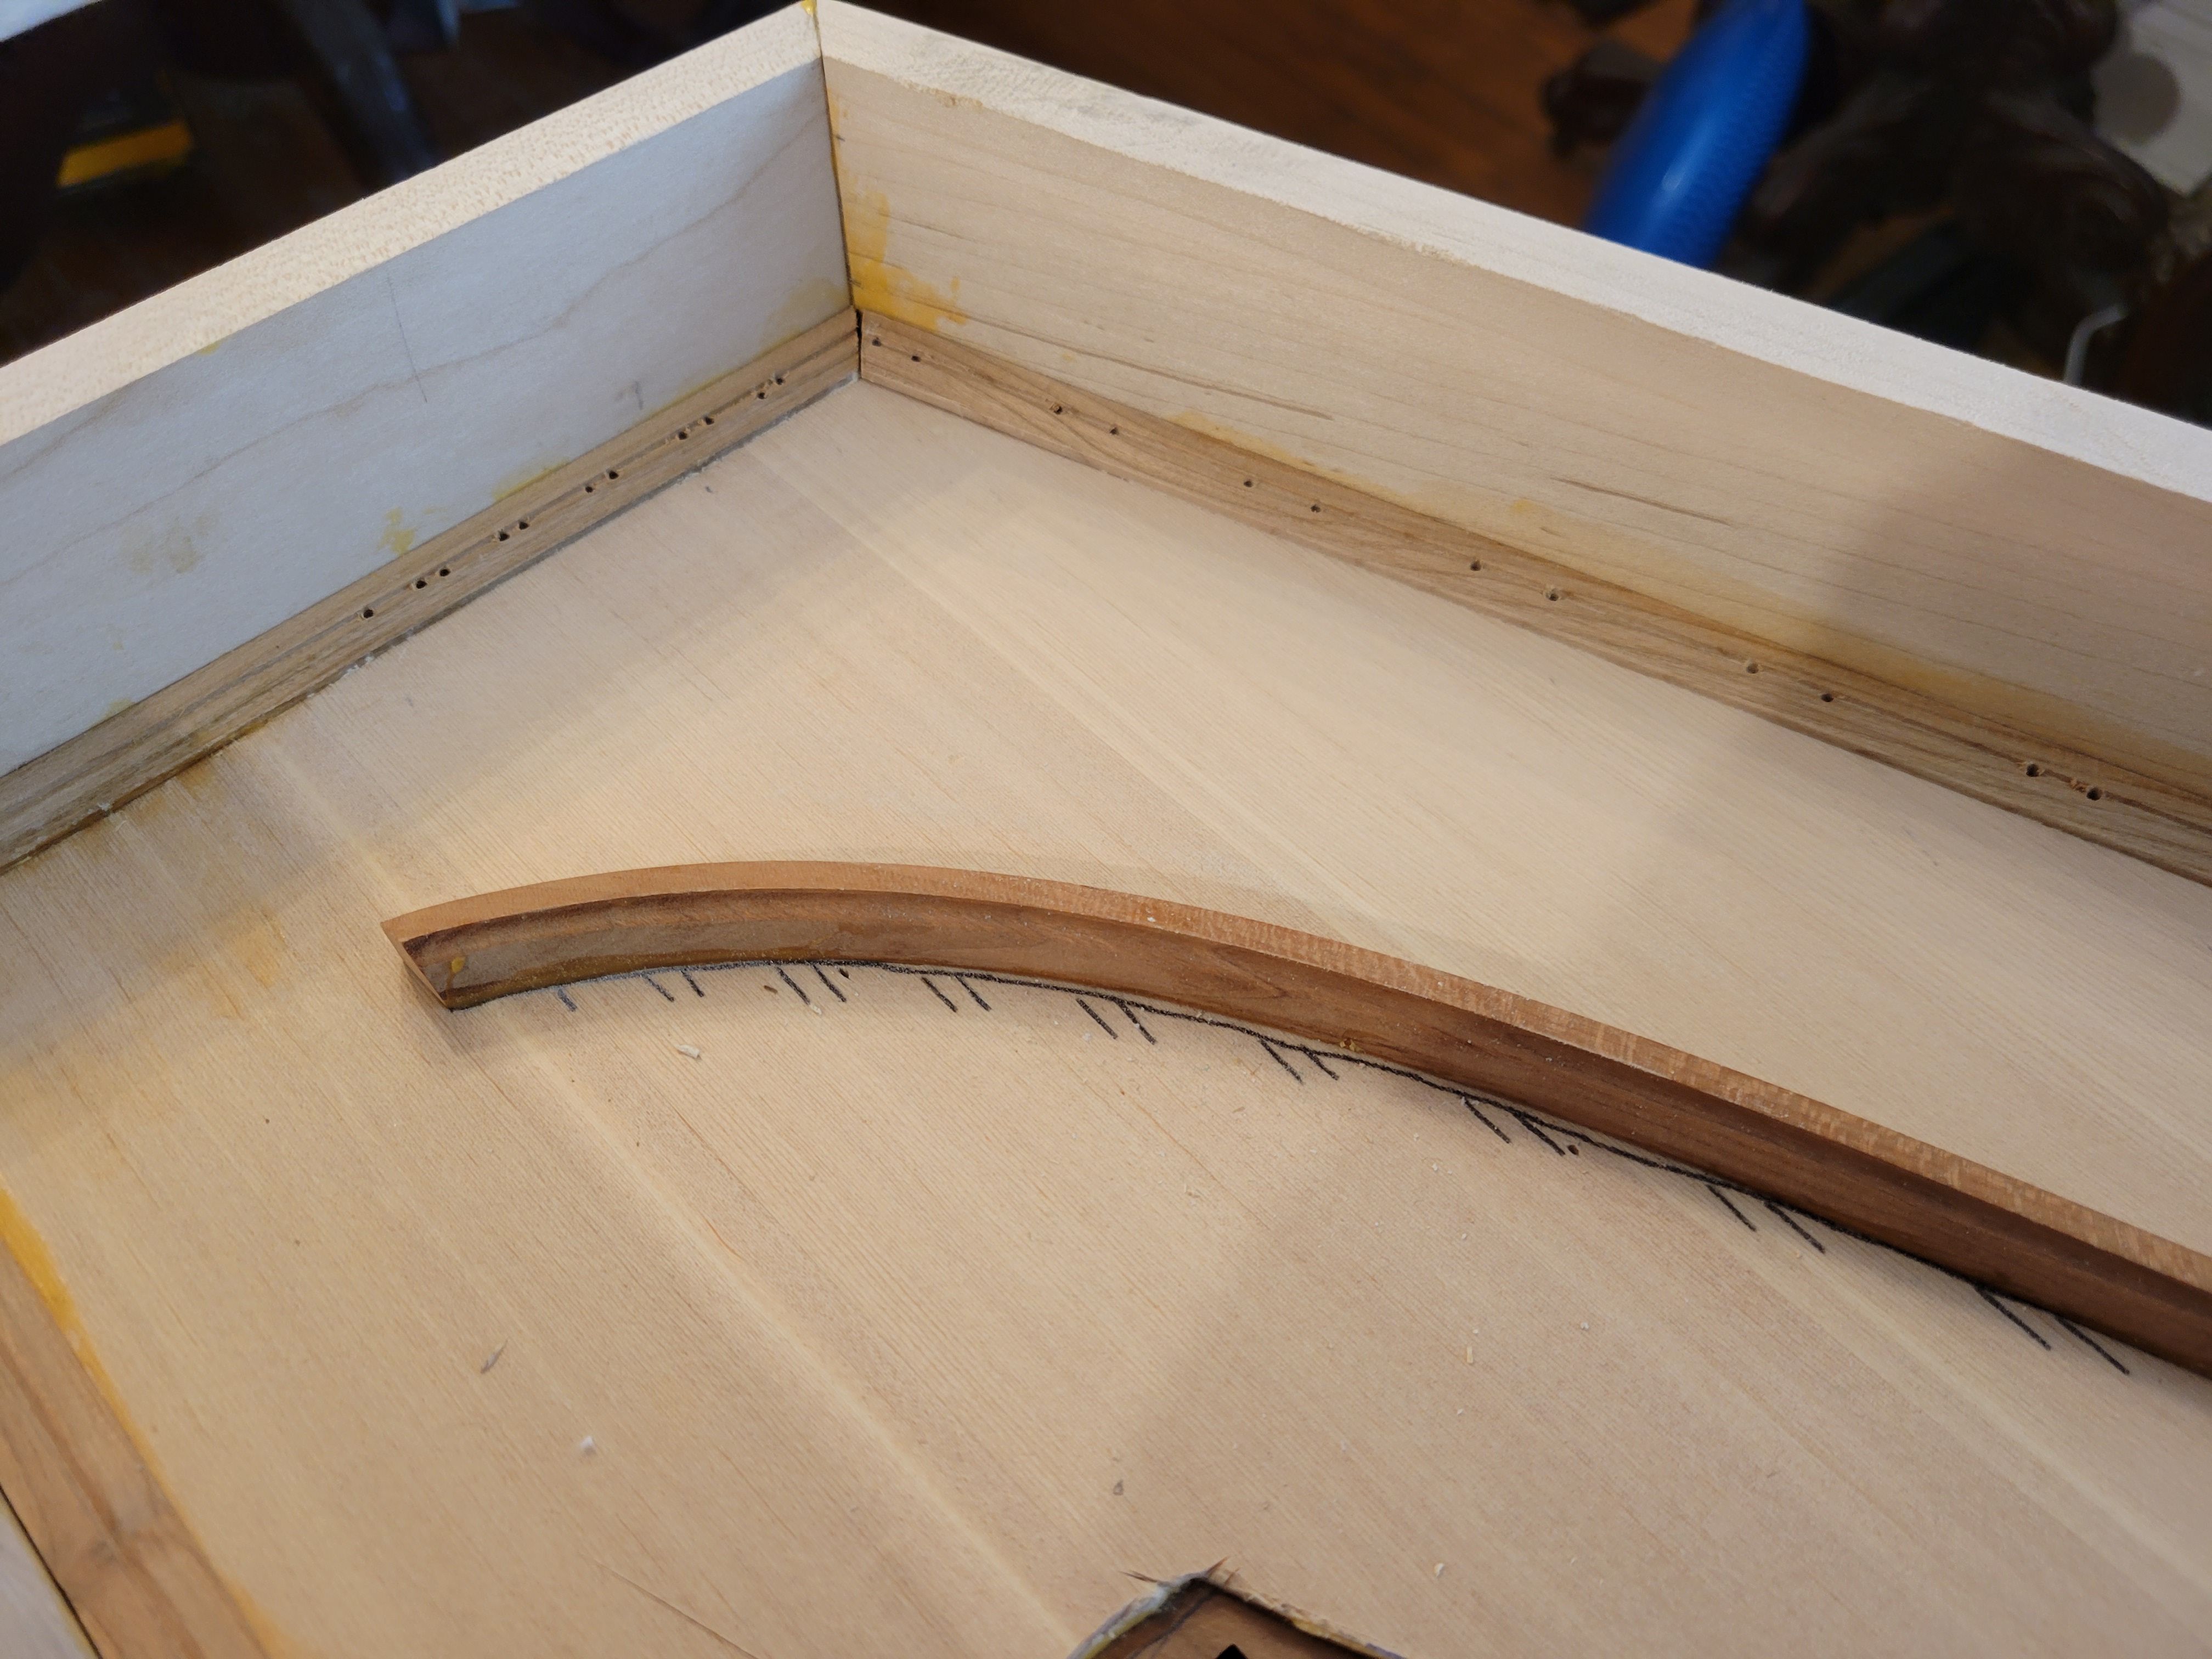
Those black lines next to the soundboard molding were copied from the Mylar drawing using carbon paper. These lines show how the strings come from the hitchpins and head towards the left bridge, so they were extremely useful for positining the hitchpin holes. After those holes are drilled, the marks are no longer needed, and I was able to “erase” them with some vigorous sandpapering:
It’s tempting to pound in the hitchpins as well, but I have to hold off a bit until the exterior and interior of the case is shellacked.