Building a Virginal: Installing the Soundboard
March 30, 2023
New York, N.Y.
An essential part of Zuckermann’s Troubadour Virginal kit is a lovely life-size schematic drawing of the virginal internals, 64 by 36 inches, printed on Mylar, and suitable for framing if you had a wall big enough and lived with someone who was as much of a harpsichord geek as yourself.
Working on the soundboard begins with an extraordinarily painful act: This beautiful drawing must be defaced by cutting out the soundboard part.
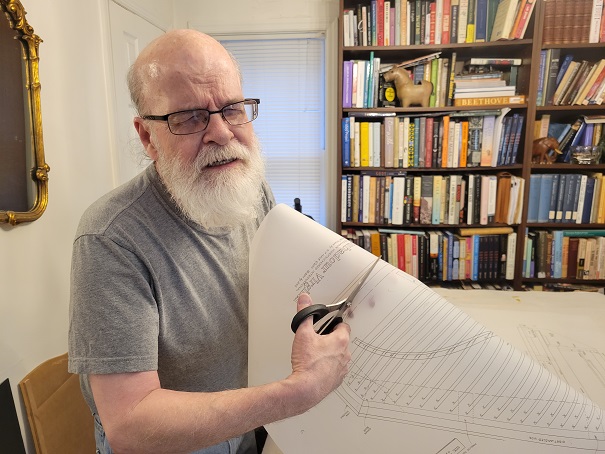
Ed Kottick’s The Troubadour Virginal Construction and Maintenance Guide says that you can later tape it back together, but it’s just not the same and never will be.
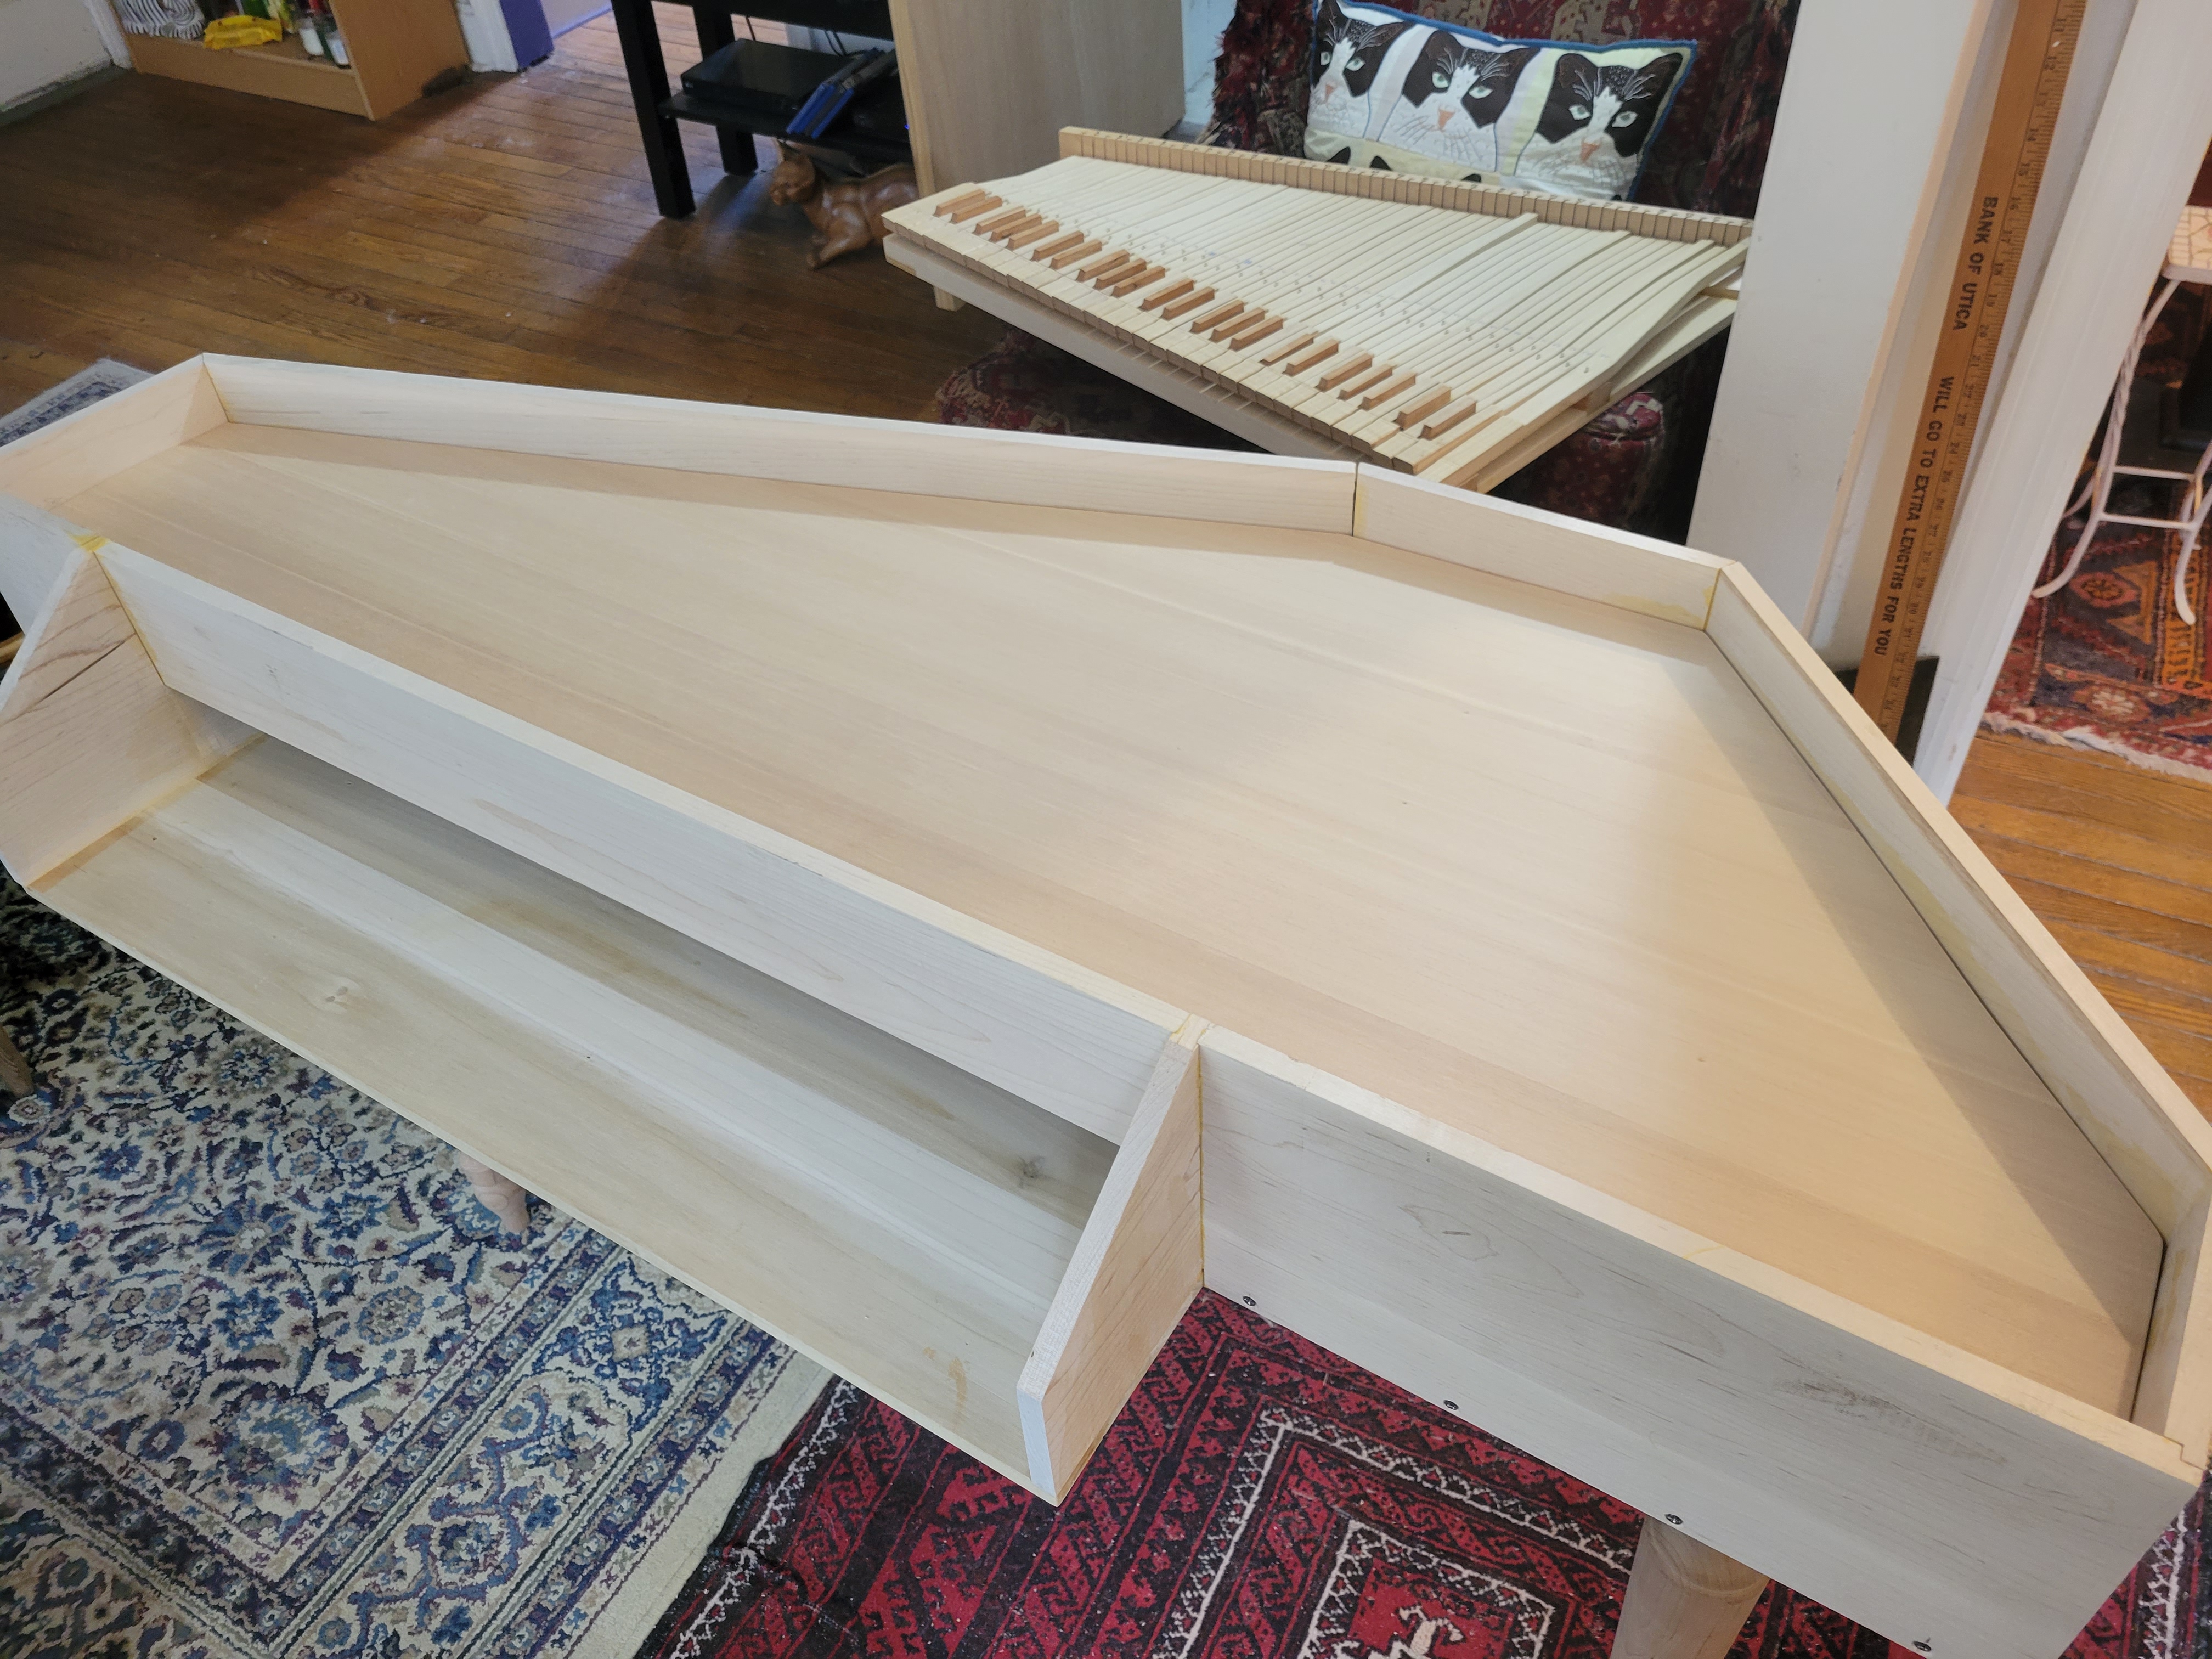
The soundboard is an extremely important component of a harpsichord, as it also is for pianos. The soundboard is what amplifies the vibrating strings. But the soundboard supplied by Zuckermann is a bit over-sized, and will not fit into the virginal case that I’ve already built:

It must be cut down and then other parts attached to it. Work on the soundboard occurred over March 28 and 29 (yesterday), which were Construction Days 6 and 7.
After I cut out the soundboard from the drawing, I wasn’t surprised that it fit well in the case.
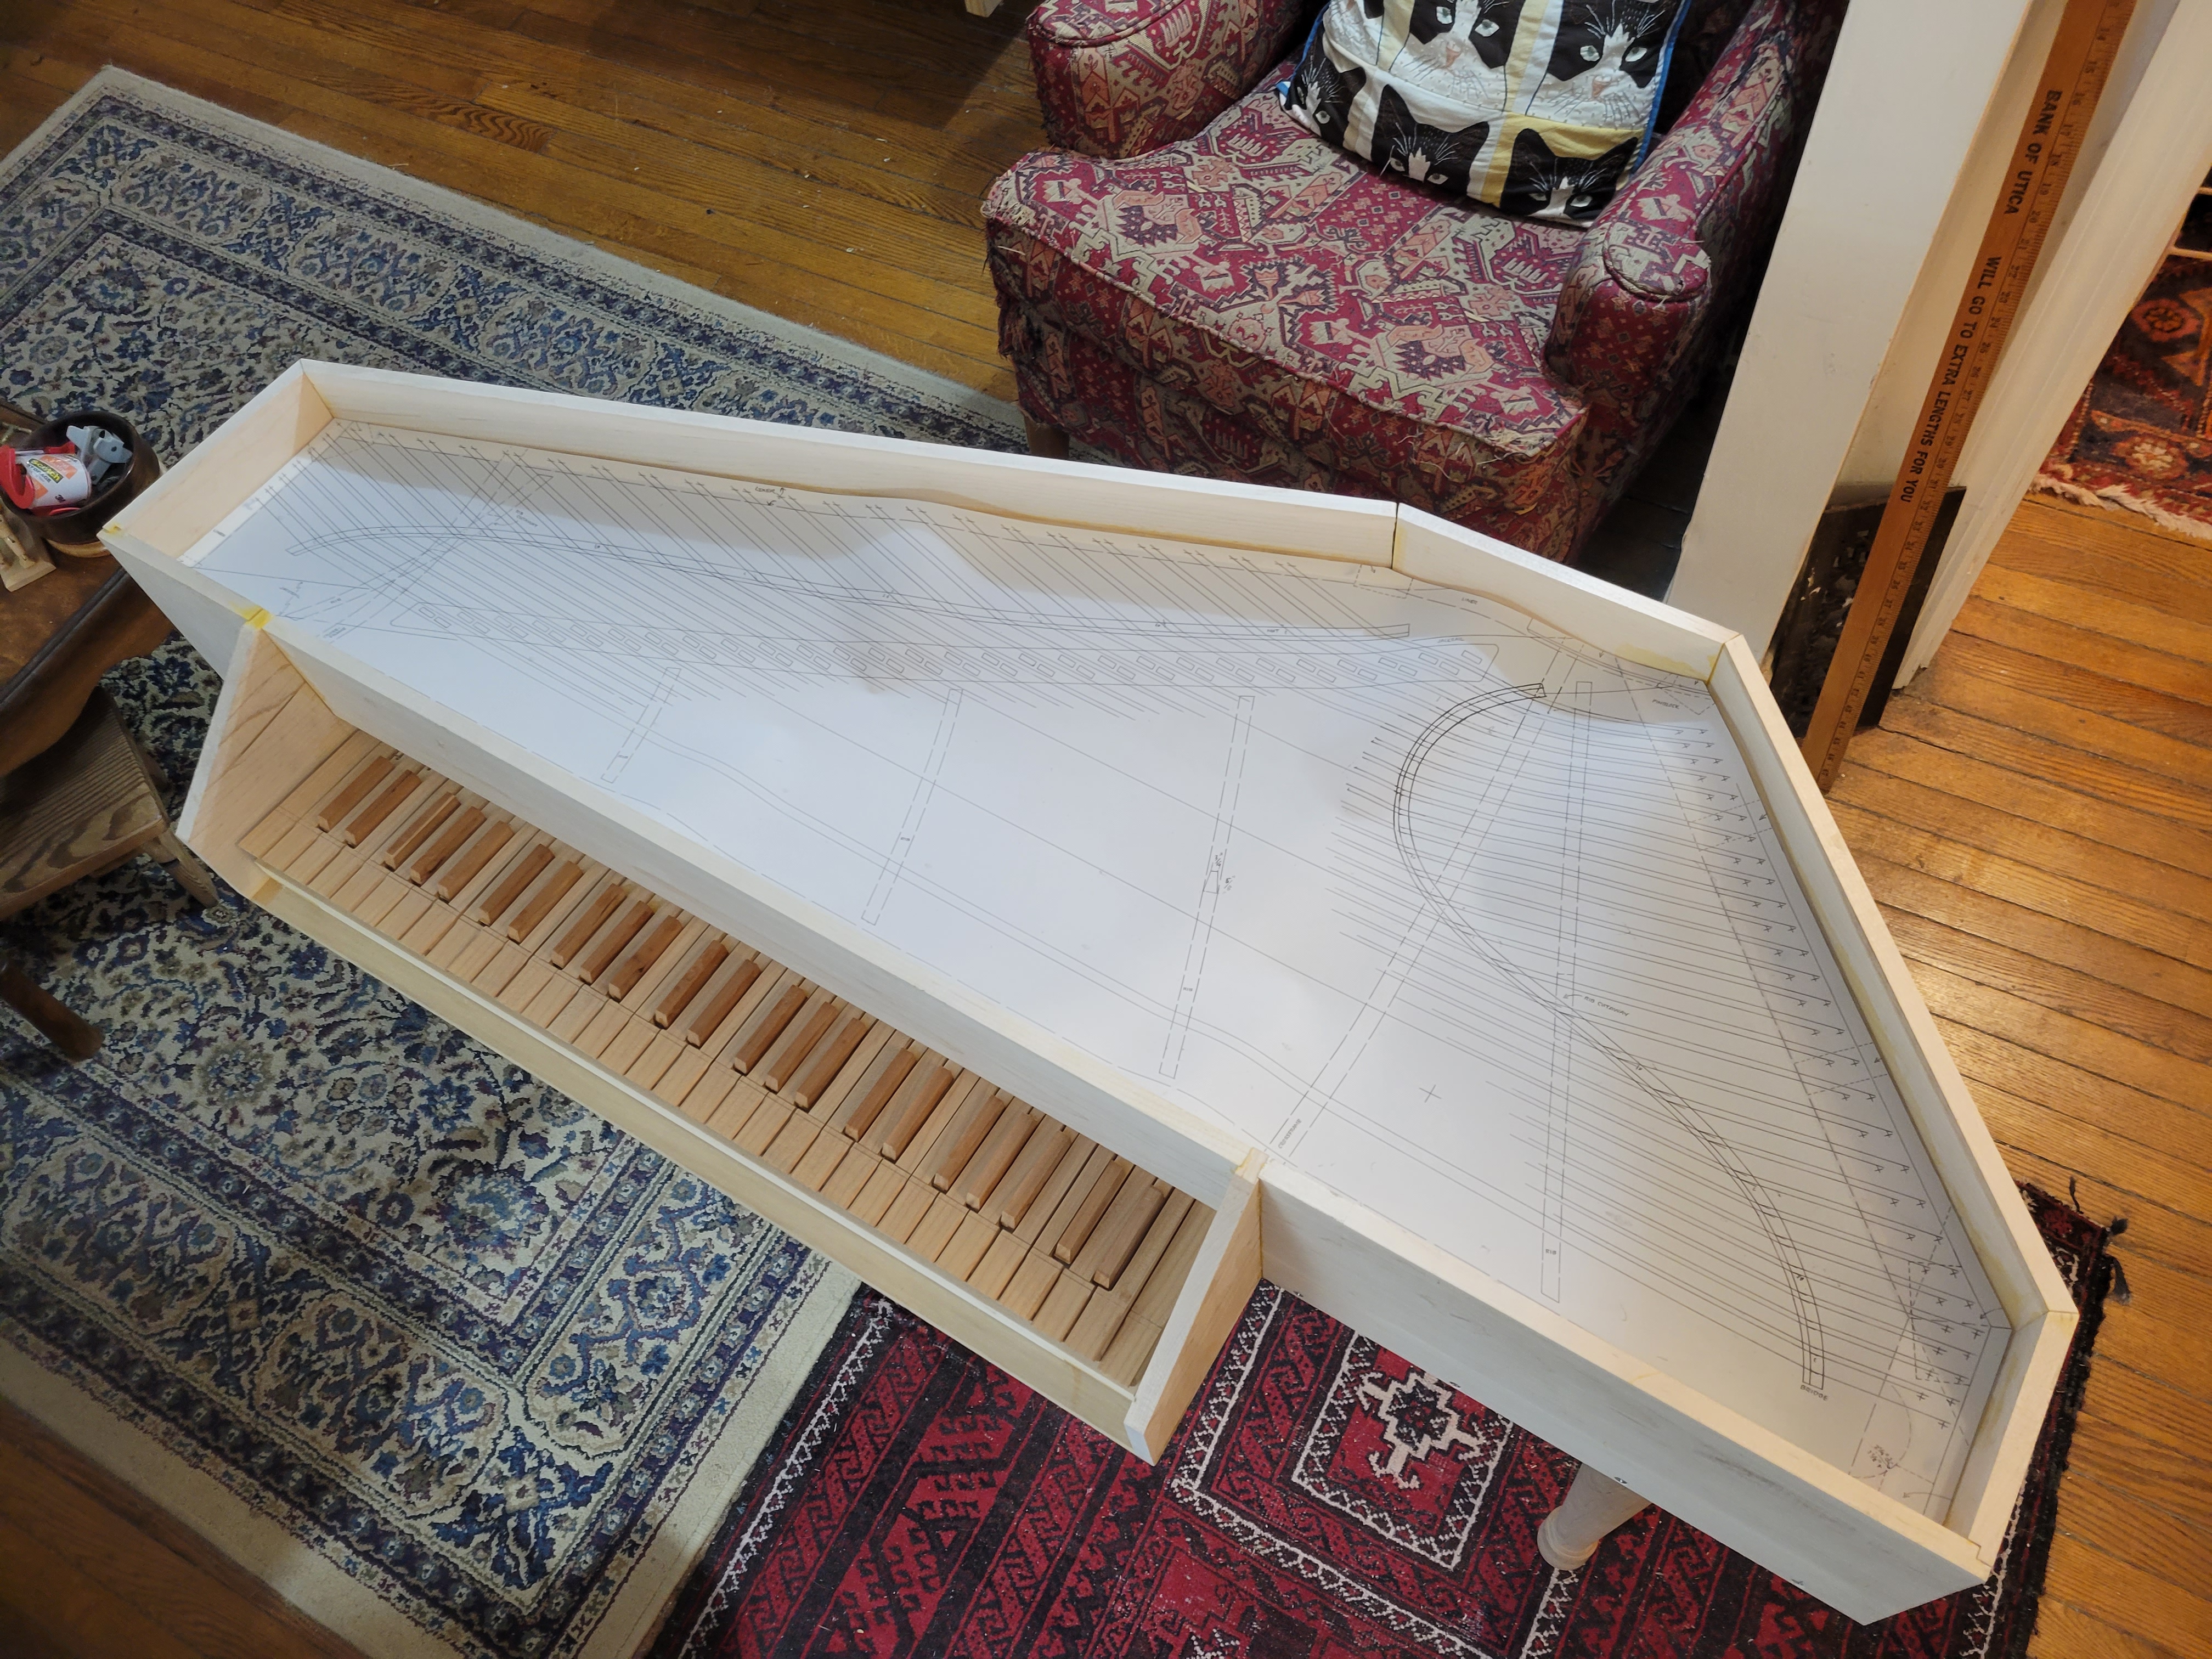
I didn’t pin it down, however. Because it droops a little, I didn’t know at this point exactly how close a fit it was, although it was clear that it wasn’t too small.
In her video on constructing her own Troubadour Virginal, Joyce Chen shows how she trimmed the soundboard down to size. I’ve cued up this video to start at 6:17:
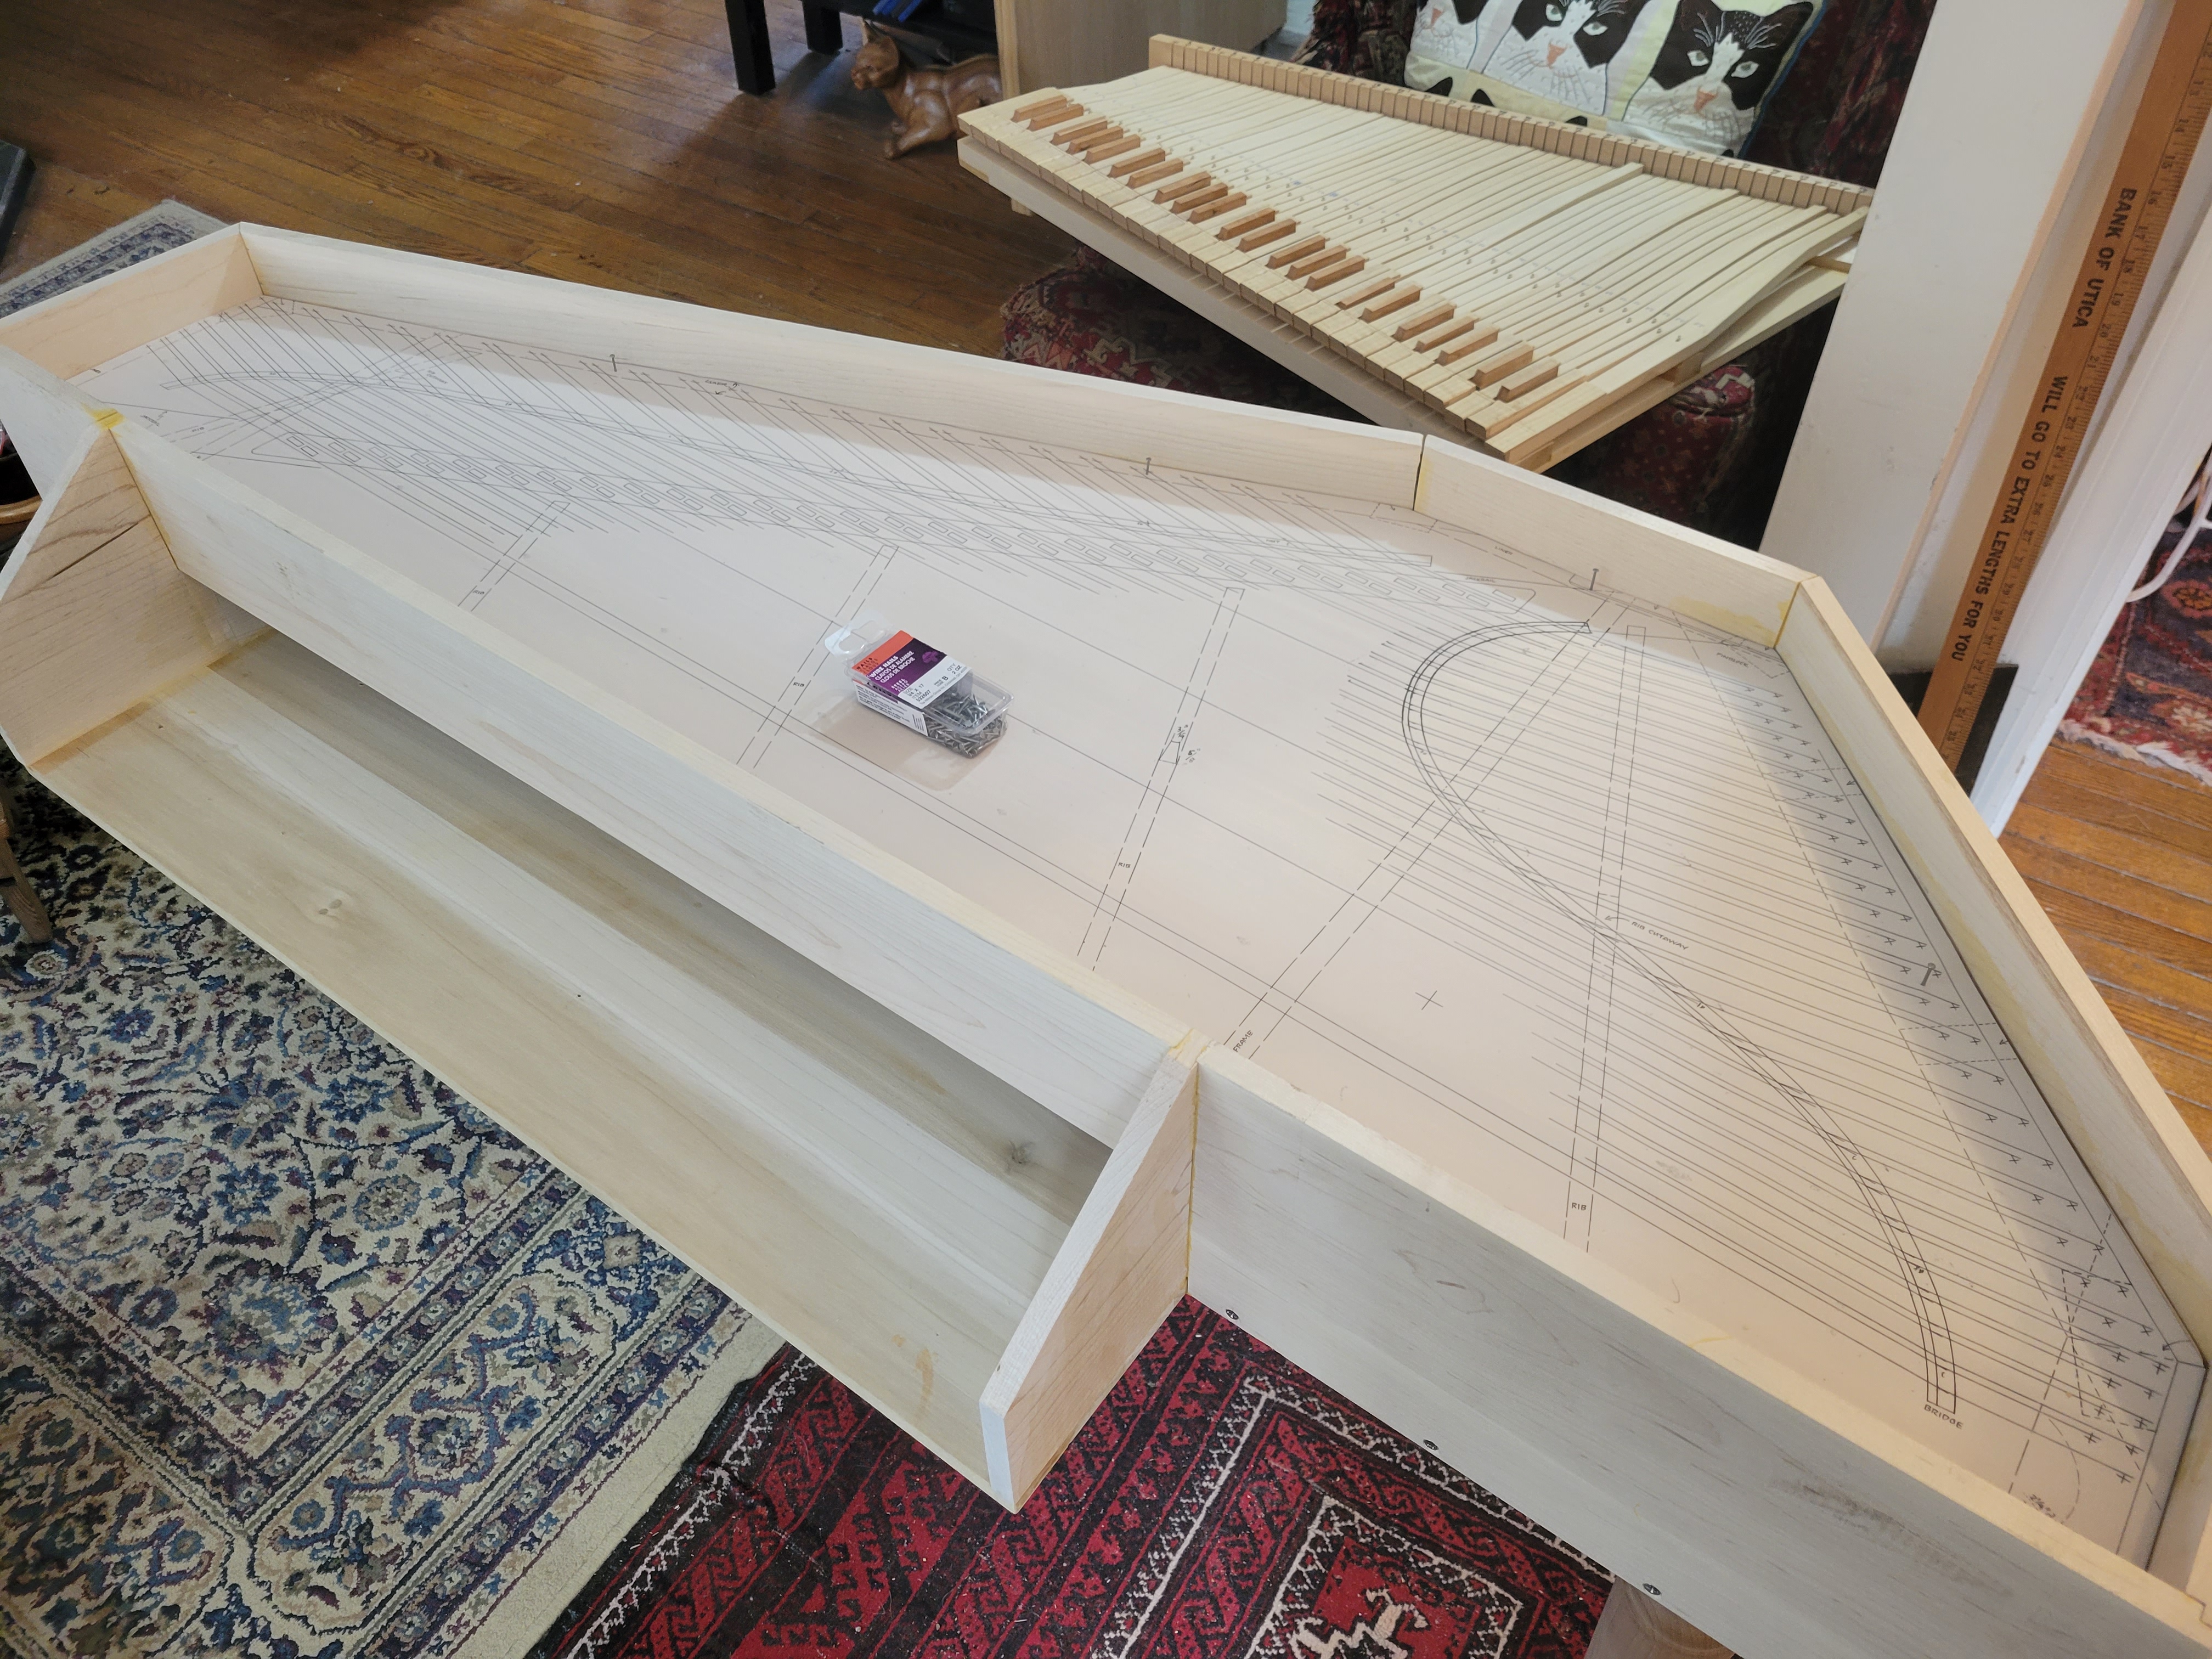
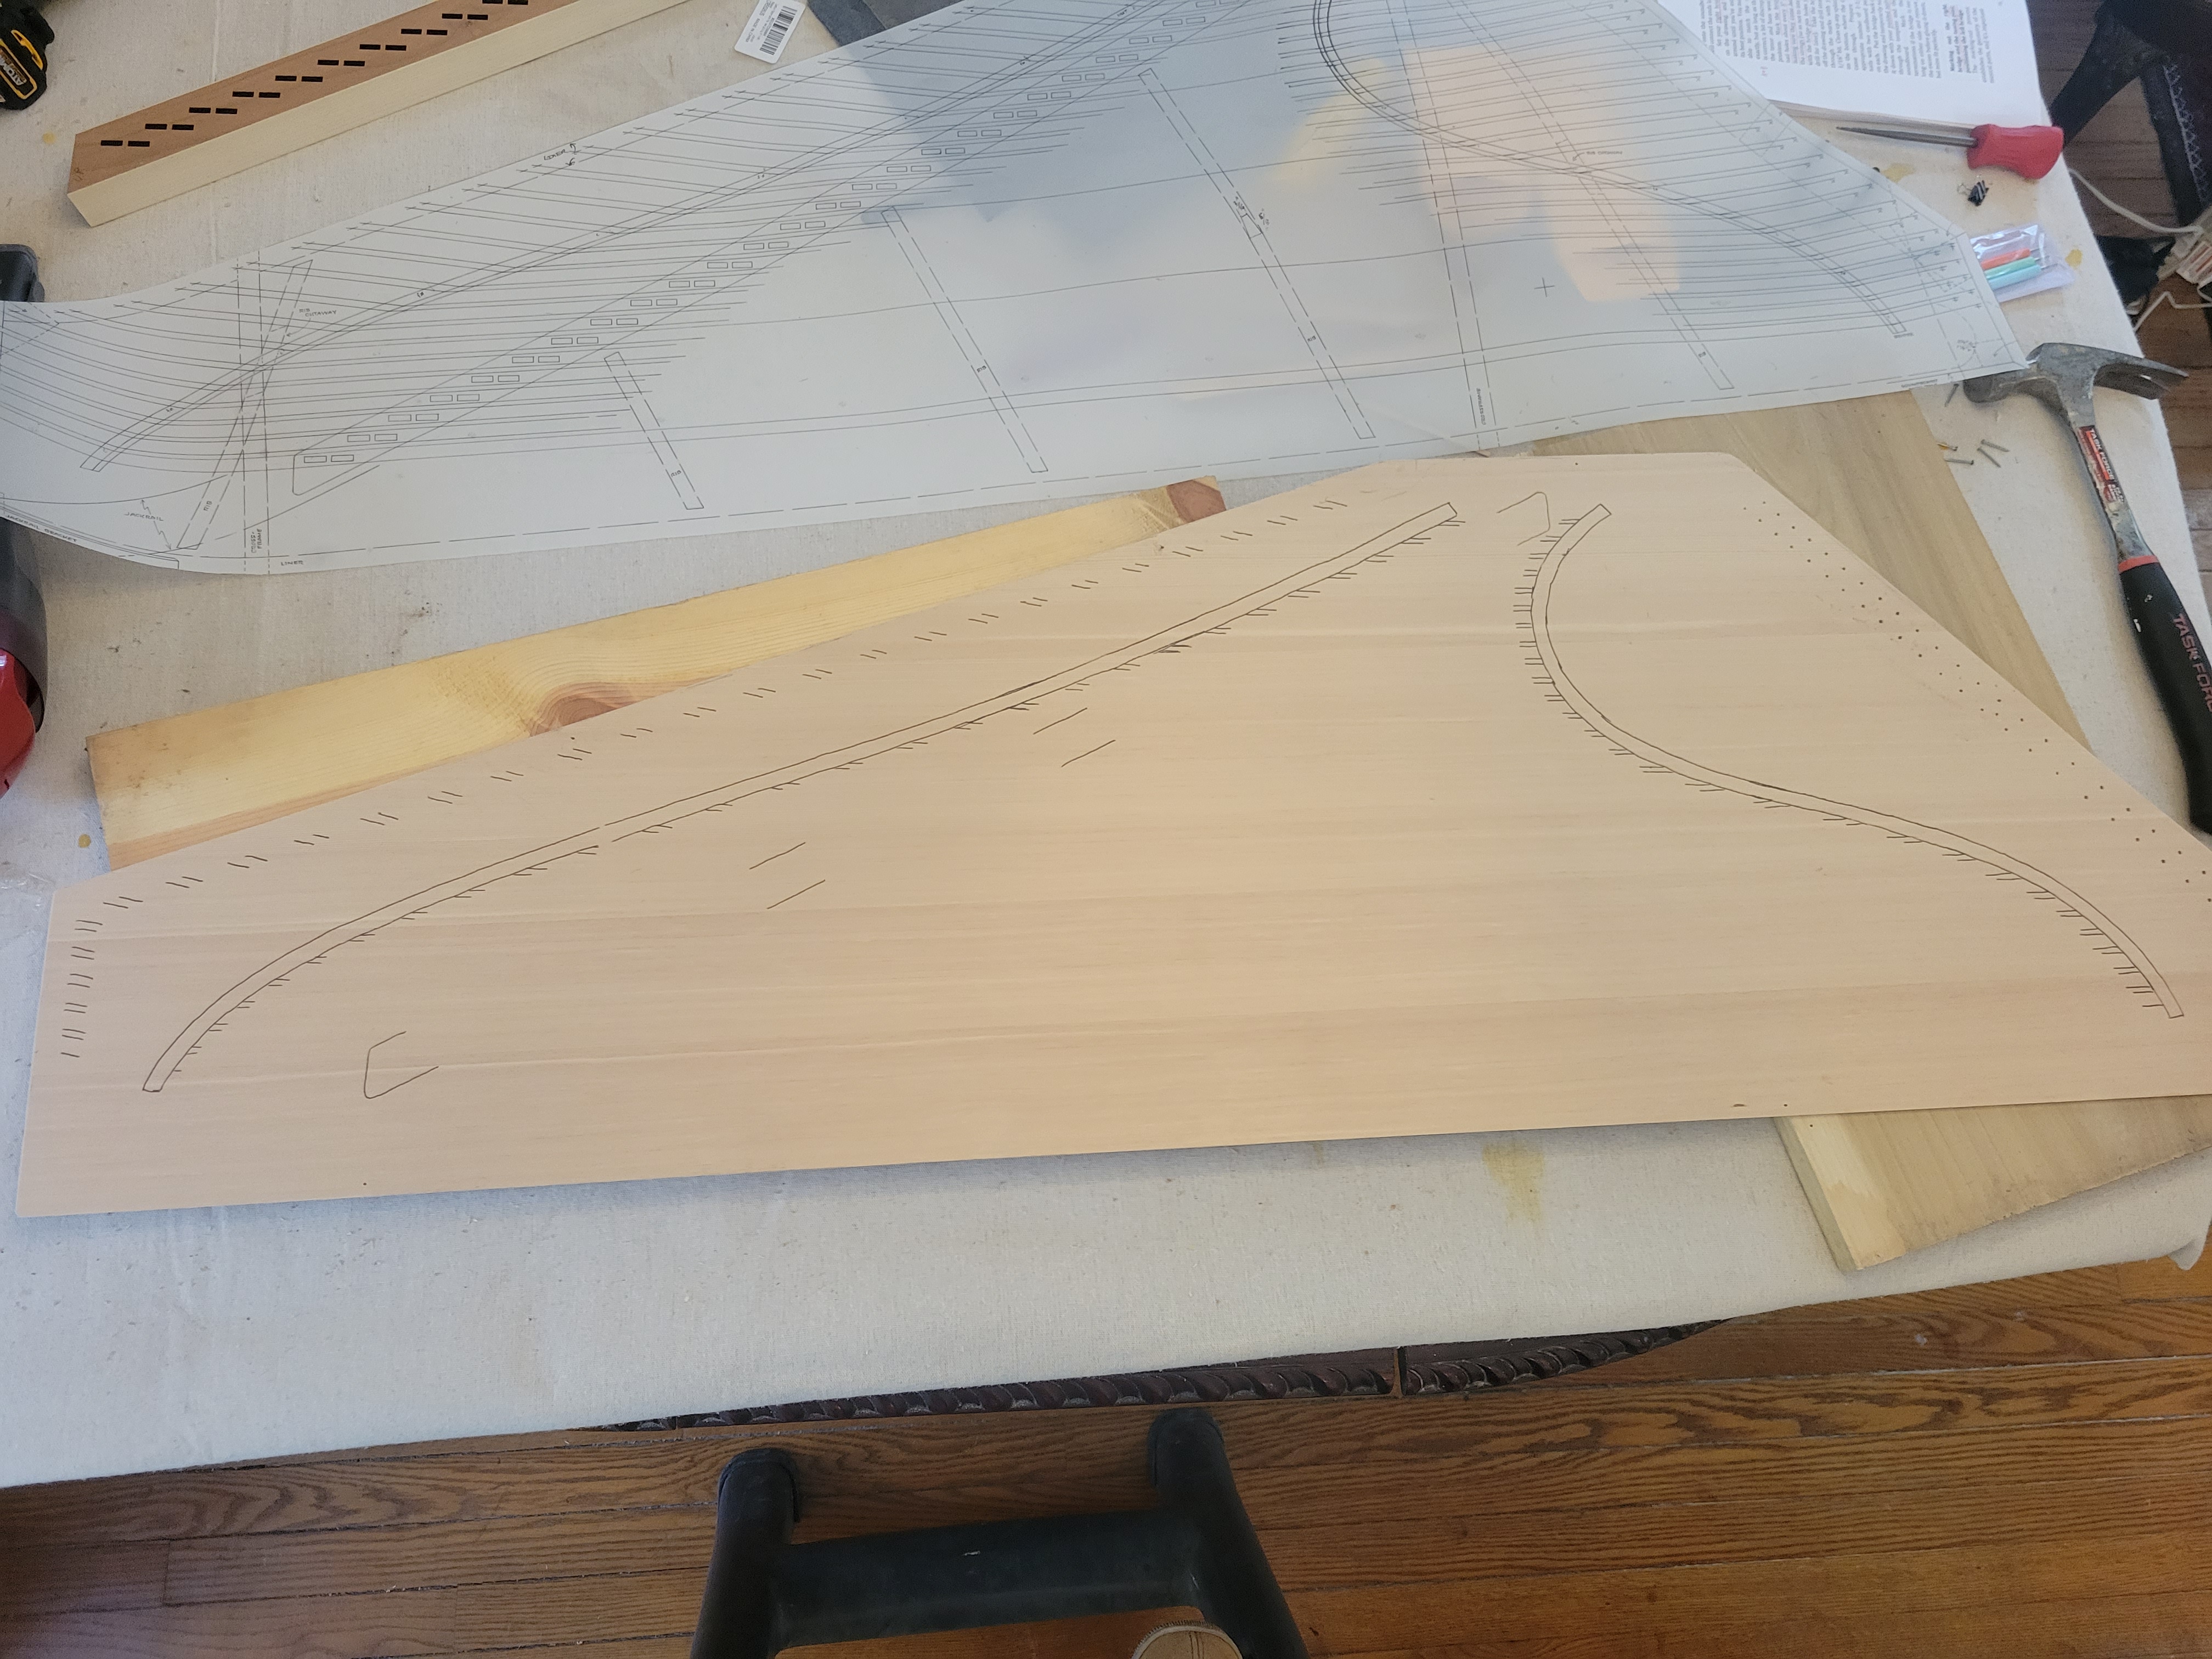
I wasn’t quite happy with that approach. It seemed like it involved too much trial and error. Instead, I aligned the drawing on the over-sized soundboard to determine the best edges to cut to minimize trimming:
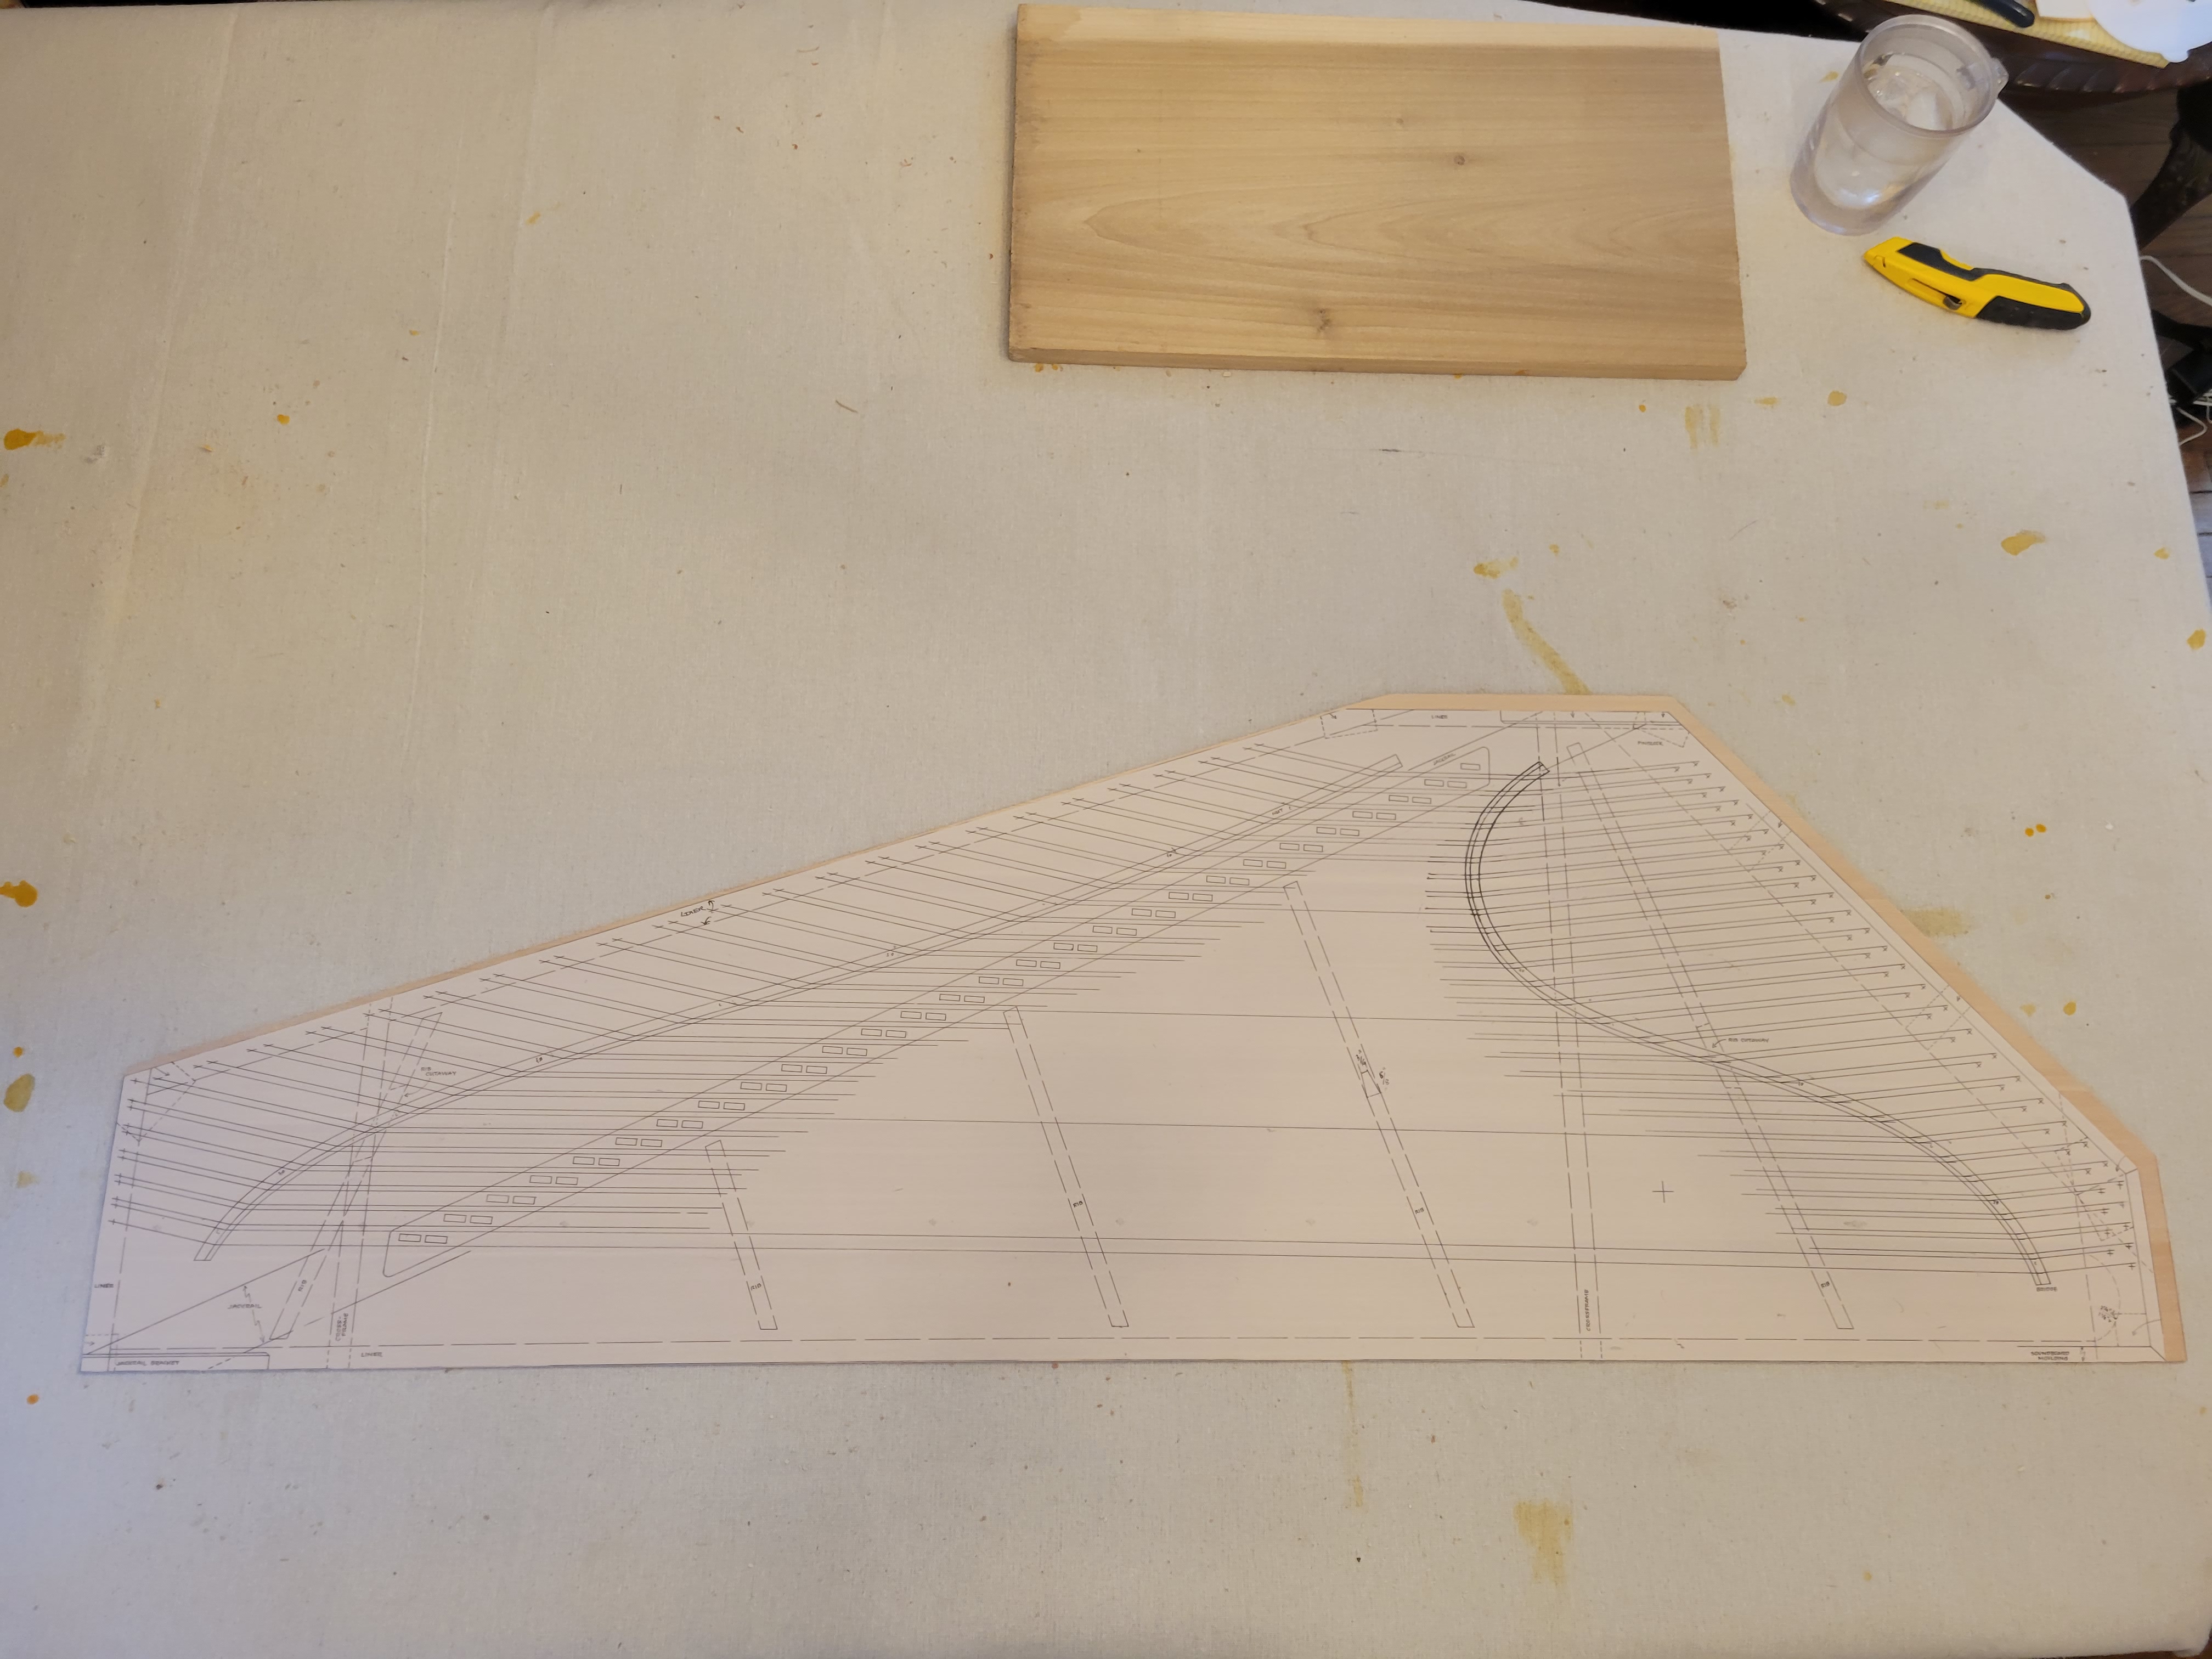
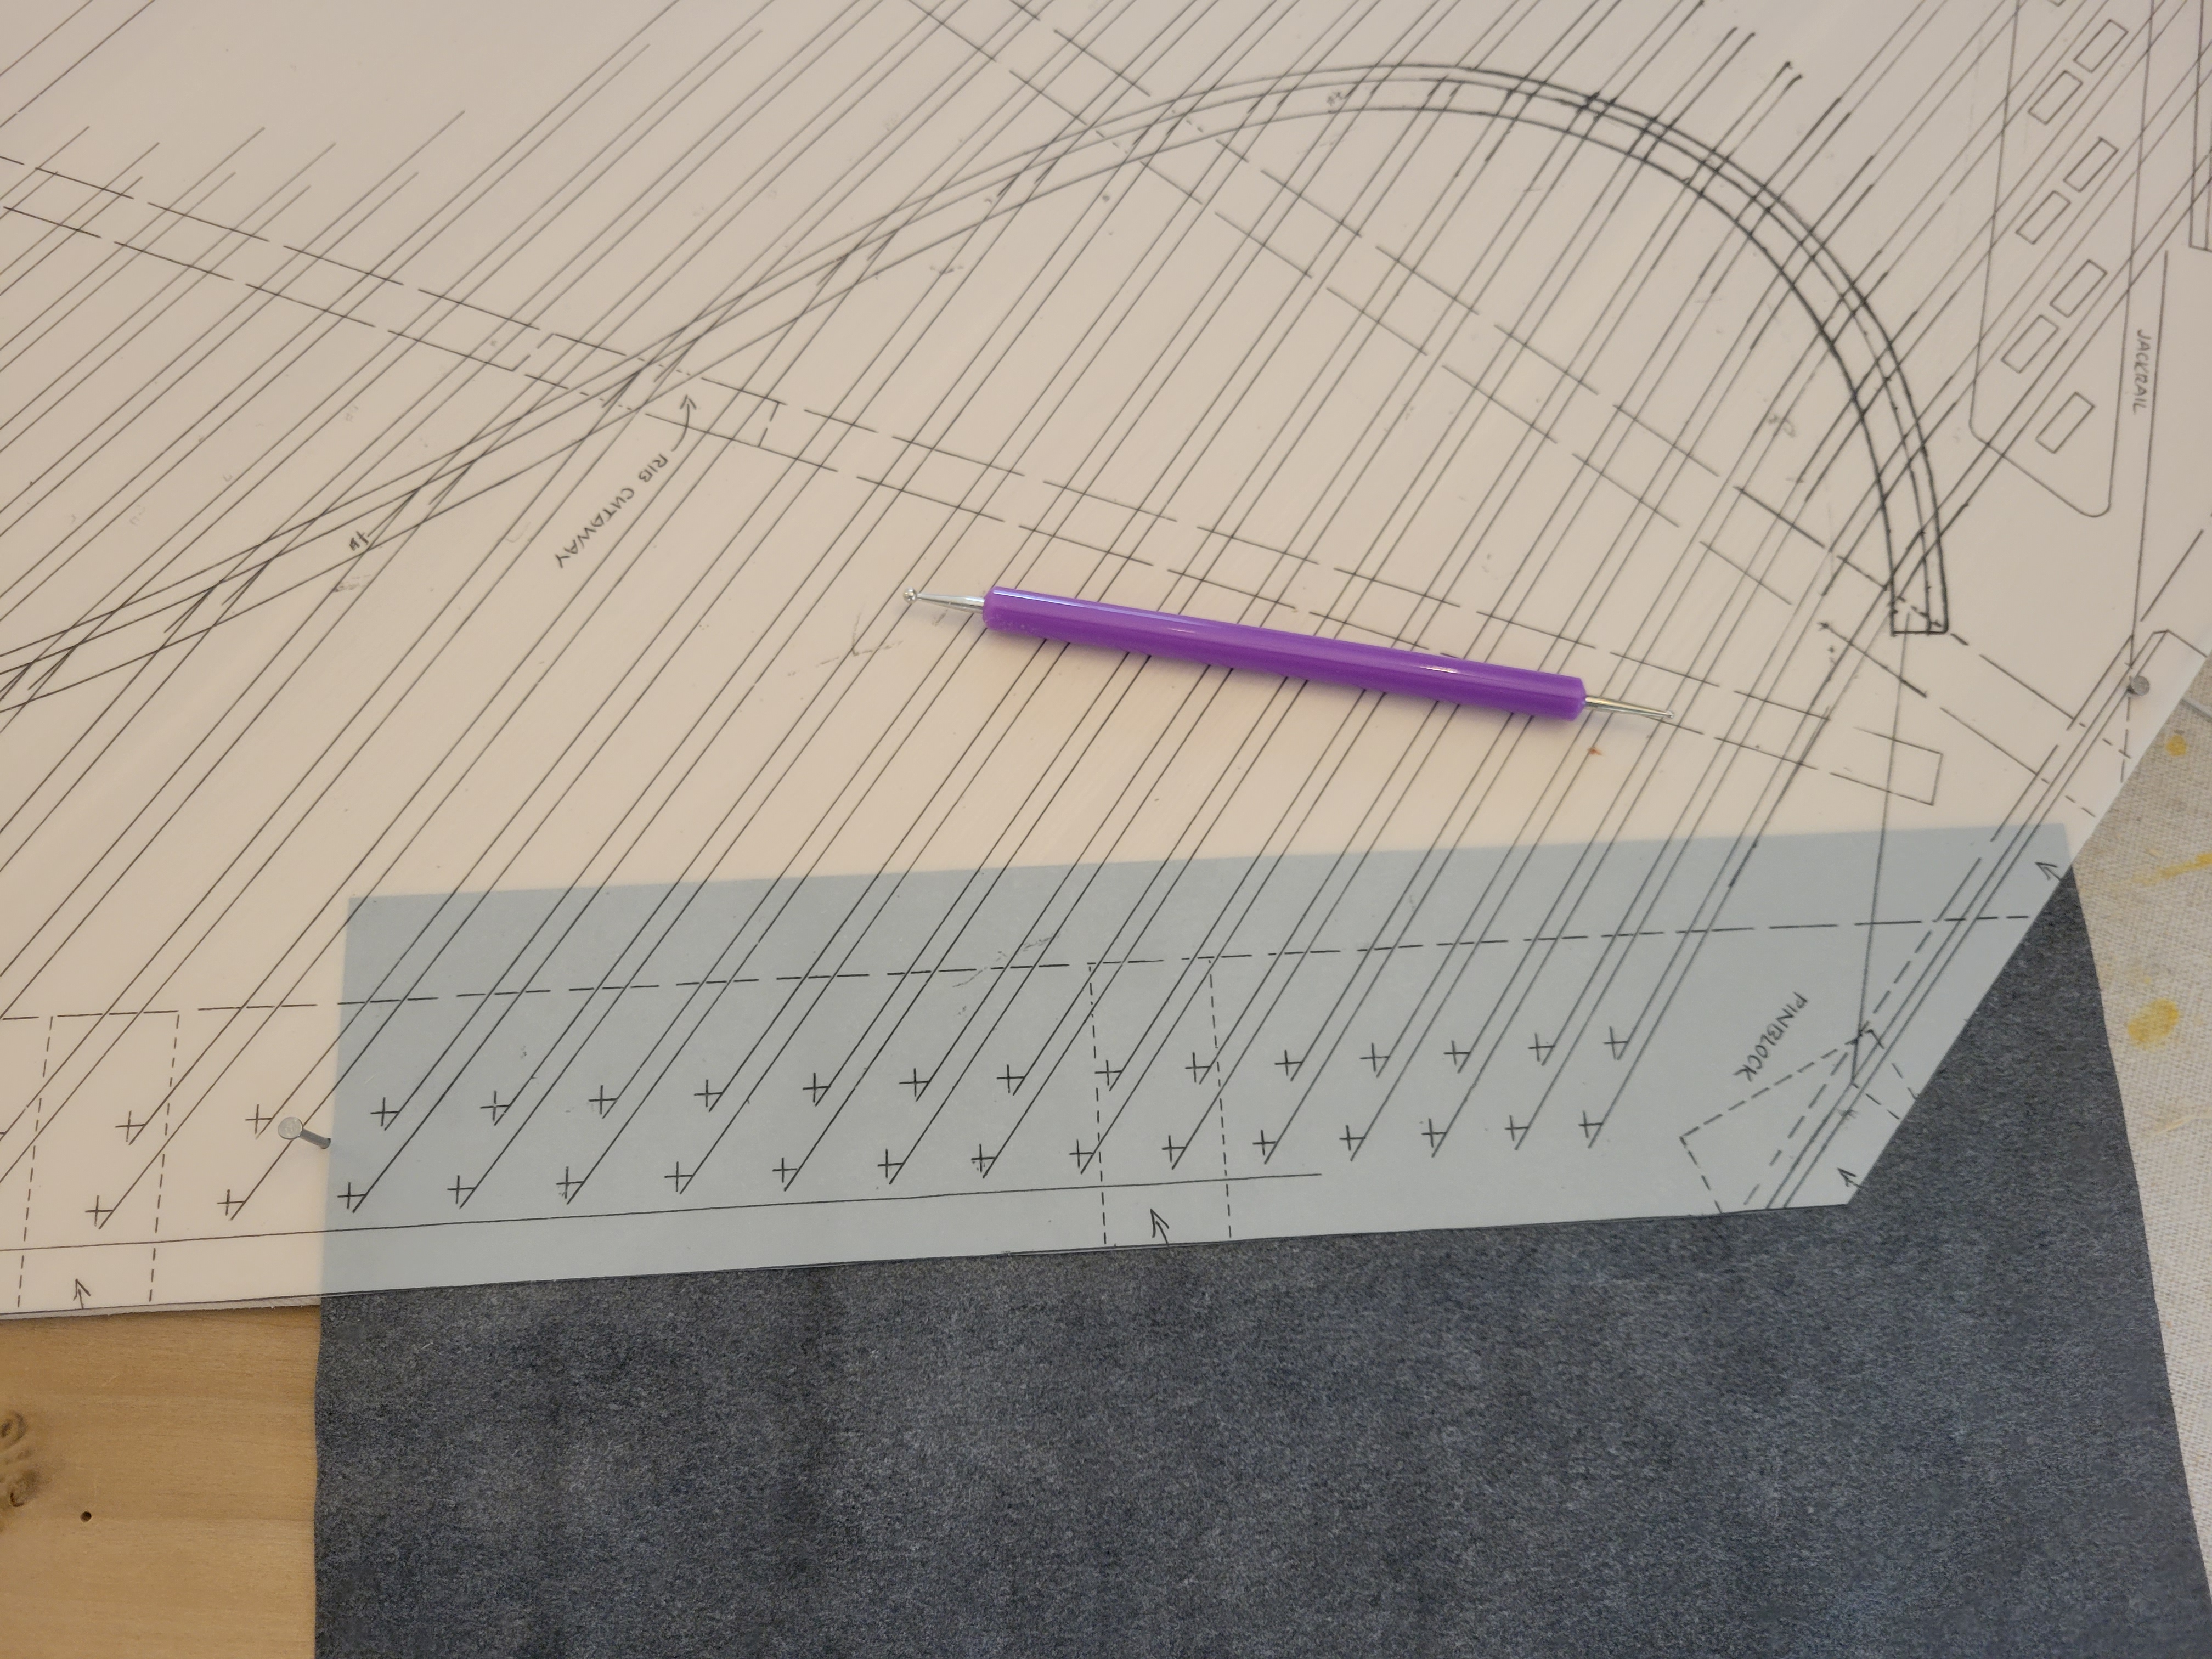
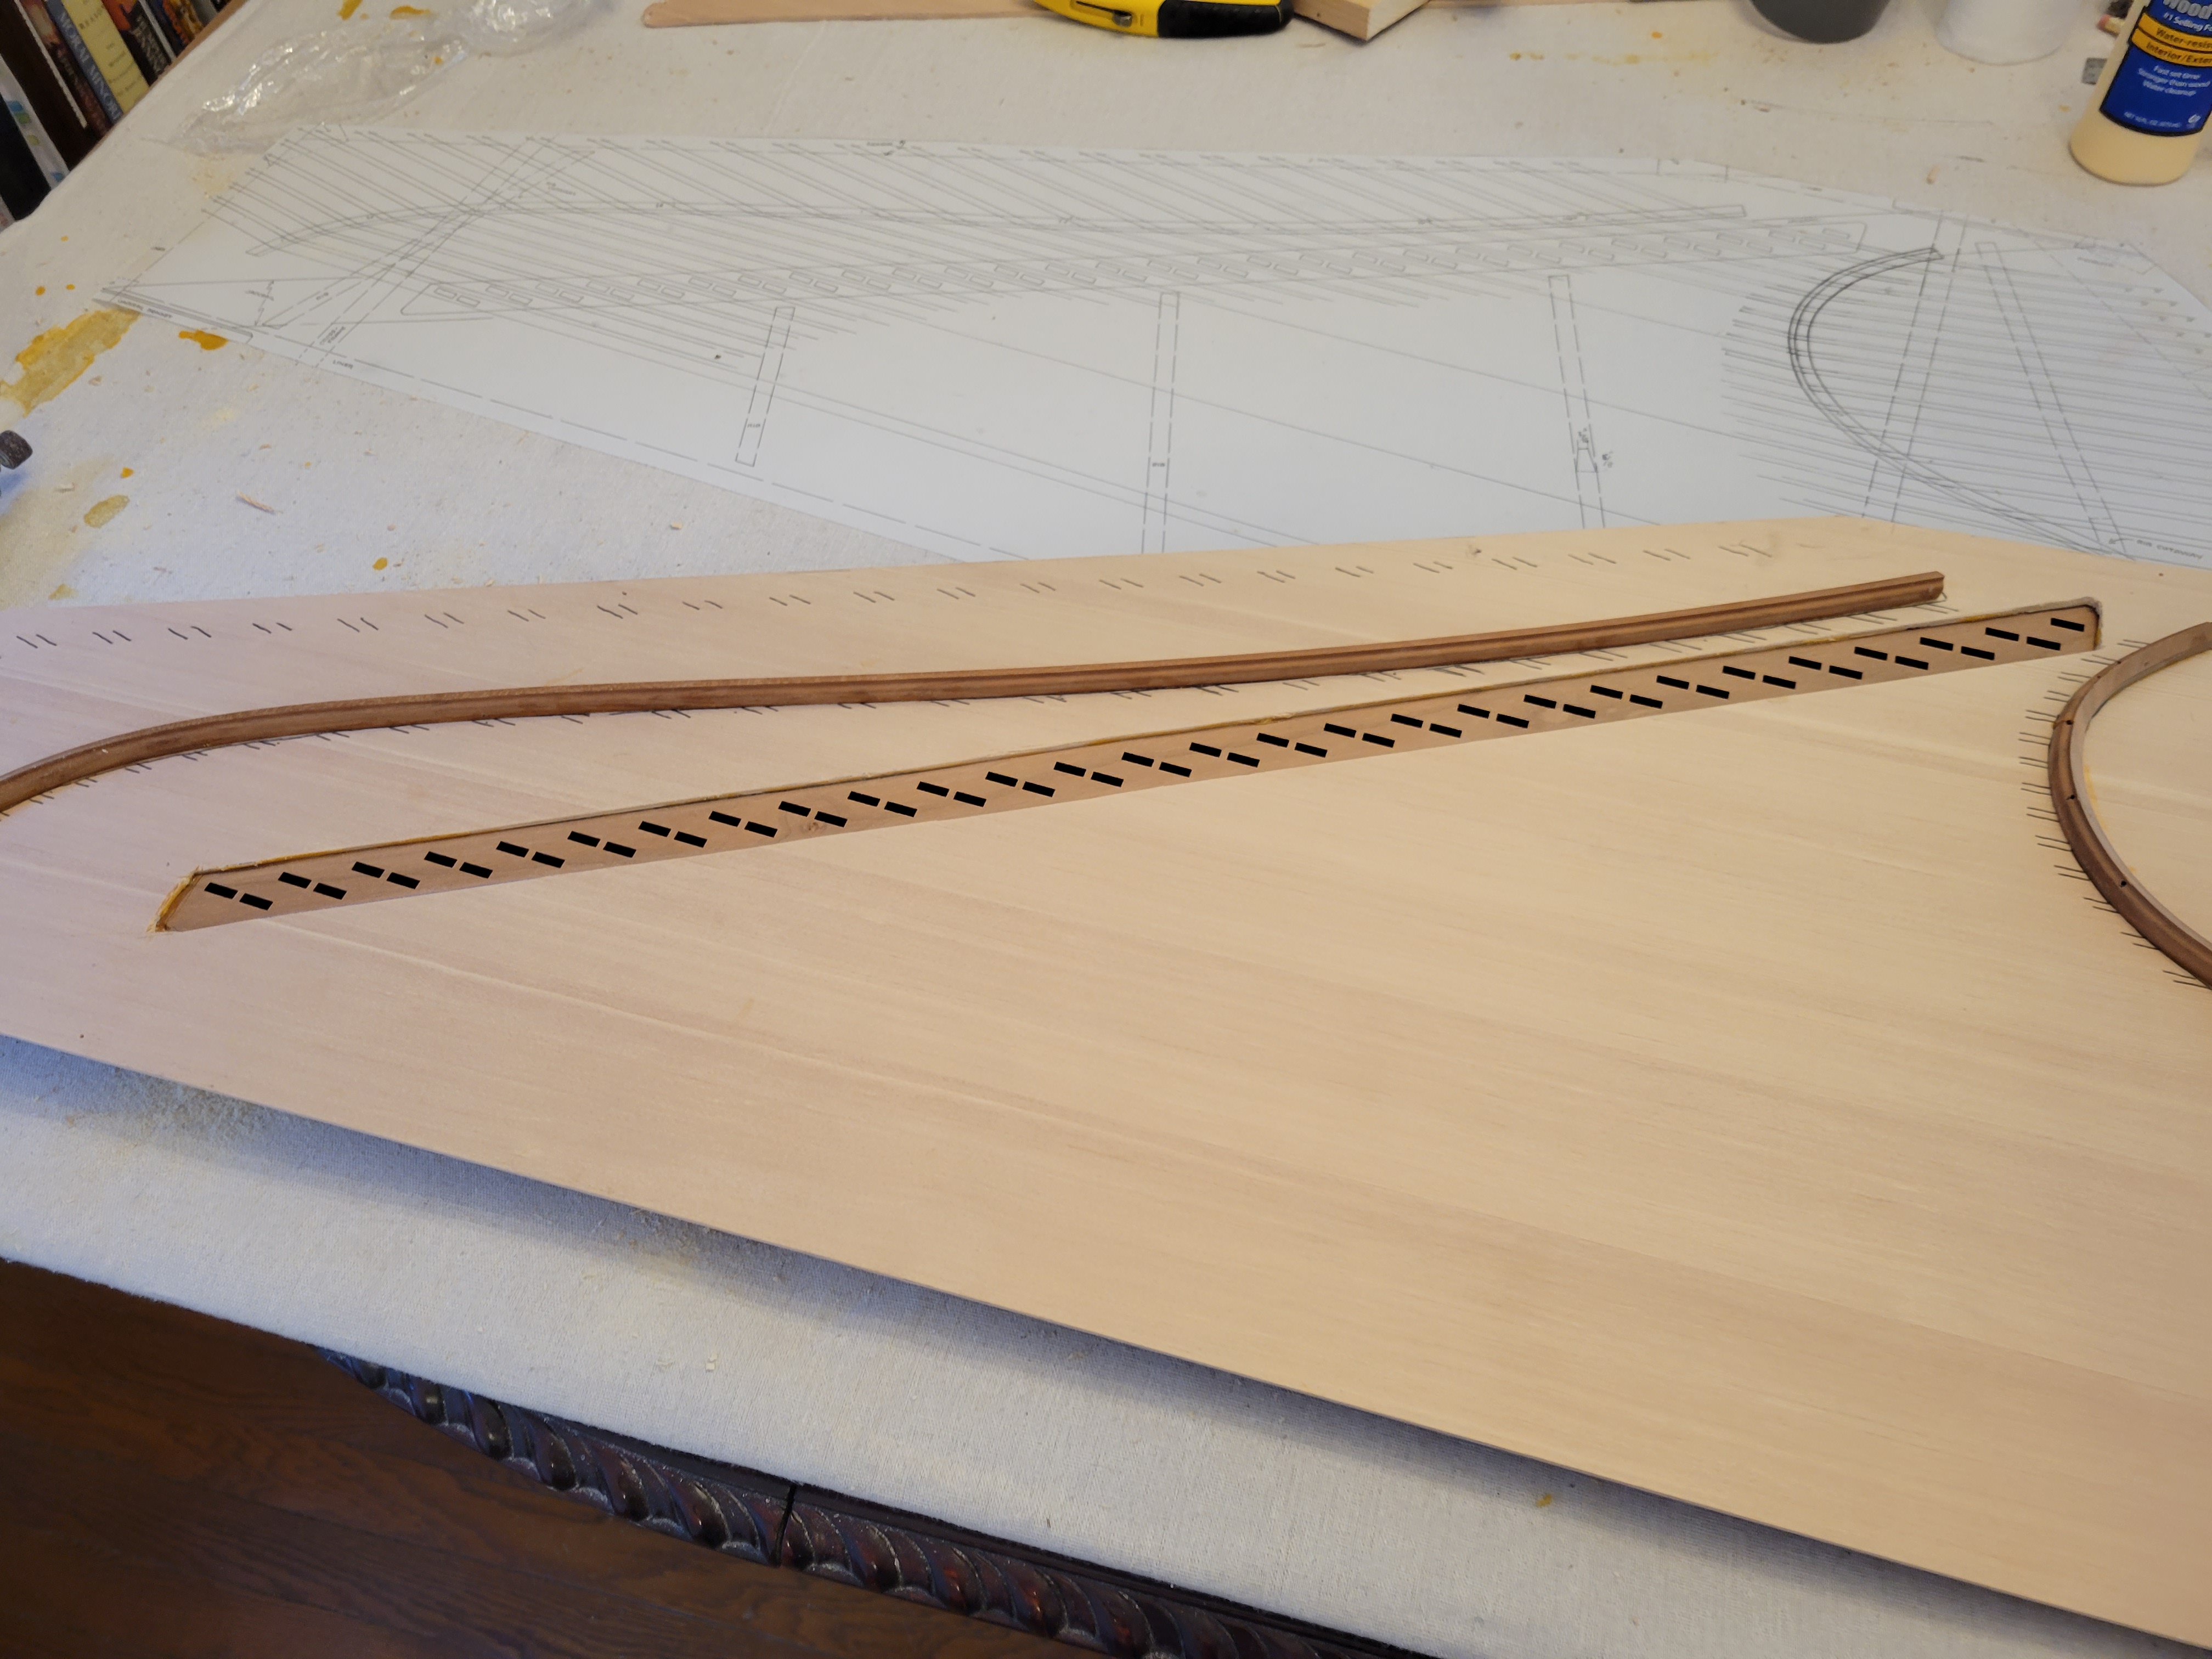
Most of this drawing shows how the strings (i.e., wires) are connected. The 55 strings in this virginal are anchored at hitch pins across the left and left-rear sides. They pass over the left bridge, which is the slightly curly object along the left and rear. This bridge is glued to the top of the soundboard. The wires then pass over the right bridge, which is the very curly object towards the right side. The strings terminate at tuning pins along the right and right-rear sides. Only the section of string between the two bridges vibrates, and the bridges convey that vibration to the soundboard.
What’s with the weird shapes?
The frequency that a string vibrates is directly proportional to its tension, inversely proportional to the length of the string and its thickness, and also depends on the material with which the string is made.
Of course, this relationship is more theoretical than actual. If a string has very low tension, it won’t vibrate at all, and if the tension is too high, it will break. For purposes of music, it’s been well established that a vibrating string sounds best when stretched close to its breaking point, but that the sound of a breaking string can be quite distressing.
If all the strings have the same tension and thickness, and are made of the same material, then the length of the strings would follow an exponential pattern. From the treble end to the bass, the strings would double in length for each octave. In the Troubadour Virginal, the distance between the bridges for the highest pitched string is 3.5 inches. The virginal keyboard has a range of about 4½ octaves. Hence, the longest string would need to be increased by 2 × 2 × 2 × 2 × 3/2 or 24 times, resulting in a length of about 84 inches. Instead, the distance between the two bridges for the lowest note is about 45 inches.
This means that for the lower notes, the wires must be thicker, and that is the case. The Troubadour Virginal kit comes with 12 coils of wire and a “stringing schedule” that specifies which wires are used for which notes. The wires range from a diameter of 0.010 inches for the highest notes to 0.029 inches for the lowest notes. Because thicker wires can be stretched tighter, three factors are in play — tension, thickness, and length. In designing the Troubadour Virginal, I don’t know if Ed Kottick did a lot of theoretical work (such as that in this paper), or if it was more empirical. I’m rather curious.
Another factor is that harpsichord and virginal strings are normally plucked towards one end, just as piano strings are struck at one end, and violin strings are (usually) bowed at one end. A virginal that plucks the strings more towards the center is called a muselar and has a mellower sound. The requirement of plucking the strings at one end also affects the curvature of the two bridges.
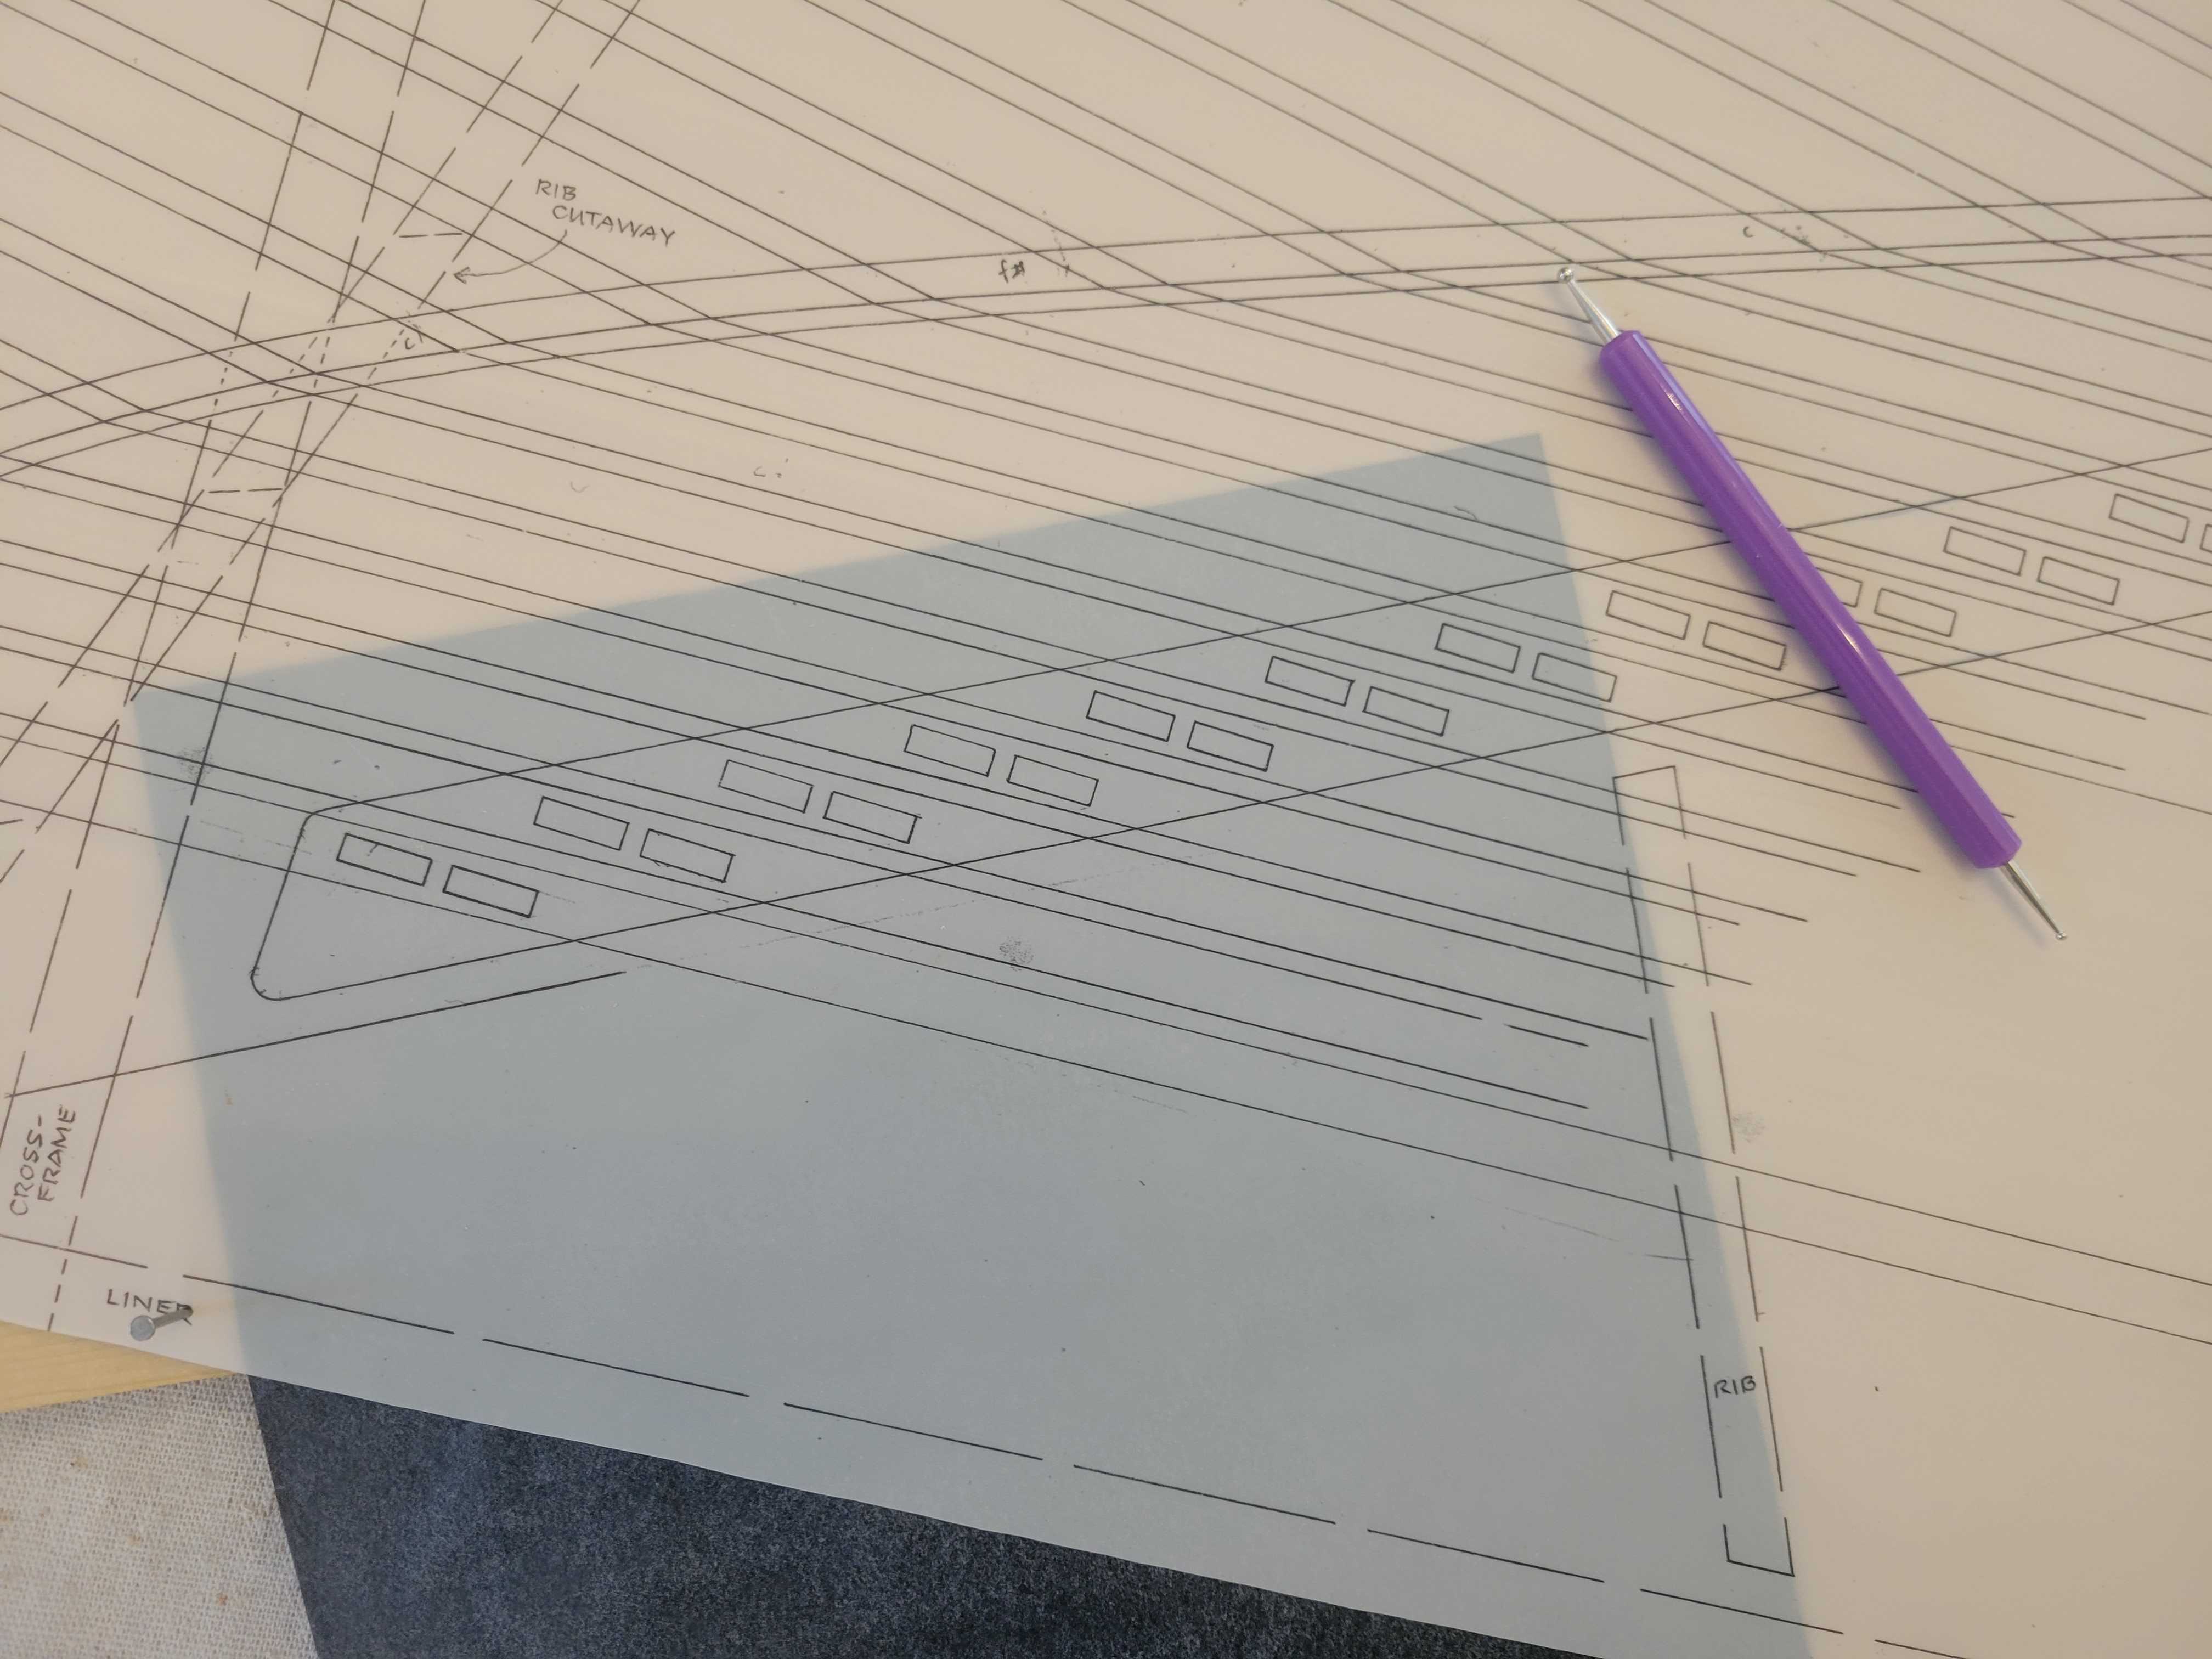
Going back to the photo of the soundboard, the long parallelogram is for the box guide. The box guide is wooden and shaped like a parallelepiped with slots on the top and bottom through which the jacks pass. Each jack sits on the far end of a keyboard key. When the key is pressed, the jack is pushed up, and a little plectrum on the jack plucks the string. The purpose of the box guide is to restrict the motion of the jacks to the vertical. The positions of these slots on the drawing essentially show where each string is plucked.
To make maximum use of space, the strings are arranged in pairs. Two jacks fit between two pairs of strings, one jack plucking one string and the other jack facing the opposite way to pluck the other string. You’ll see how this works in a later installment of this blog.
The drawing of the soundboard also shows ribs that are positioned underneath the soundboard.
Trimming the soundboard down to size was a chore. I tried a utility knife and a block plane, but eventually I settled on a brute-force approach using a saw supplemented by sandpaper:
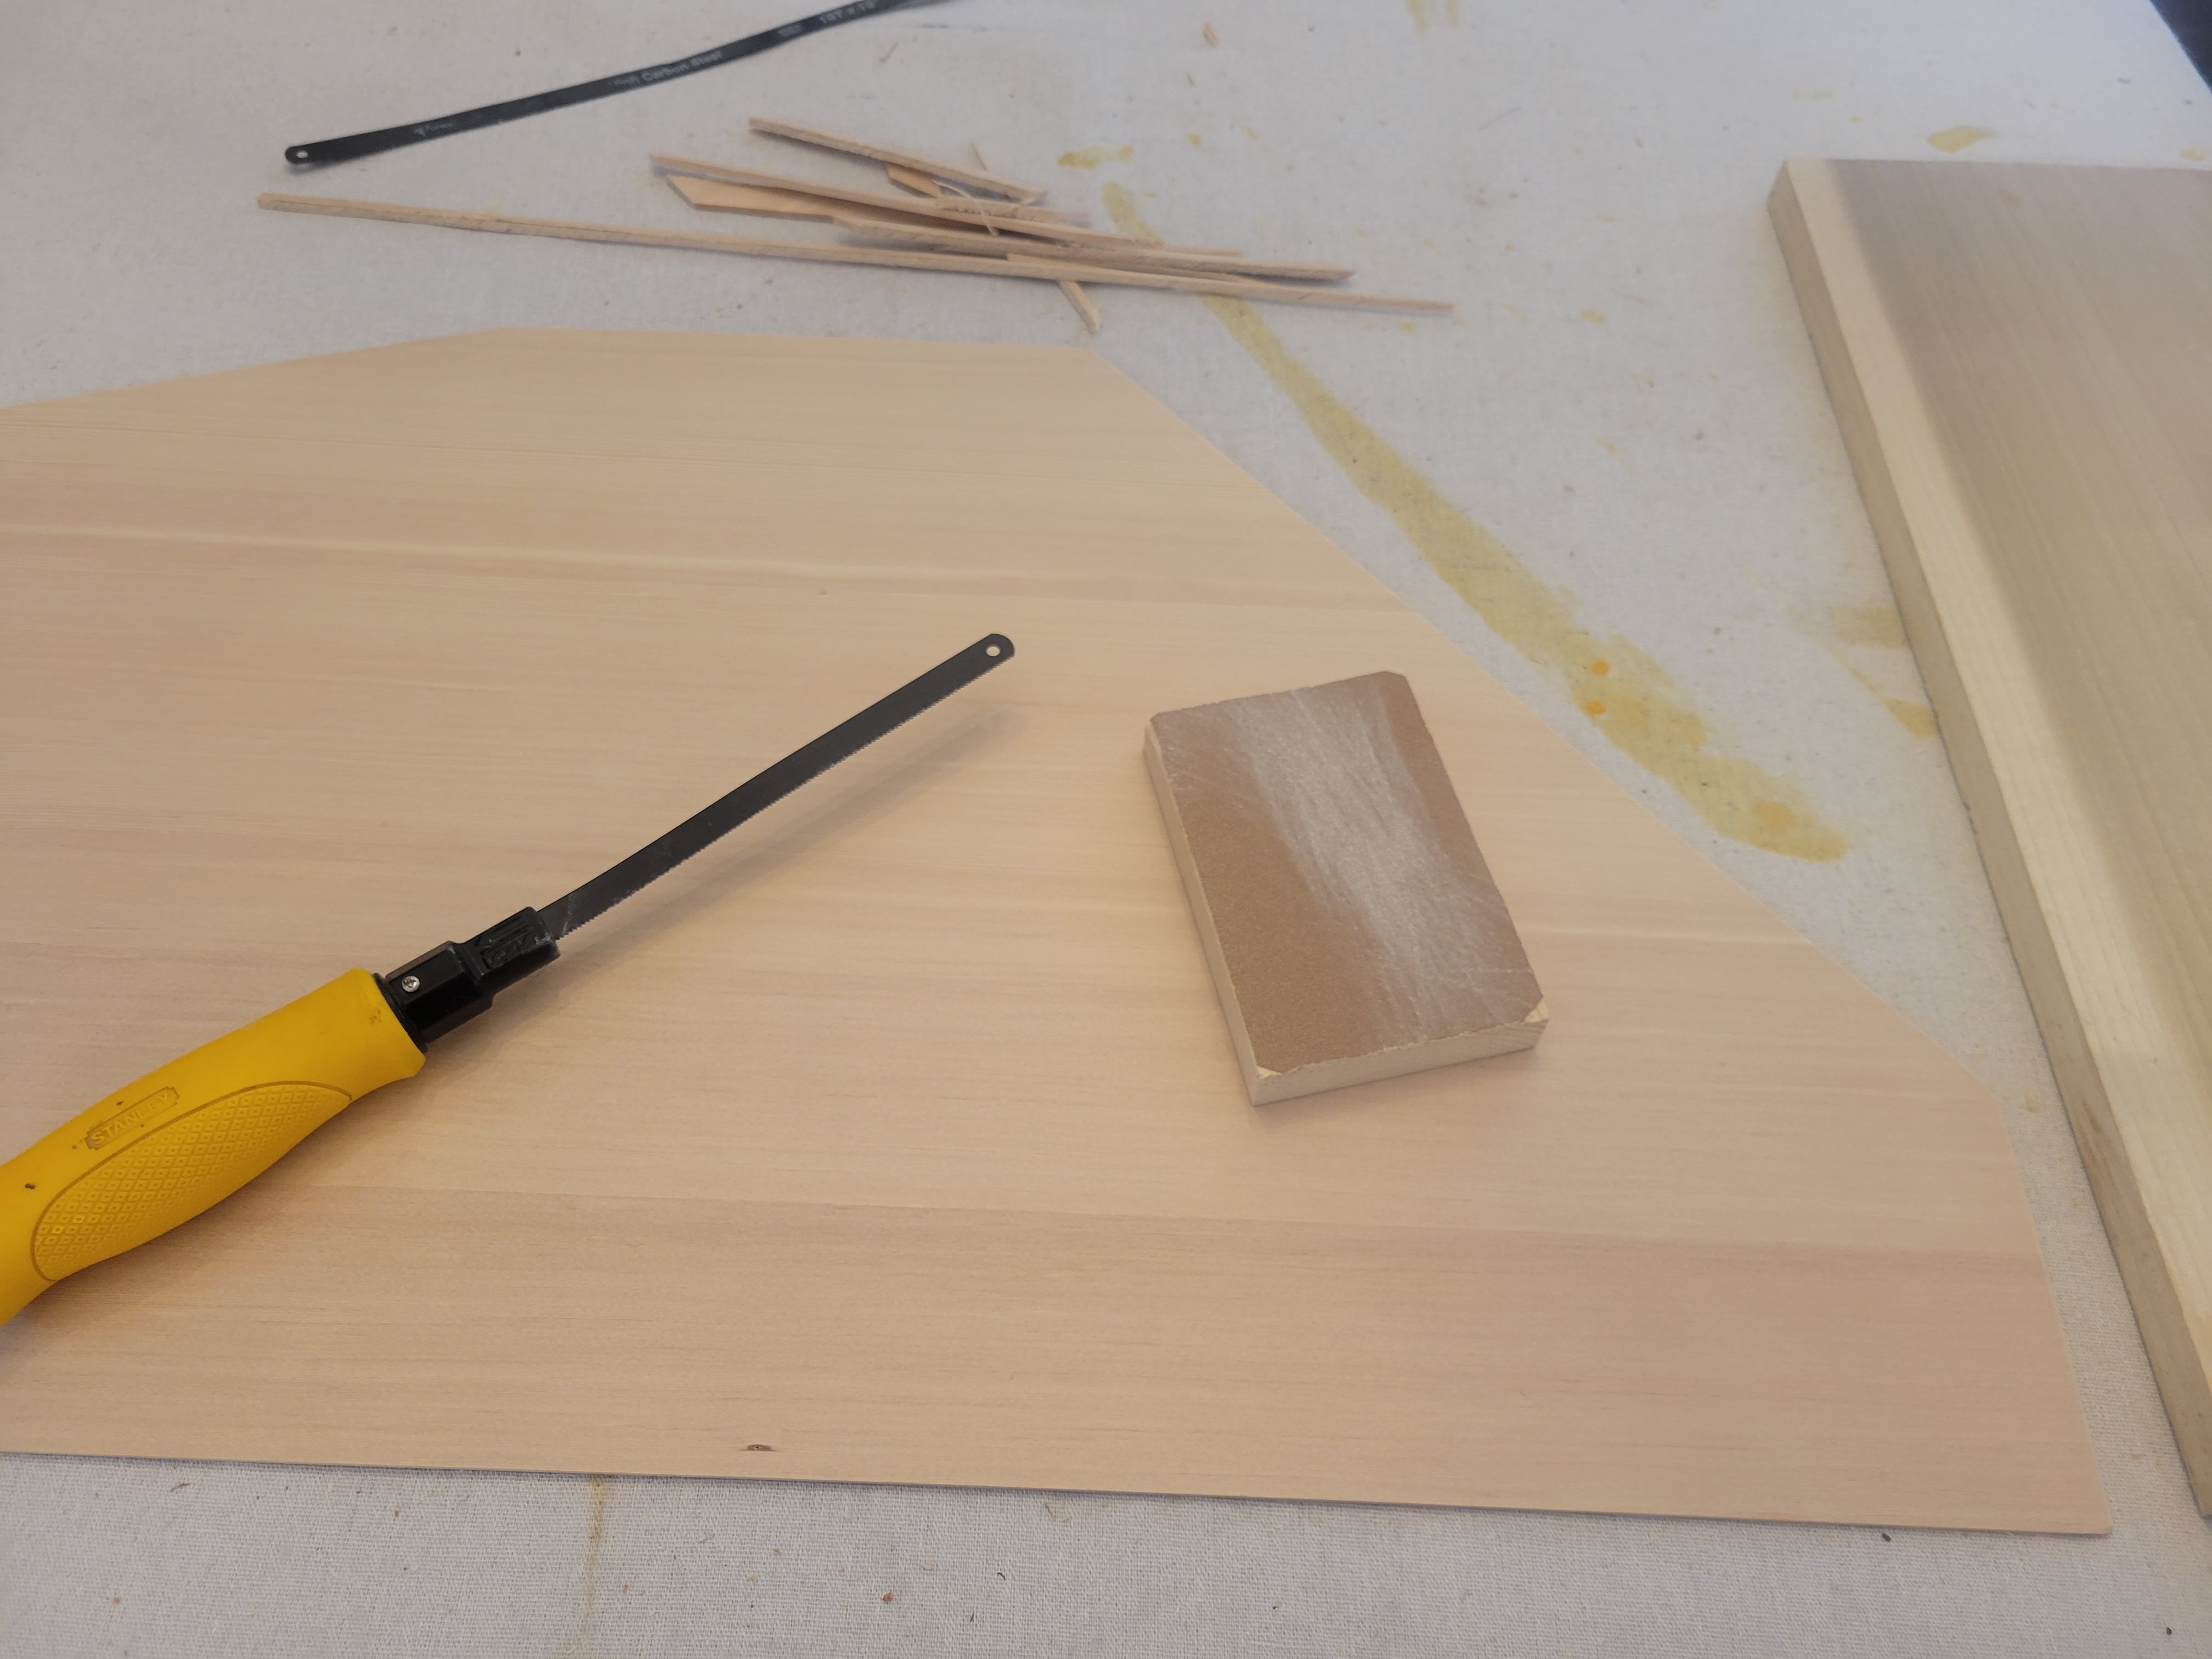
I think a coping saw would have been a better choice but I didn’t have one at hand.
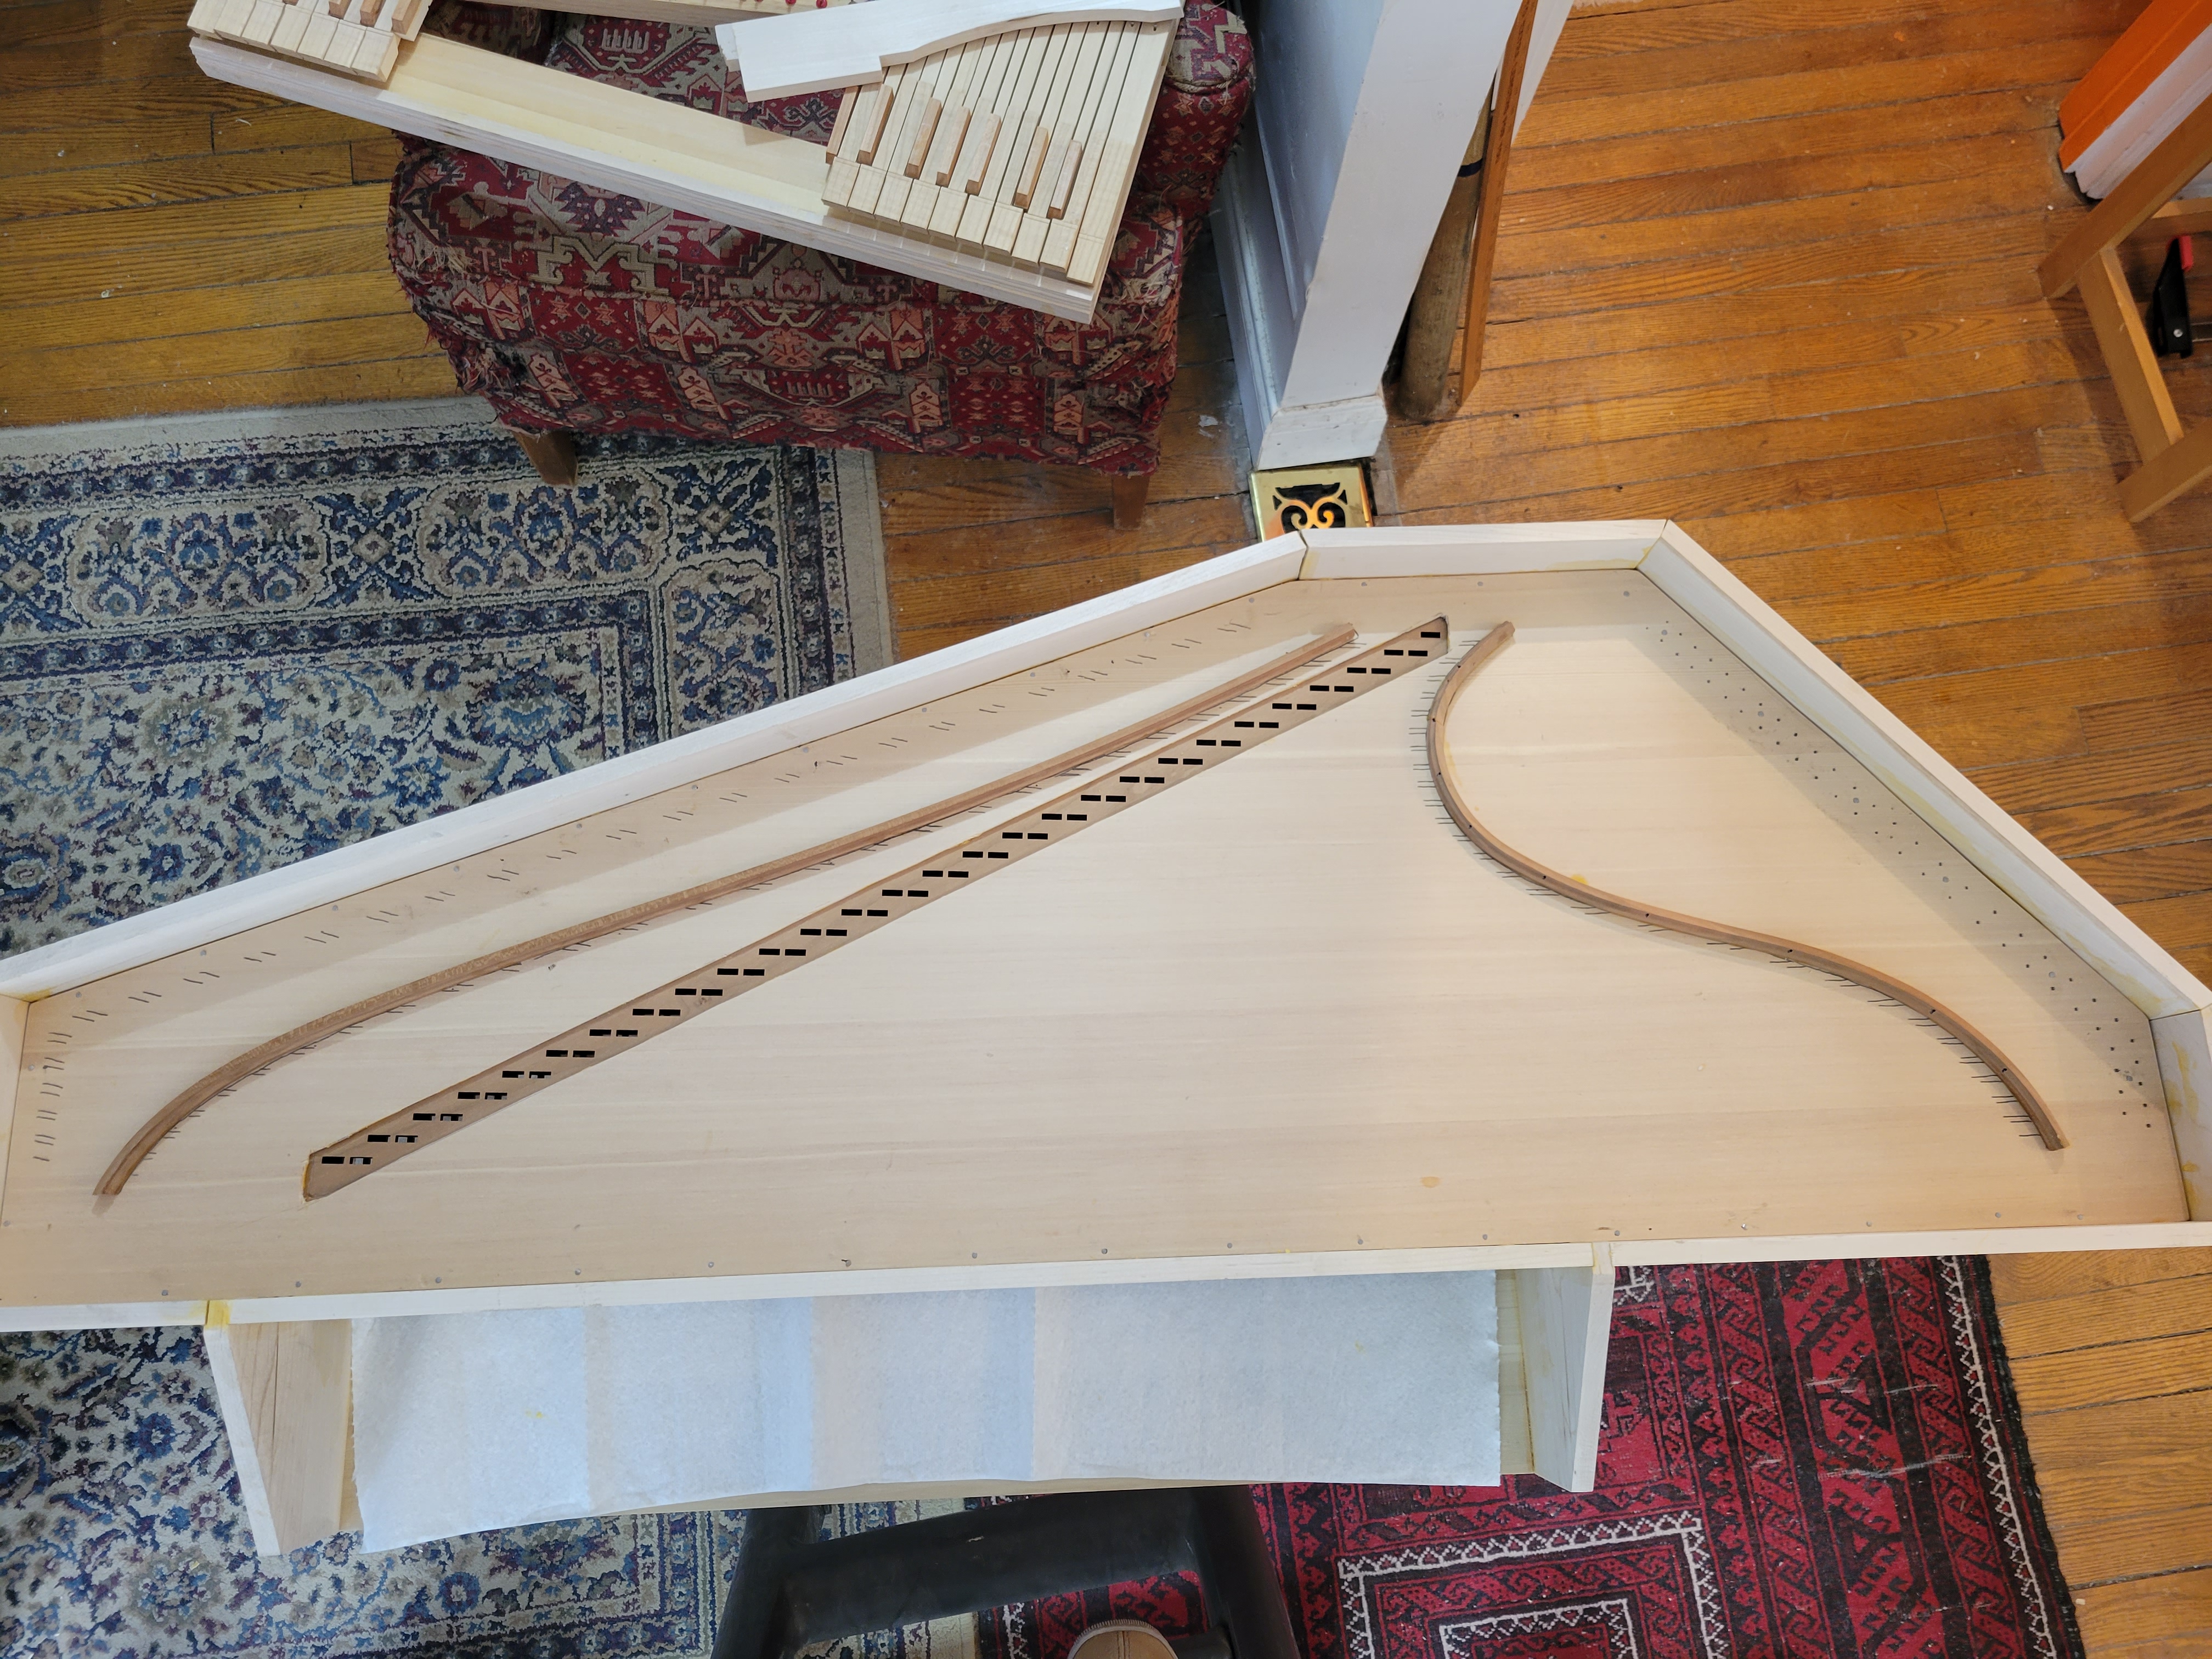
Then it became a process of sanding and fitting, sanding and fitting, sanding and fitting, until one day... the soundboard just dropped into place:
Then I overlaid the Mylar drawing and discovered that it too was still a little large and required some trimming. But then the drawing and soundboard were reunited, their relationship consummated by a few nails soley for orientation purposes:
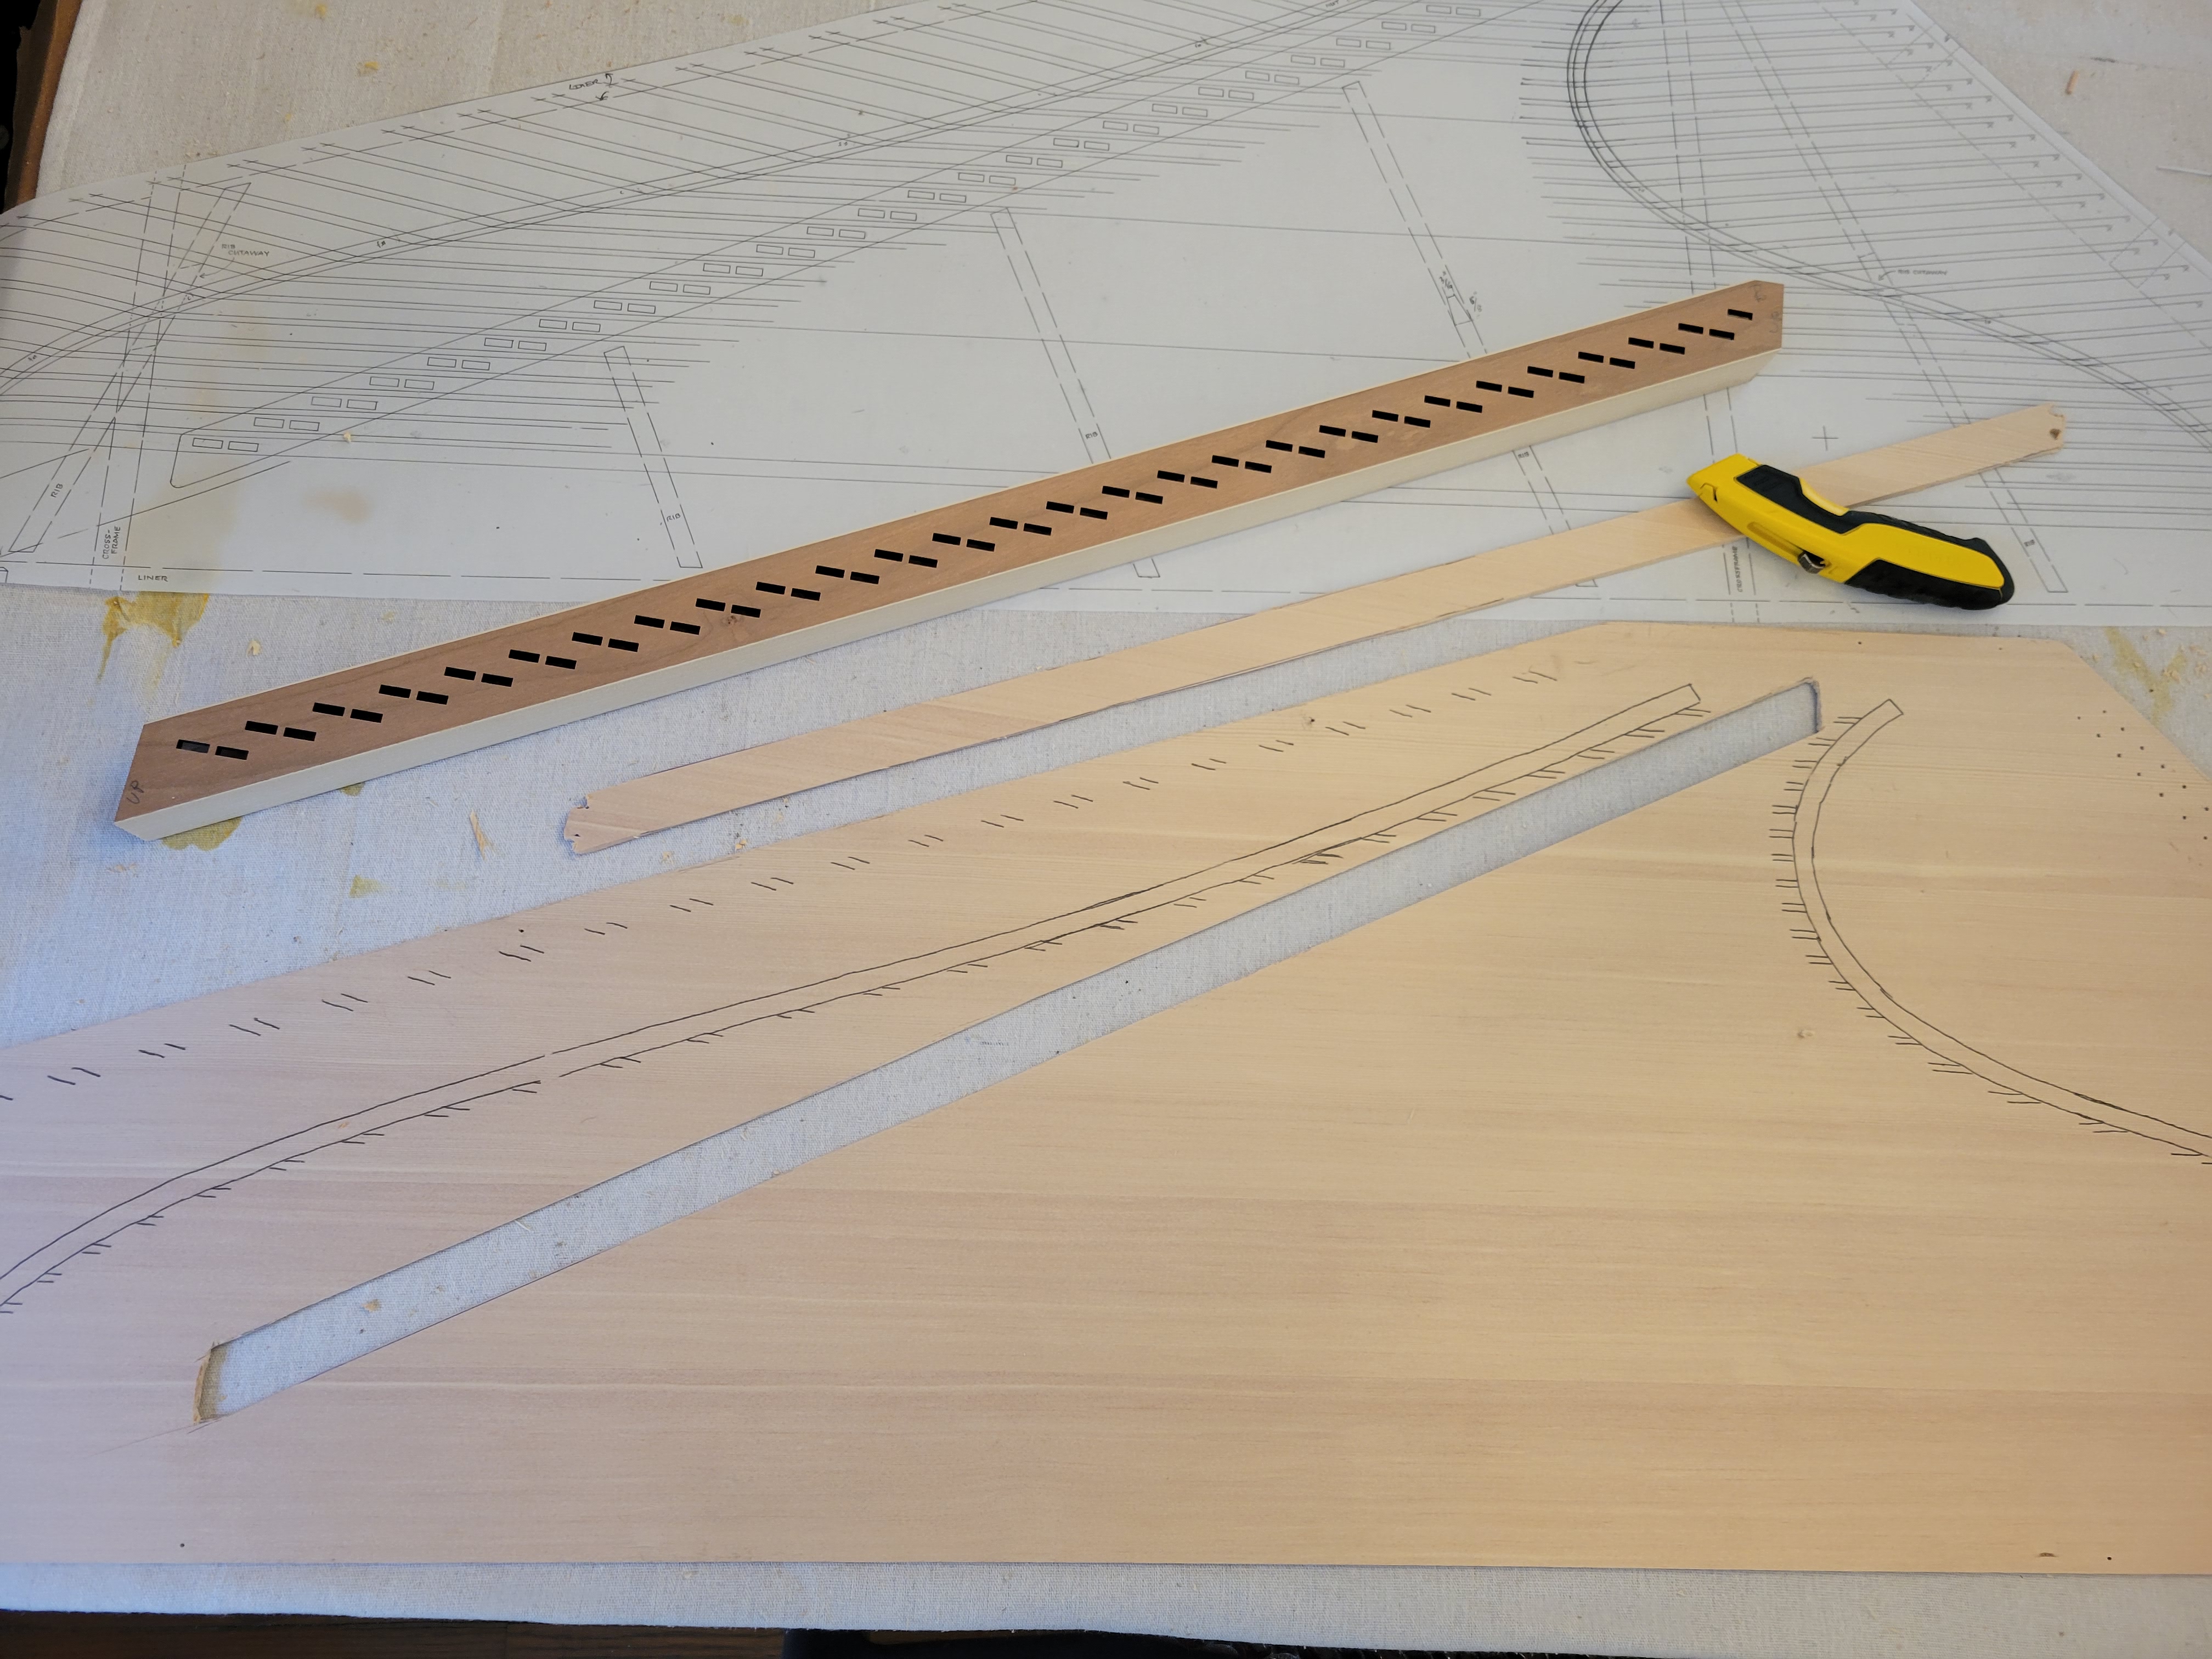
With the soundboard and drawing out of the case but aligned with those nails, I used carbon paper (and a little marking tool that came with the carbon paper) to mark the locations of the tuning pins (the plus signs on the drawing). These will later be drilled:
I also used carbon paper to mark the outline of the box guide. This whole 30-inch parallelgram will soon be cut from the soundboard:
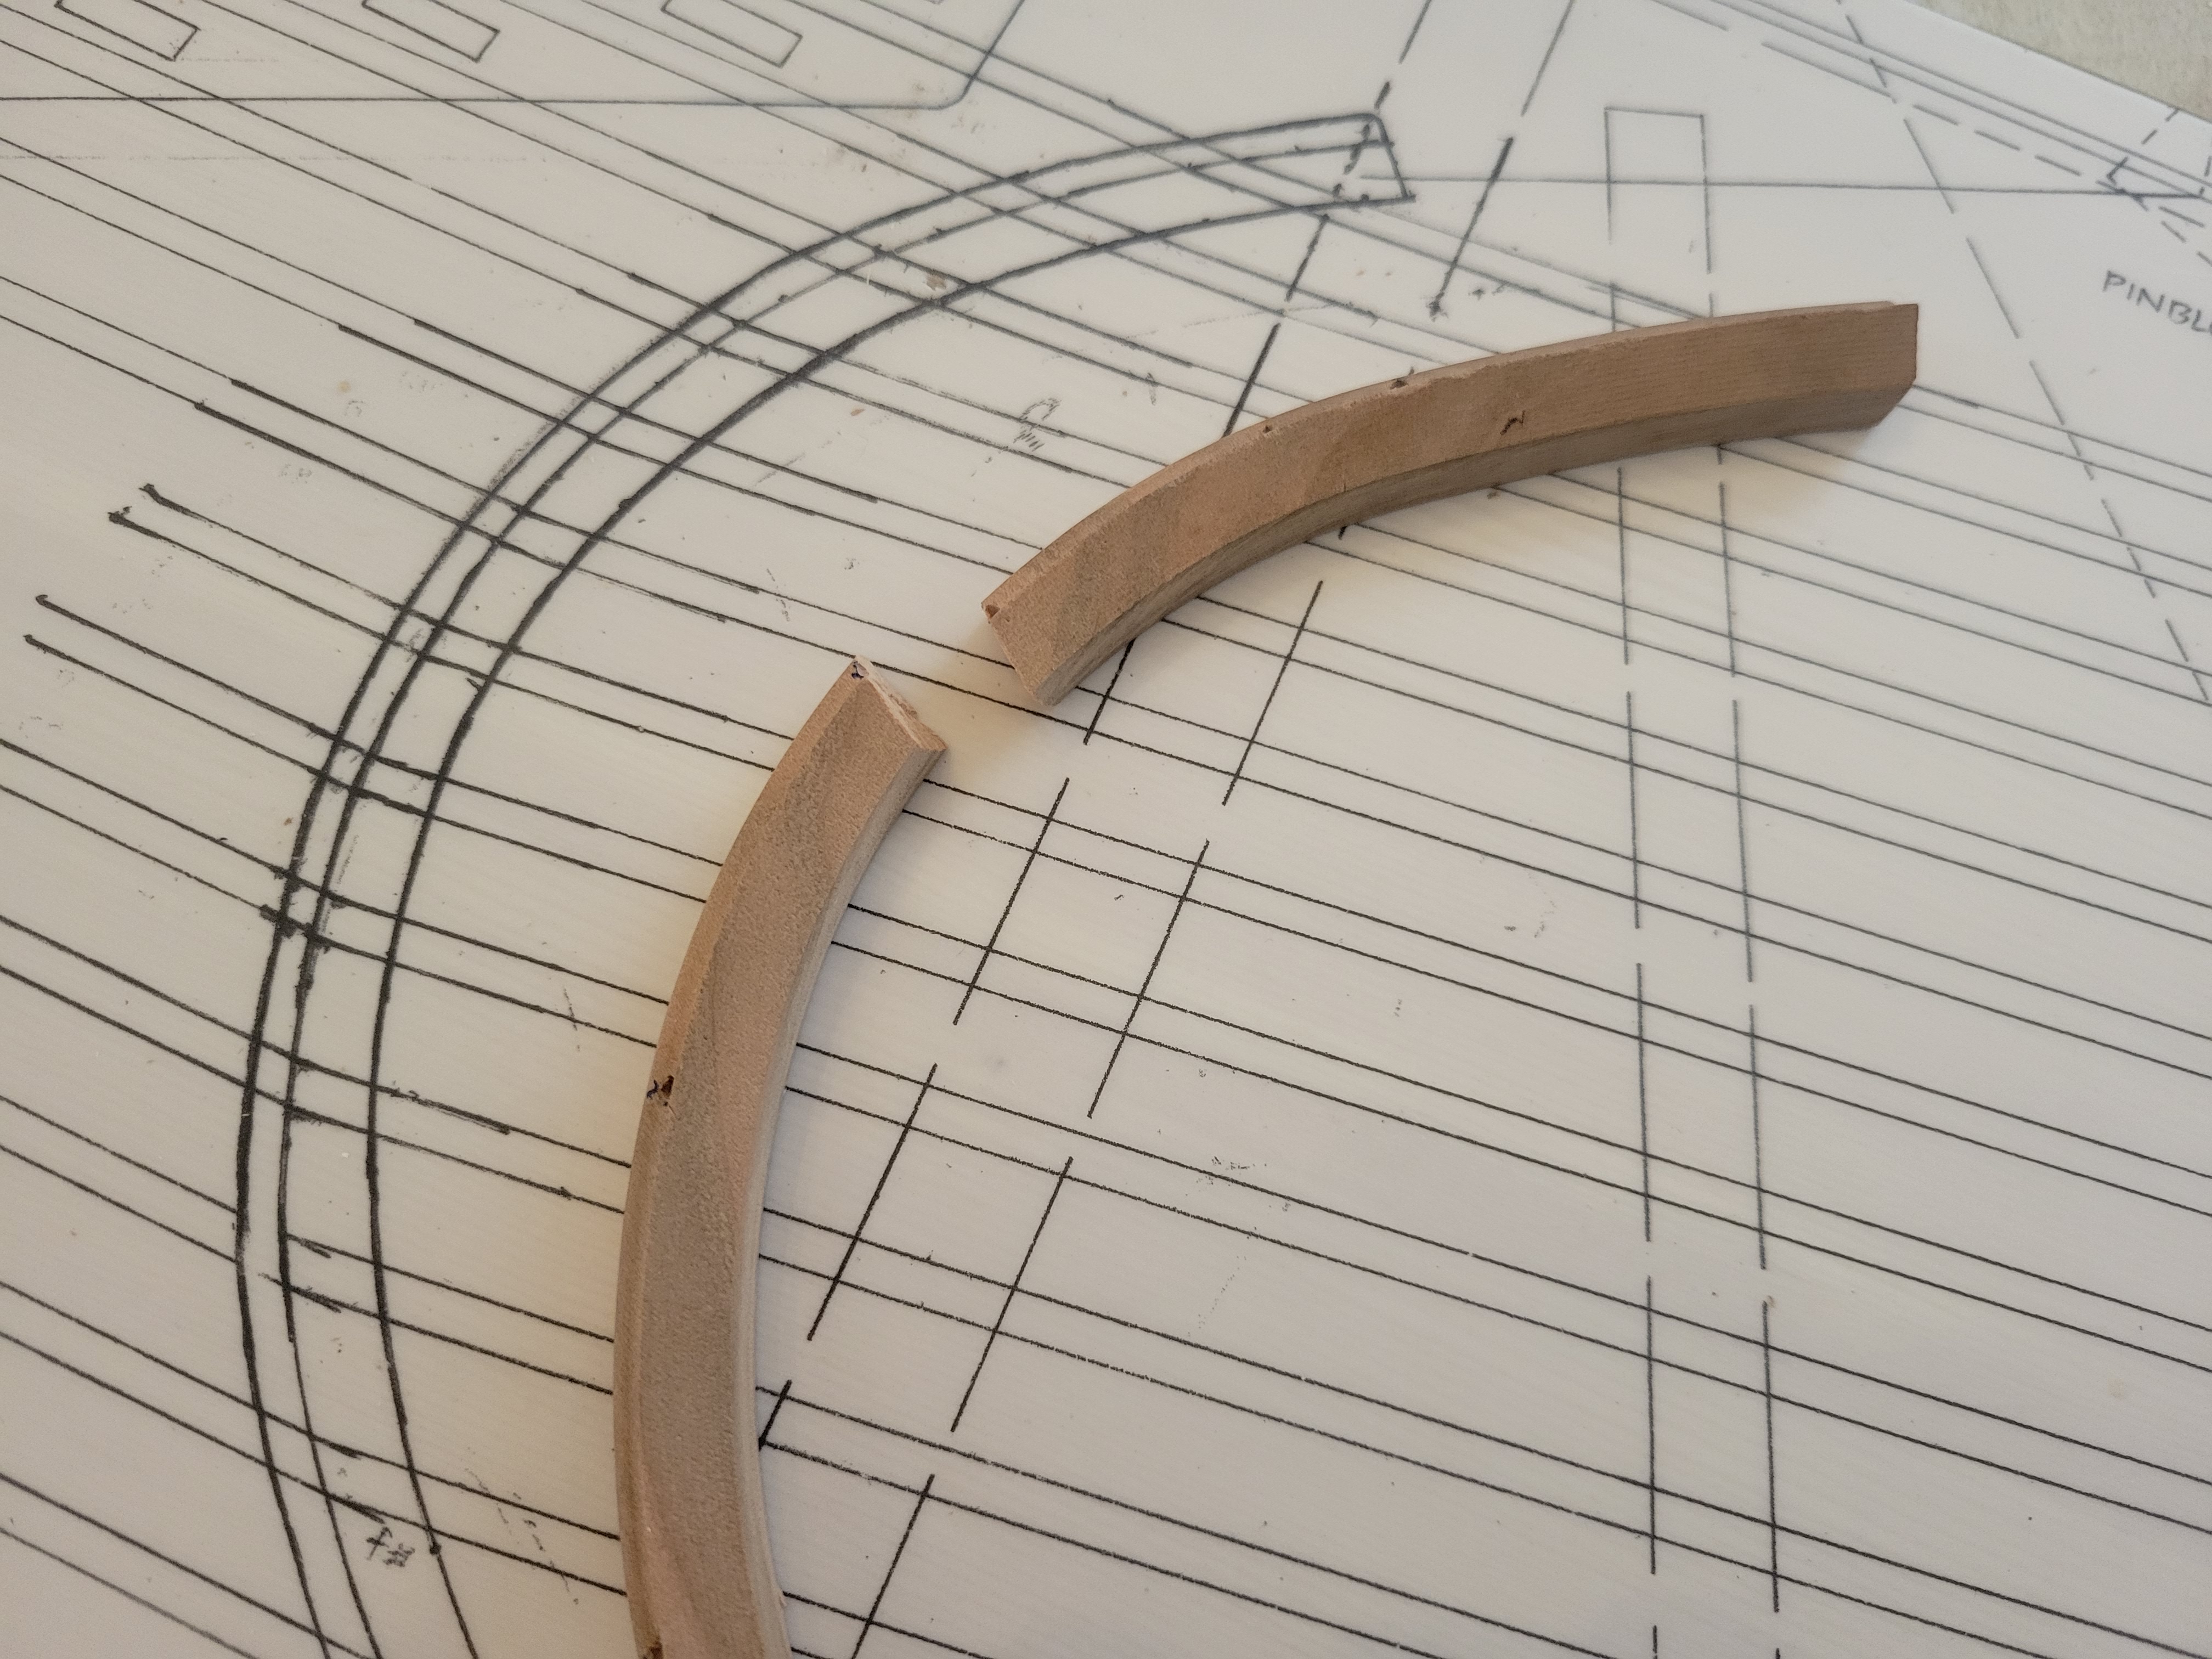
Then I ran into a problem. While attempted to nail the right bridge through the drawing and soundboard (a process described on page 15 and 16 of the Construction Manual), it broke, even though I had drilled 1/16-inch holes for the nails:
The alternative approach I came up with was not optimum. But I had so much success with the carbon paper for marking out the locations of the tuning pins and the box guide, I decided to transfer all the information I needed from the drawing to the soundboard itself. Here’s the result:
I know this makes the soundboard look rather ugly, but I think I’ll be able to clean it up at a later time. I’ve already searched the web for ways to clean carbon paper marks from wood, and there seem to be several (although others say that it’s hopeless).
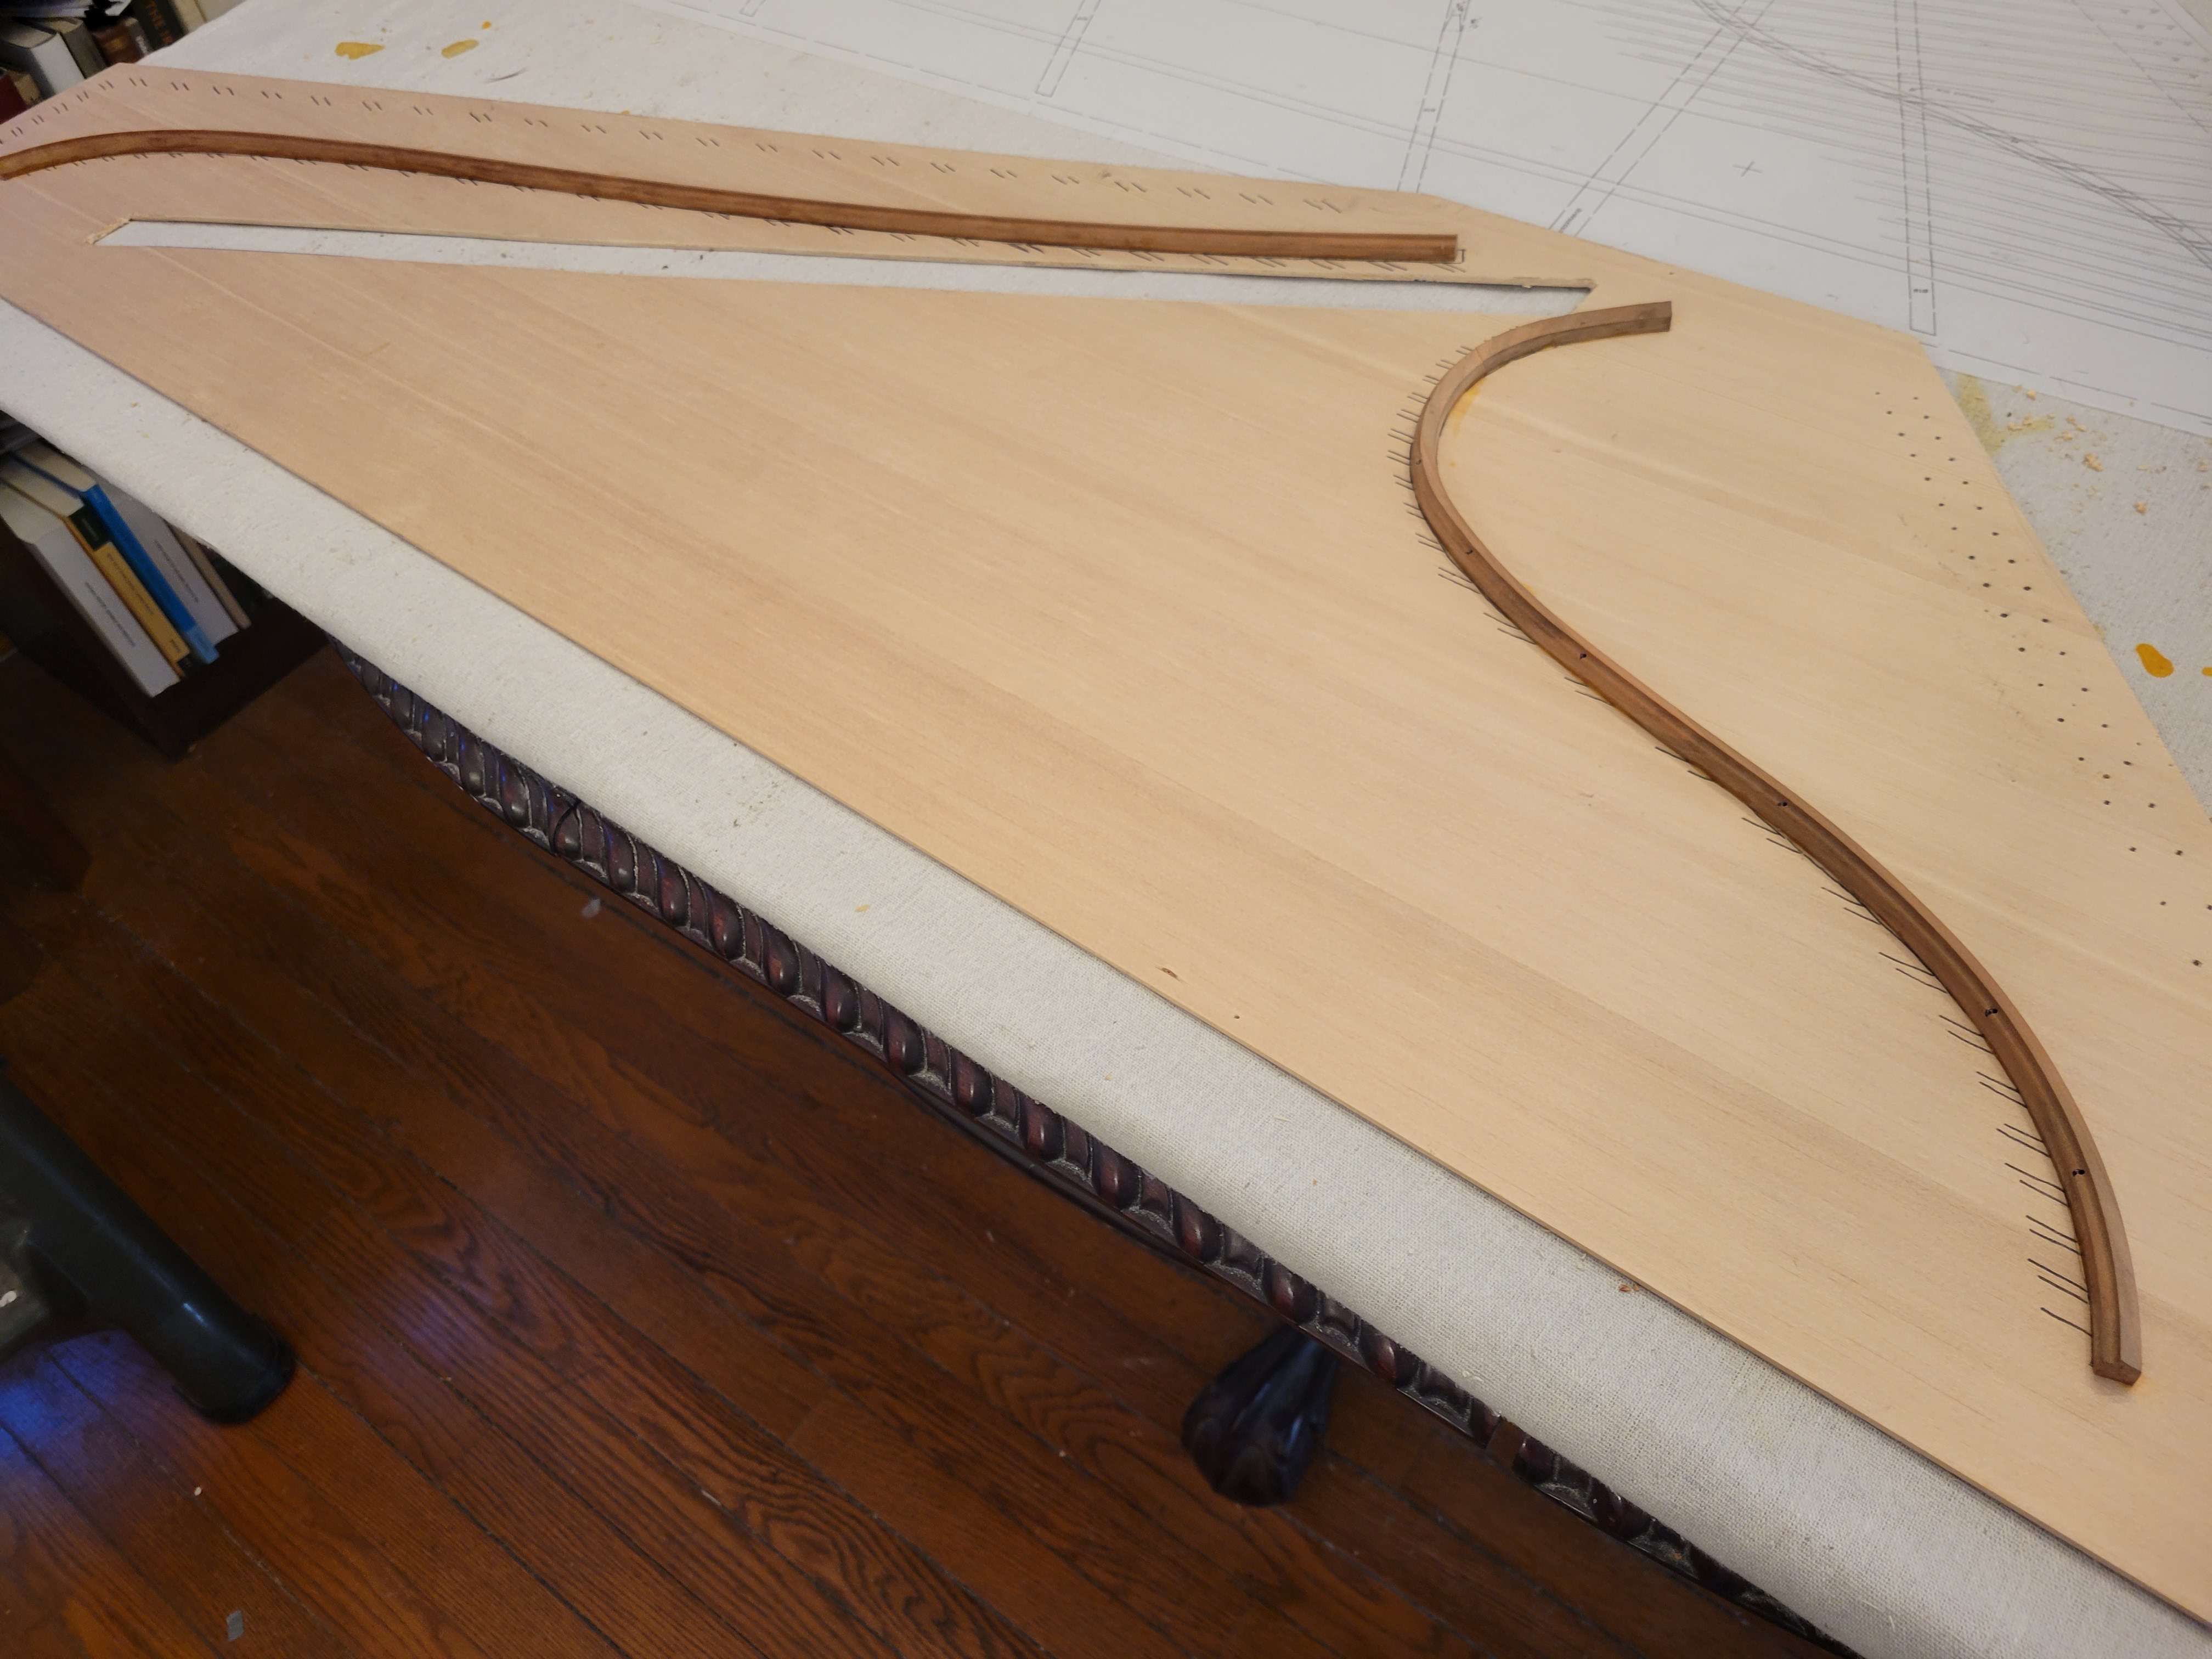
This job took about 90 minutes with a utility knife and a steel ruler:
I just kept cutting along the edge of the ruler until I started breaking through to the other side. Then I turned it over and completed the job. You can also see the box guide itself in that photo, the slots of which are said to be “laser cut.” This is probably the most sophisticated single component of the kit.
To attach the bridges to the soundboard, I used some tiny nails to build a little fence that held the bridges in place. I then put some glue on on their bottoms, and stacked a bunch of books on top, conveniently available from a nearby bookcase. Here’s the result:
Afterwards, I started worrying that maybe the bridges weren’t making a consistent firm contact with the soundboard, which just offhand, seemed to me an important requirement. If an inadequate contact causes a problem with the sound of the instrument, I’m not sure how I would diagnose it. Or fix it.
I spent some time pondering the best way to glue on the box guide. The problem is that it needs to be glued to the underside of the soundboard but the slots need to be exposed and properly centered on the top of the soundboard. Moreover, it can be positioned on the soundboard in a variety of ways, and Ed Kottick warns in his manual (page 20) “Anything other than the right way will be disastrous.” By trial and error, I was able to draw an outline of the box guide on the bottom of the soundboard. When I held the box guide in that position, it looked good from the top. Then I applied glue, stacked a lot of books on top, and prayed to Voltaire and David Hume.
This photo of the bottom of the soundboard shows the box guide in place as well as five ribs:
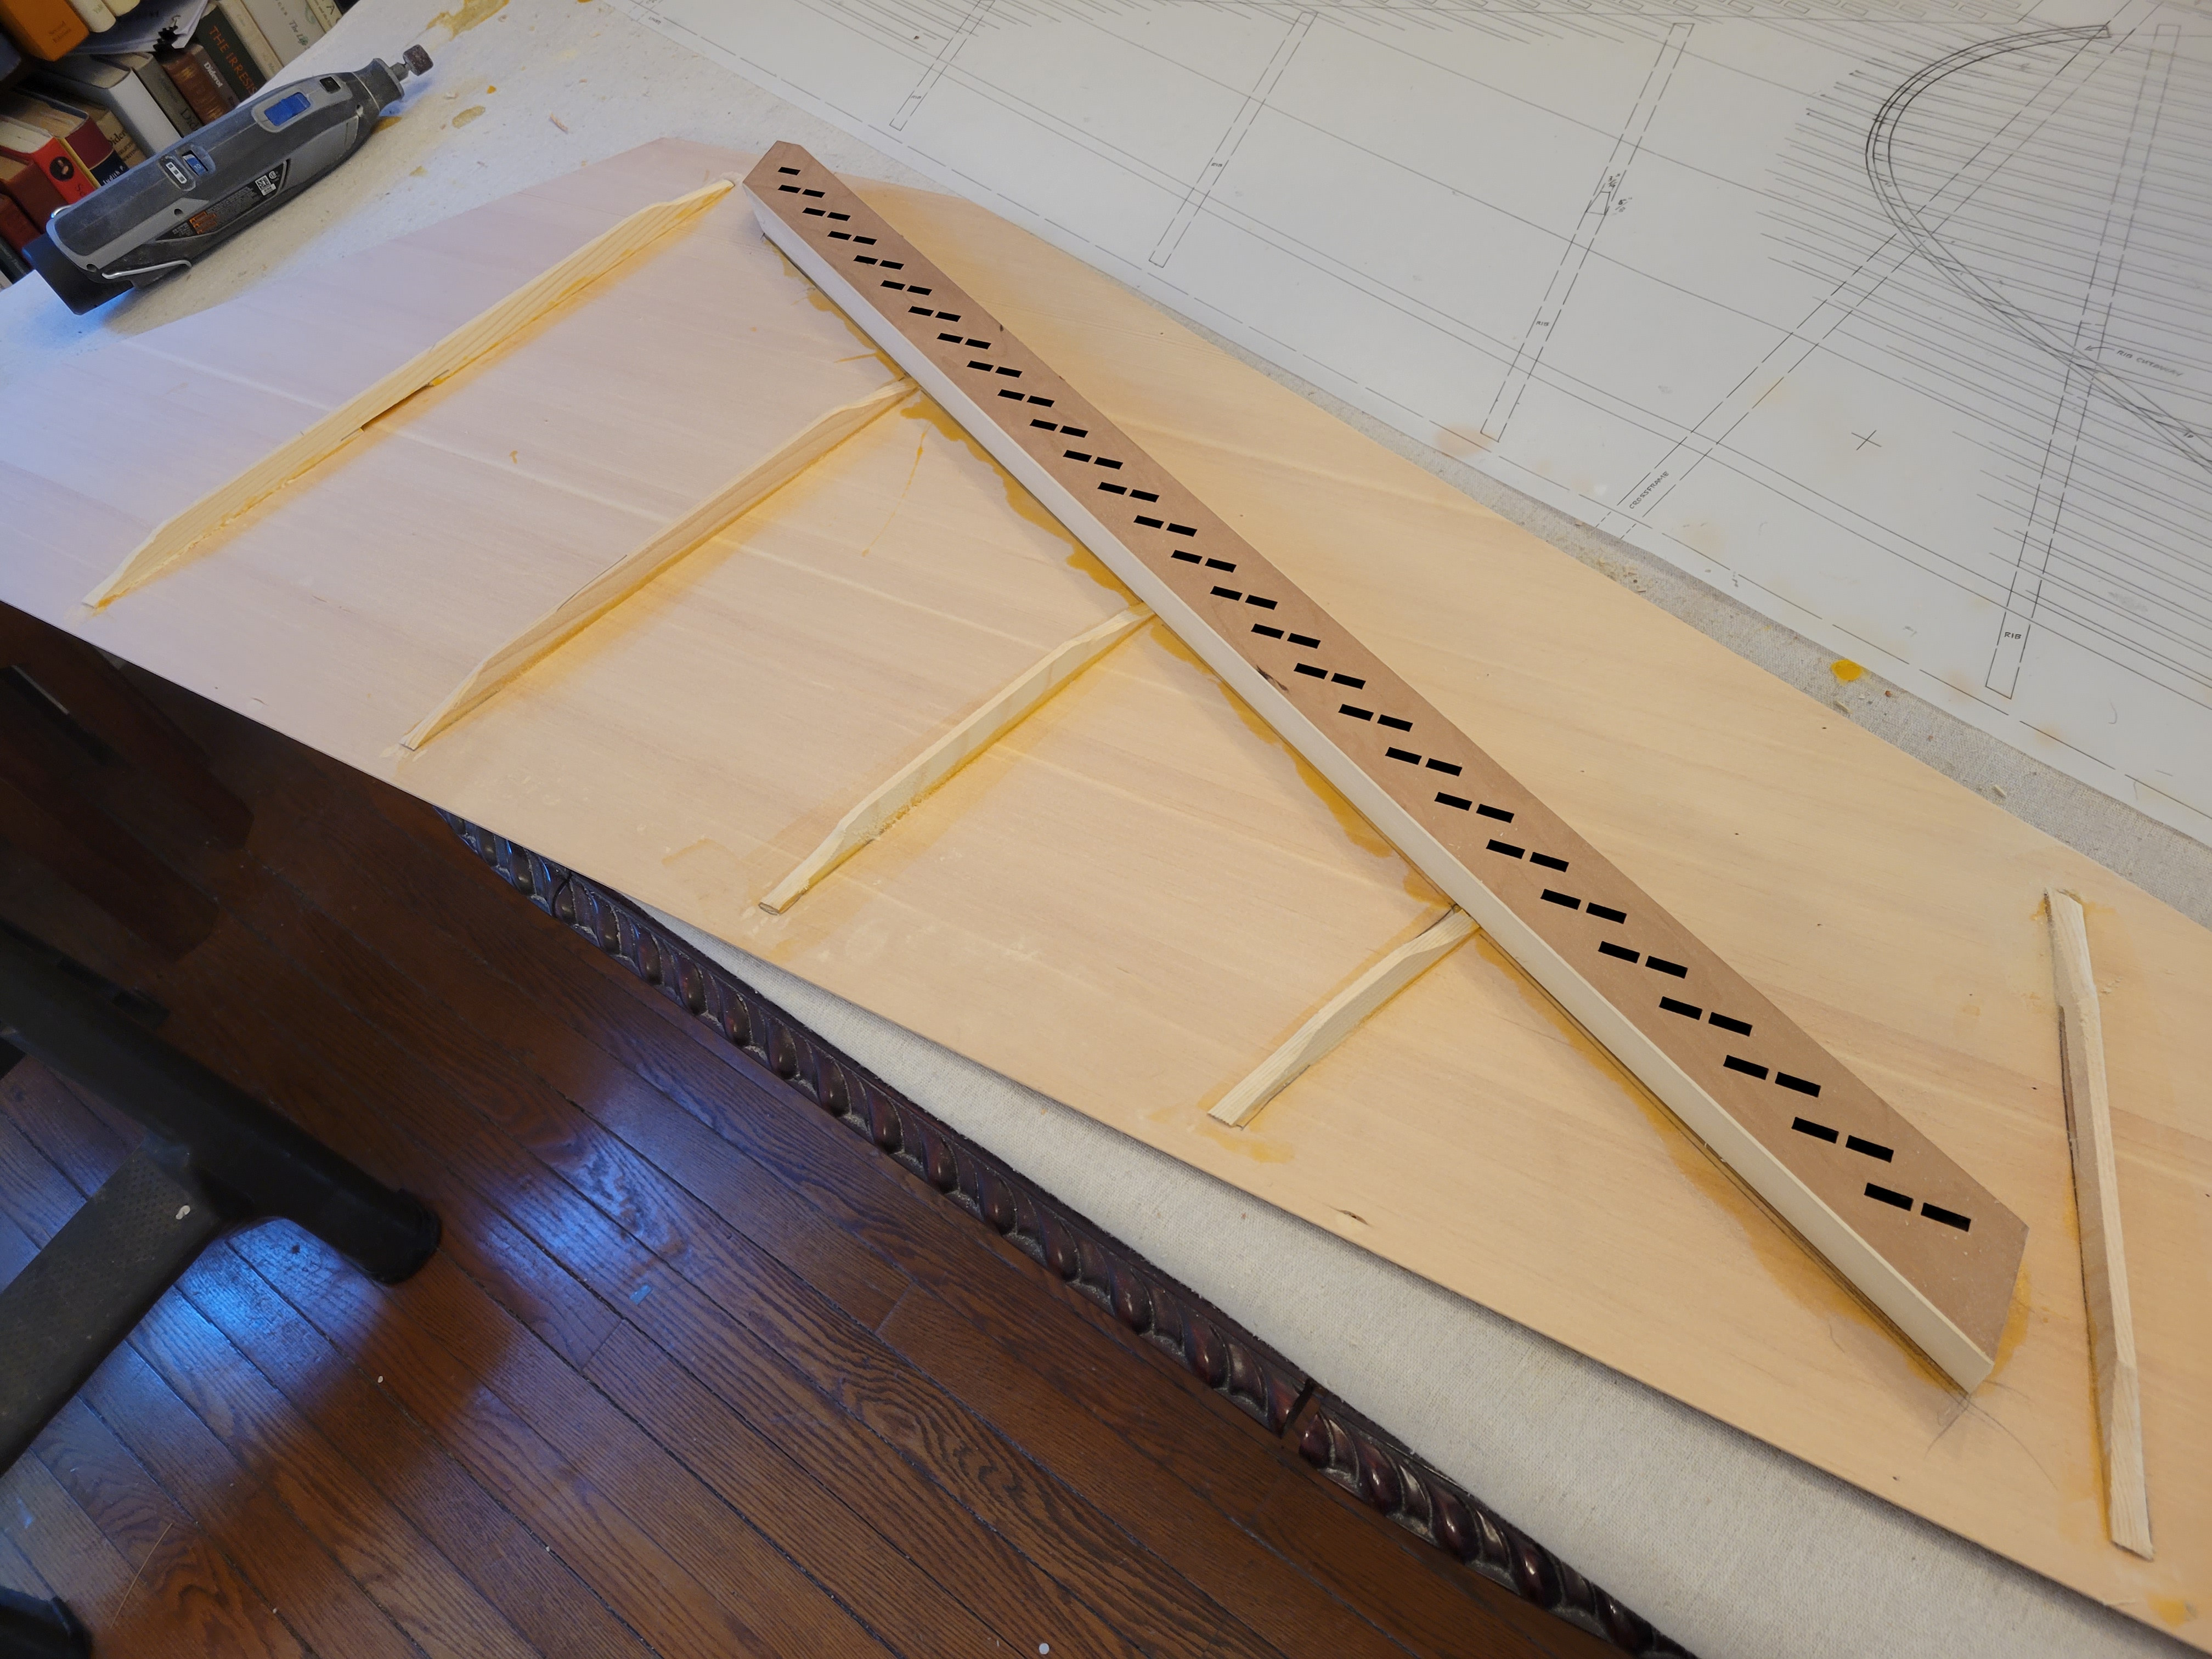
The ribs add stability to the soundboard as well as define acoustical regions. There might be some magic involved in their placement. The two outside ribs cross the bridges on the top of the soundboard and have little crevices already carved out to not interfere with the vibrations of the bridges. To flex better with the soundboard, the ribs are supposed to be scooped at the ends, but they don’t come that way. I did the scoops with a sanding tool on a Dremel.
Here’s the top of the soundboard, confirming that I did a pretty good job in positioning the box guide:
The soundboard dropped right into the case, and I secured it with glue along the liners and wrestplank, and nails approximately every 3 inches — 38 in total.
Ed Kottick says in his Construction Manual (page 21): “Not only is it perfectly satisfactory to nail in the soundboard, there are many antique instruments in which that method was used, so there’s historical justification for it.” He would know. I put down paper towels in the keyboard cavity to catch glue drops.
This soundboard is now installed in the case for good, which means that never again will I have a top view inside the case. If you follow Ed Kottick’s Construction Manual, you’re installing the soundboard on page 21 but not beginning work on the keyboard frame and keys until page 30. But I already did some of that work and have documented it here and here, and you can see the keyboard in some of the photos. I was happy I did it in that order, because I was able to see how the keyboard frame sits within the case before obscuring the view with the soundboard.
Tomorrow’s blog entry will have more about the keyboard.