Building a Virginal: Tools for Stringing
April 15, 2023
Roscoe, N.Y.
In the Zuckermann Troubadour Virginal that I’m building, the strings (i.e., wires) begin at the hitchpins at the left, go over the left bridge, pass a jack (which will someday pluck the string), go over the right bridge, and then end at a tuning peg on the right. On the bridges, the strings are held in place by bridge pins, which help convey vibrations of the strings to the soundboard.
To conserve space, the strings are grouped in pairs. Here’s a section of the Mylar drawing of the virginal showing part of the box guide, which holds the jacks in a vertical position:
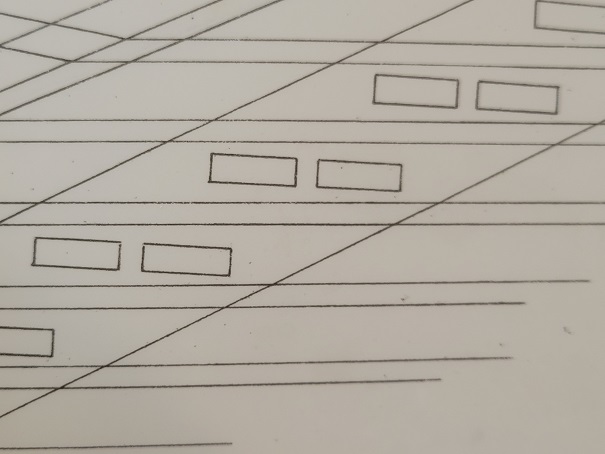
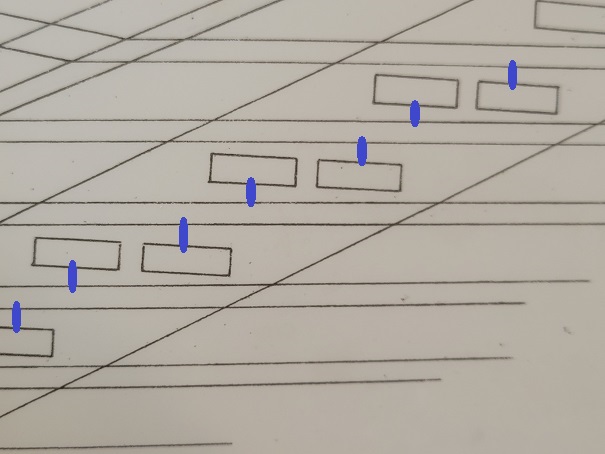
The rectangles are the holes in the box guide for the jacks, the cross sections of which are approximately ½” by 1/8”. (They’re smaller than I imagined). The horizontal lines are the strings. For each pair of side-by-side jacks, the one on the left plucks the string below it, and the one on the right plucks the string above it. I’ve marked up the drawing to (rather symbolically) indicate the positions of the plectra:
On page 16 of the PDF of The Troubadour Virginal: Construction and Maintenance Manual, Ed Kottick, instructs us to mark the right bridge for the bridge pins based on the Mylar drawing. On page 41, the right bridge is pinned, that is, the bridge pins go into the holes that were marked 25 pages earlier.
Pinning the left bridge is described on page 46. This comes after the string is prepared with a hitchpin loop at one end. The string is eventually attached to a turning peg on the other end. Here’s how it begins:
On virginals, pairs of jacks run between wide pairs of strings, one jack plucking to the left, the other to the right. Clearly, the wider apart we can get those strings the longer the plectra can be, and (within reason) we’d like to have them as long as possible. As a practical matter, rather than think about getting the wide pairs as wide as possible, we’ll do the opposite and work with the close pairs, aiming for a distance of about 3/32” between the strings. Please note: we don’t want the centers of those close pairs separated by 3/32”; rather we want the distance between the inner sides of the strings to be 3/32”.
And here comes two important sentences:
Not to belabor the point, but we would want to be able to insert a 3/32” shim between the close pairs. Further, we want the close pairs to be centered between each pair of slots.
But the way that Kottick has us do this doesn’t seem very precise to me. He emphasizes “For evenness of voicing and response, we really do want to get those close pairs about 3/32” apart and centered,” but I wasn’t happy how he’s having us do this.
If the pair of strings are spaced 3/32” apart, and if they are centered between the jacks, and if the strings are parallel to the face of the jacks — which is not specified but seems reasonable to me — then the locations of the left and right bridge pins are uniquely determined. So why have we been instructed to pin the right bridge before stringing the instrument?
Moreover, take another look at the Mylar drawing. Are those pairs of strings parallel to the face of the jacks? Not to my eyes.
I wanted a more precise and deterministic approach to pinning the bridges. I didn’t want to have to do what Kottick suggests if a mistake is made: “there’s no choice but to pull the pins, plug the holes with toothpicks, and try again.” I don’t think so. “O, that way madness lies.”
But this job is important: “Just keep in mind that the better pinning job you do now, the easier it will be to voice and adjust later.” Since voicing is the job I fear the most, I think I want to get the stringing as accurate as possible.
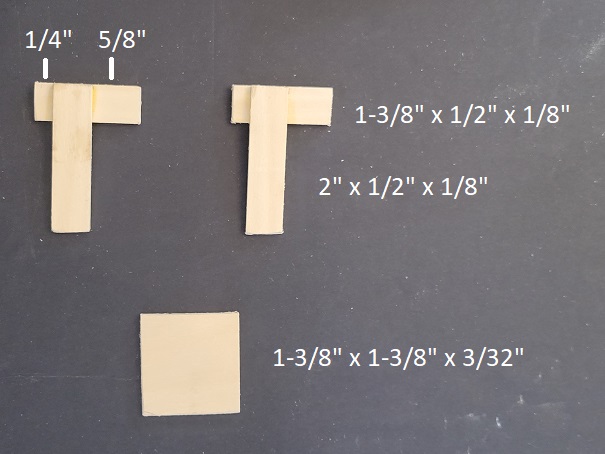
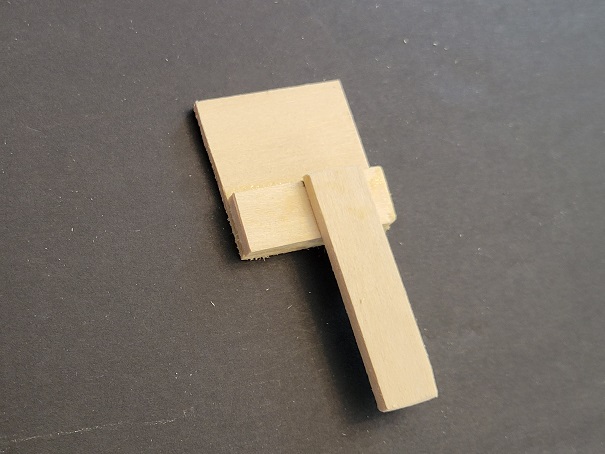
So I made a little tool out of inexpensive bass wood sold as “hobby wood” or “craft wood.” I cut a ½” by 1/8” strip into four pieces, glued them in pairs like so, and I cut a 3/32” sheet to form a shim:
When gluing these three pieces together, I made sure they fit in the box guide:
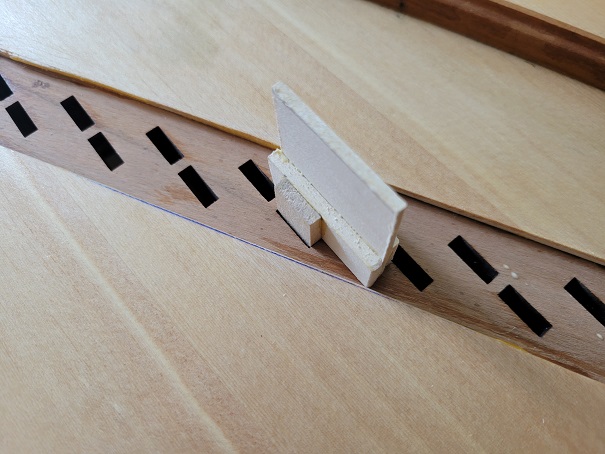
I will refer to this as the Stringing Tool. The idea is that you drop it in adjoining holes in the box guide and use it to space each pair of wires 3/32” apart centered between the jacks.
Where the Stringing Tool doesn’t work is for the lowest note on the keyboard. For that, I made a Bass Stringing Tool from the same components:
I then made another little tool described on page 16: a quarter-inch dowel with a bridge pin sticking out:
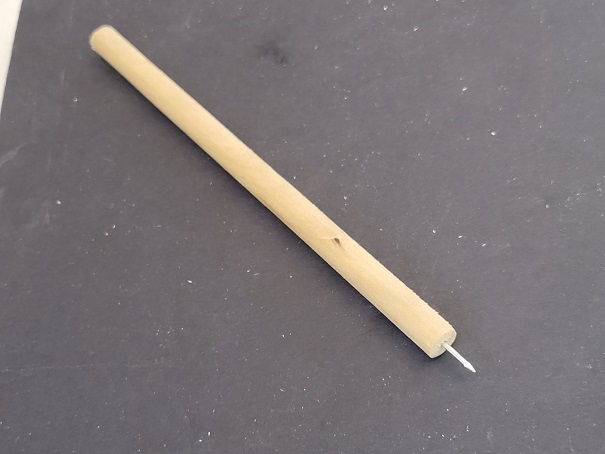
This I’ll call a Poking Tool.
Will these tools help me achieve a more accurate stringing?
We shall see…