Building a Virginal: Keyboard Balancing
April 14, 2023
Roscoe, N.Y.
When I was a kid in the 1960s, I made lead soldiers. The lead was melted in a little pot on an electrical heater. The insides of the molds would be lubricated by holding them over a candle flame to get a carbon coating, and then you’d clamp the mold together, and pour the lead in. It looked something like this, although I suspect I wasn’t so nicely dressed:
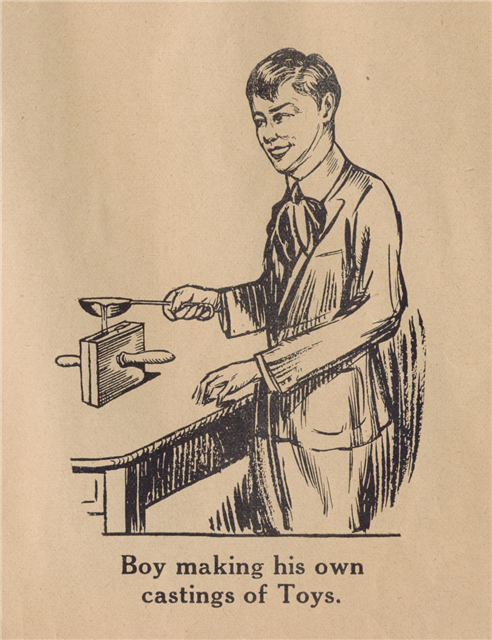
I found that image from the 1930s in an article “Lead Toy Soldier Casting Kit” on the Wisconsin Historical Society website. I feel obliged to clarify that I wasn’t really interested in amassing an army of lead soldiers. It was the process that amused me. Of course, some burns did result, and molten lead burns continued when I switched from soldiers to solder.
We know now that burns are one of the more benign effects of lead on the human body, and that by engaging in this innocent little hobby, I was likely exposing myself to lead poisoning. These days when people work with lead— as I did yesterday, Day 13 of constructing a Zuckermann Troubadour Virginal — we’re advised to wear gloves and a face mask.
The Troubadour kit comes with about a yard of ¼” lead wire that’s used in two of the virginal construction tasks. In a few days (I hope), I will be cutting 1/8” pieces to give a little more heft to each of the 55 jacks. Yesterday I cut pieces for balancing the 55 keys. Ed Kottick’s The Troubadour Virginal: Construction and Maintenance Manual says that these pieces should be “just under ½” long” (p. 36), which is about the width of the keys. Do the math, and you’ll see that the quantity of lead supplied with the kit is just about right.
Why are we doing this? In a virginal, all the keys are a different length, and they all have different pivot points. It’s desirable for establishing a good feel of a keyboard that pressing each key requires the same amount of force. To achieve this uniformity, some extra weight must be added to the keys, usually towards the tail ends.
The process of balancing the keys is shown in two videos on the Zuckermann YouTube Channel. Here’s intern Seymour doing the job starting at time 7:31:
Seymour says to cut the lead into ¼” pieces, and indicates that the hole should only be drilled midway through the side of the key (8:17). The Troubadour Construction Manual says to drill “straight through the side of the key” (ibid.).
Keyboard balancing is also shown by Joyce Chen in her video at about 10:11, but she doesn’t mention a particular size of the lead chunks:
As Ed Kottick recommends (and both videos demonstrate), the force of a finger on the key can be mimicked by a nickel and dime taped together. Ed Kottick says that’s “about 9 grams” total (ibid.). Actually, a nickel weighs 5 grams and a dime is about 2¼ grams, so a nickel and two dimes would be closer to 9 grams. But I’ll stick with the 15¢ standard.
I started the keyboard balancing job almost two weeks ago when I made my own balancing stand similar to Ed Kottick’s description and the ones in the two videos. I even made a little video of it for my Twitter feed.
But I didn’t get very far, and I decided to kick the job down the road. The balancing seems fine in theory, but I found that as the key seesawed back and forth, both the coins and the lead chunks kept sliding off, and I was unhappy about the ambiguity about how far it should tip. That I was doing all this while wearing gloves added to the aggravation. I wanted a process that was more definitive and consistent, and I spent some time contemplating an alternative, which turned out to be rather simple.
For the lead pieces, I decided to use an average of Ed Kottick’s ½” lengths and Seymour’s ¼” lengths, and I scored and cut my lead in 3/8” chunks:
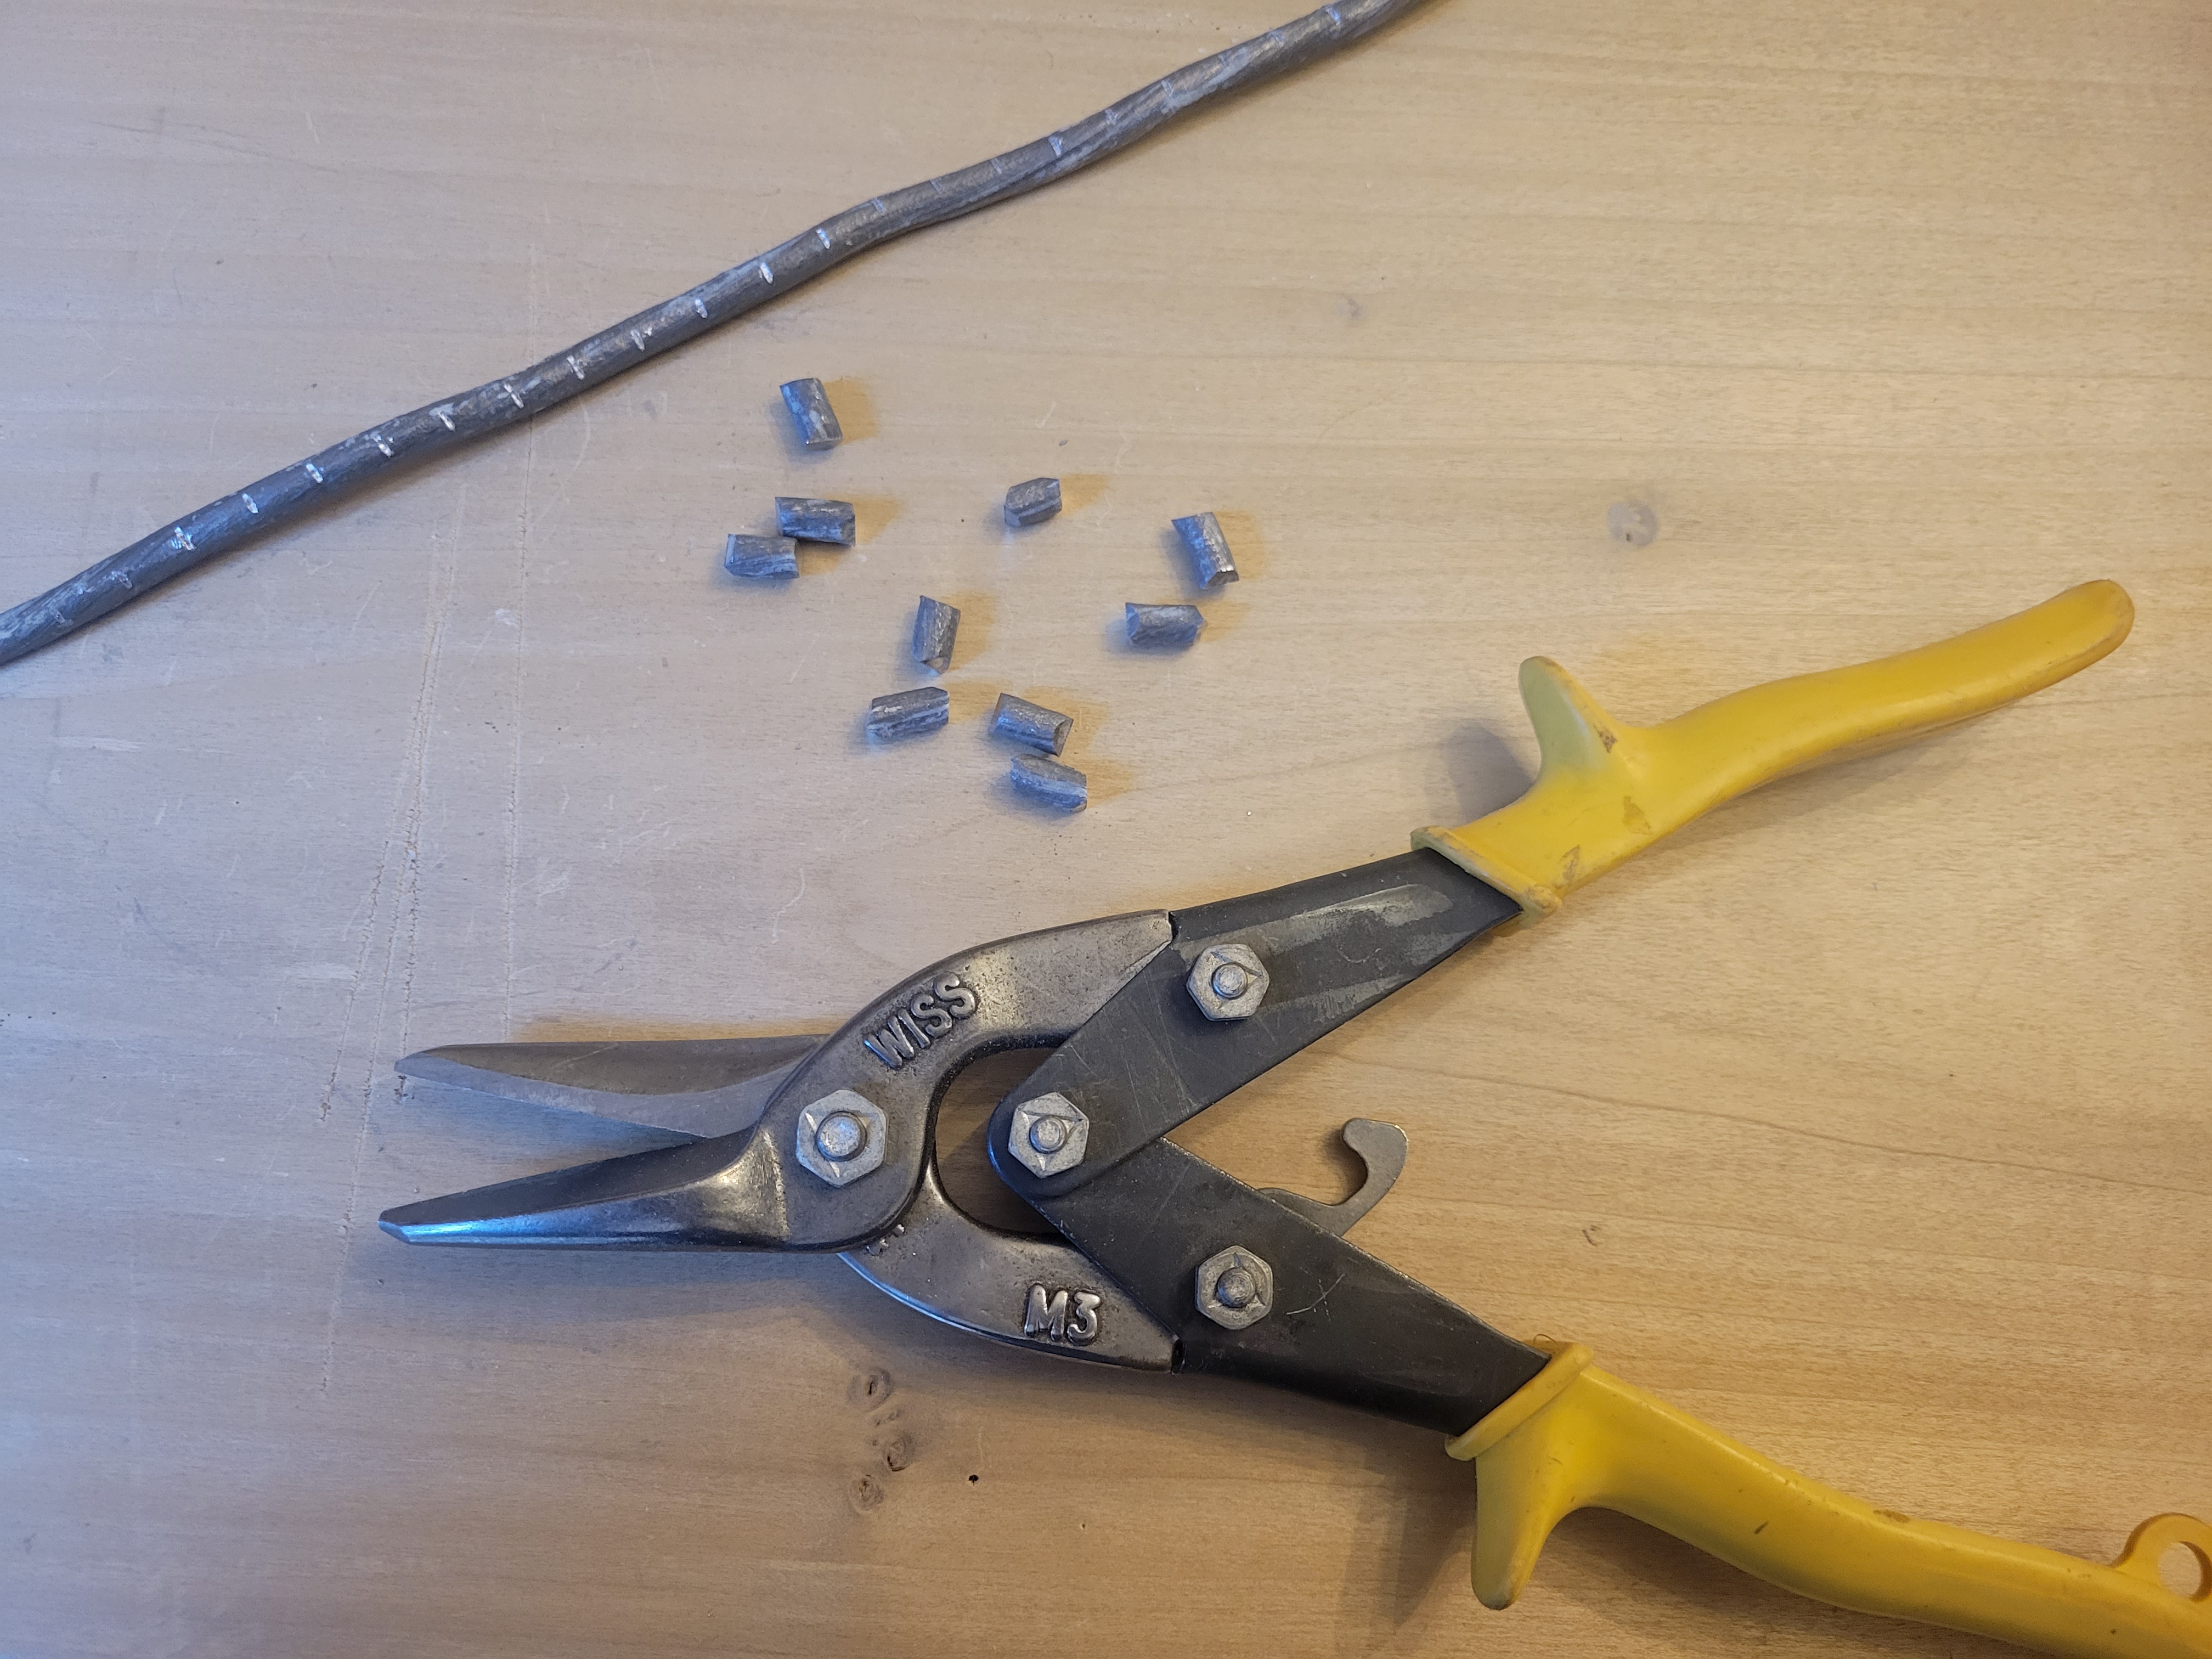
Obviously my measuring and cutting is not entirely consistent, but for this job, they don’t have to be uniform.
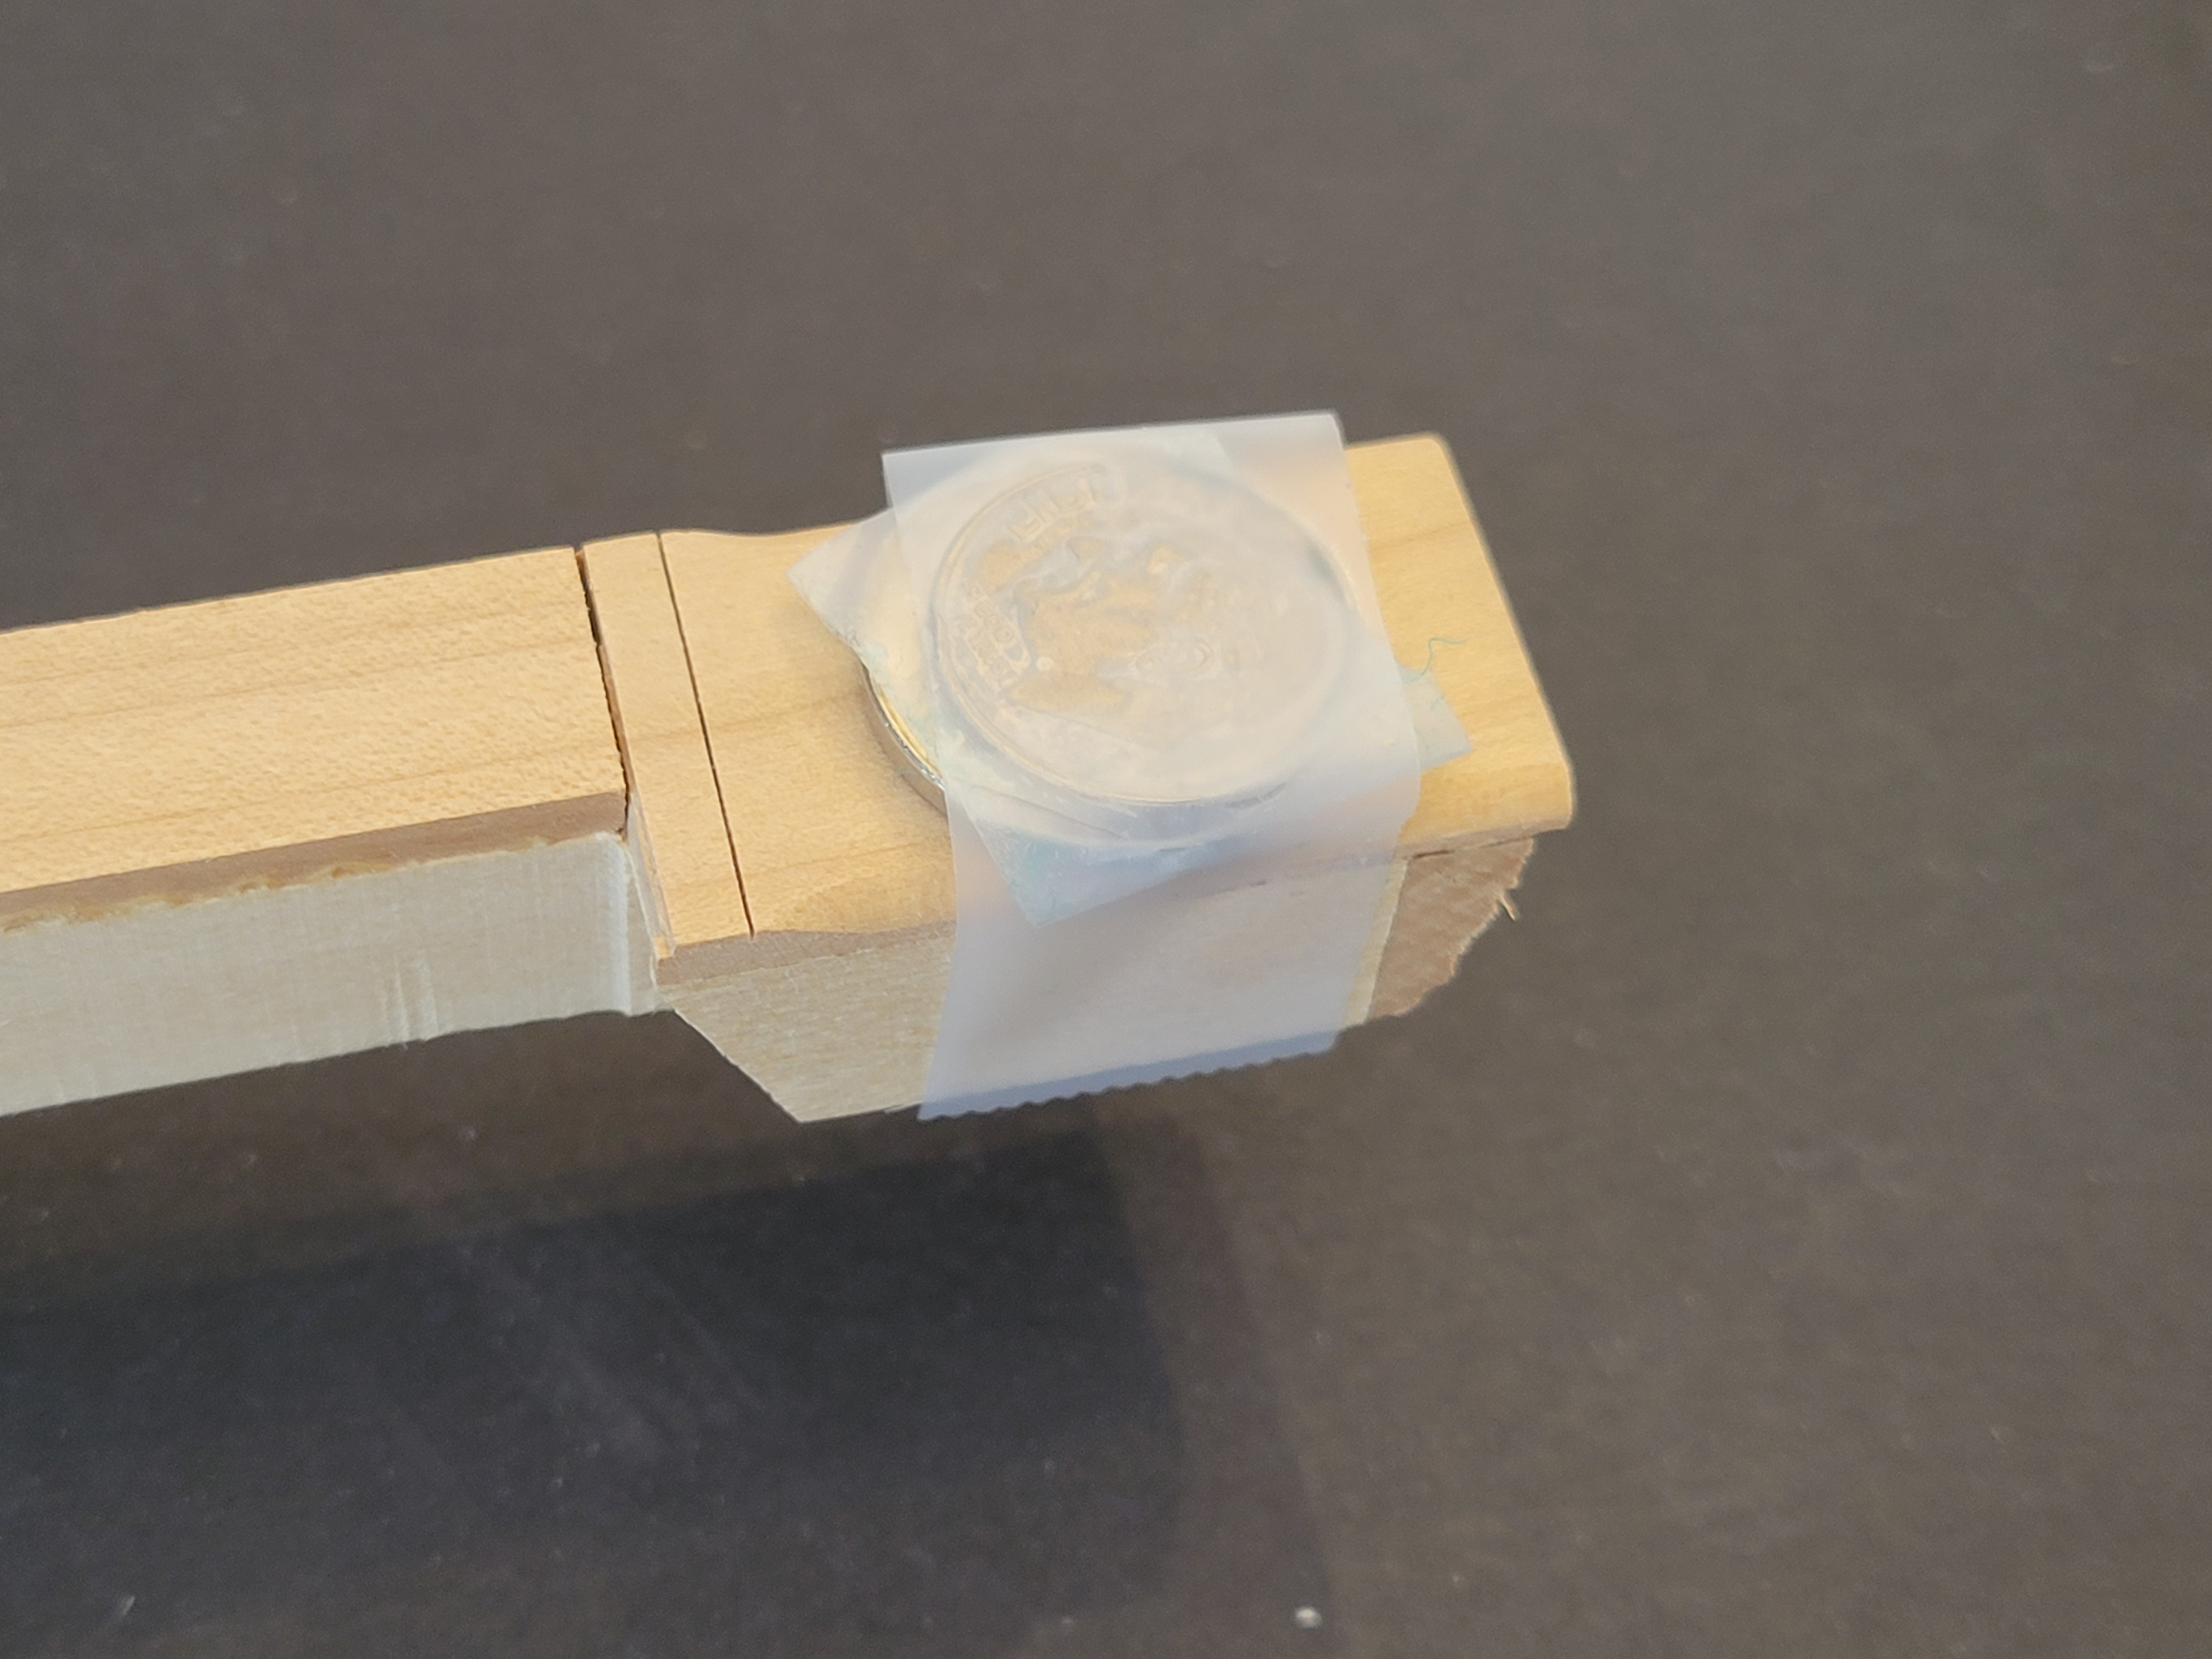
I decided to tape the nickel and dime to the head of each key so it wouldn’t slide off. This was my most profound improvement to keyboard balancing:
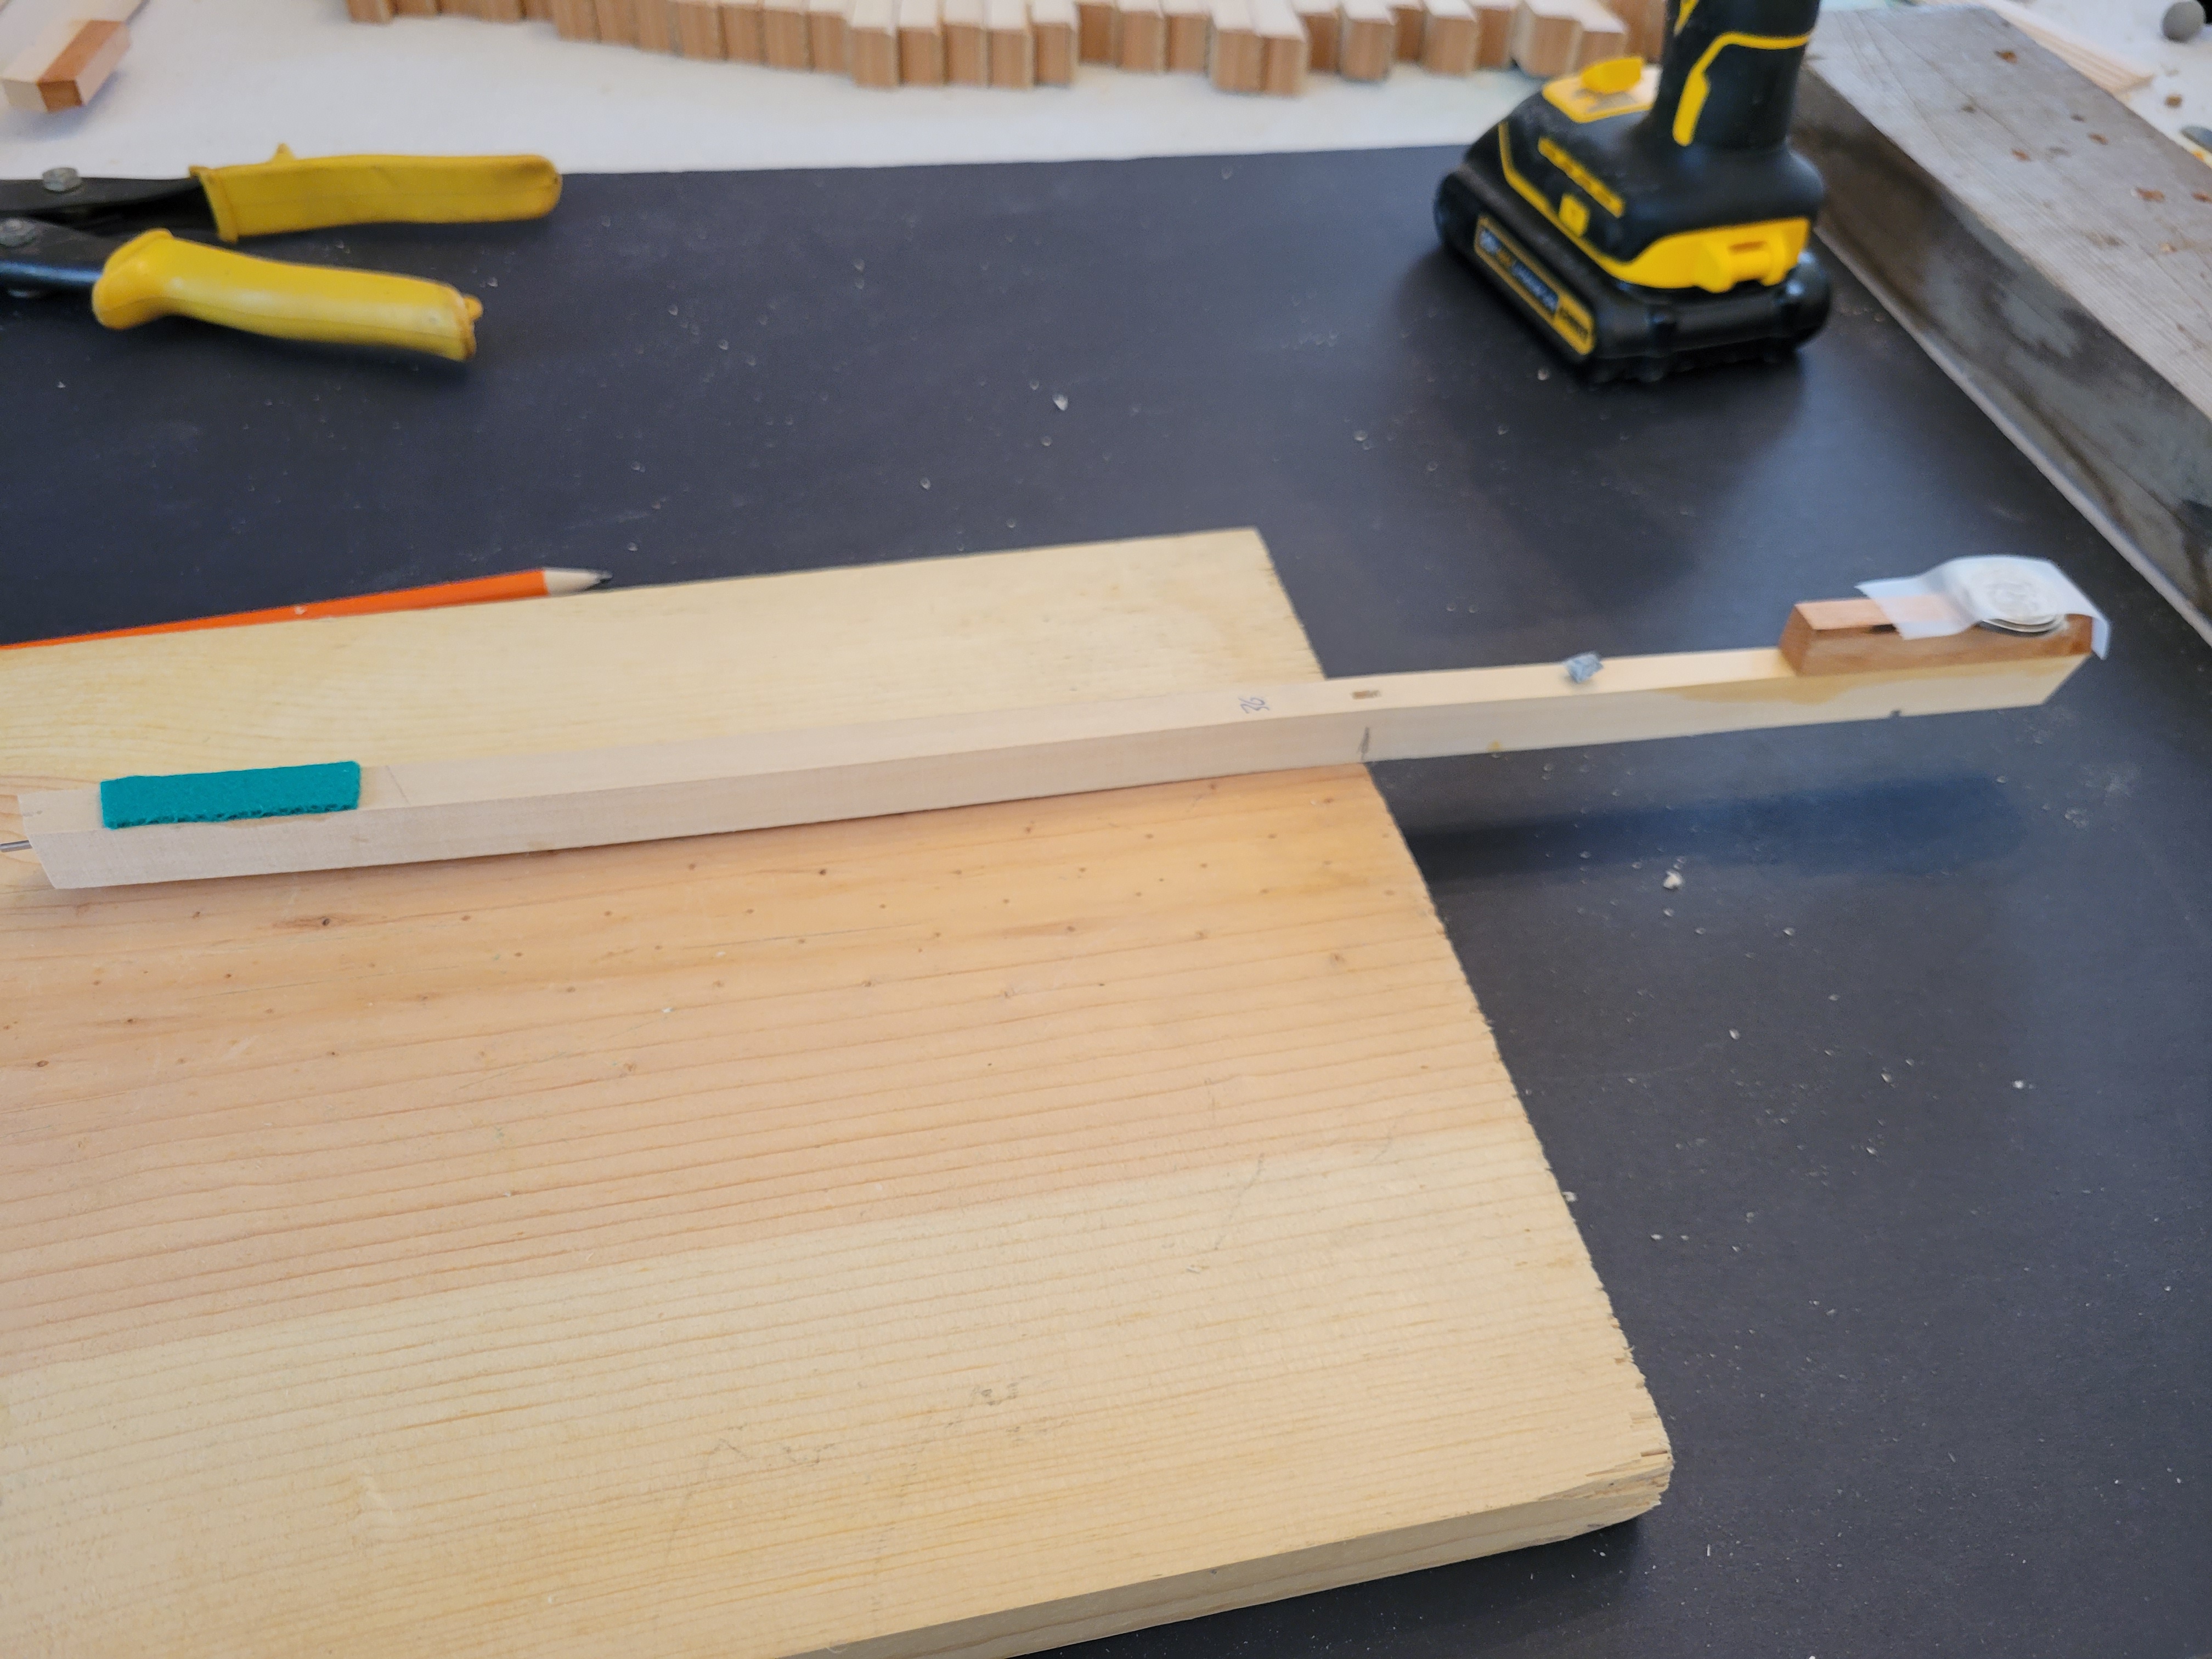
Instead of balancing the key on a pin, I drew a little pencil mark where the balance hole was, and balanced the key on the edge of a board:
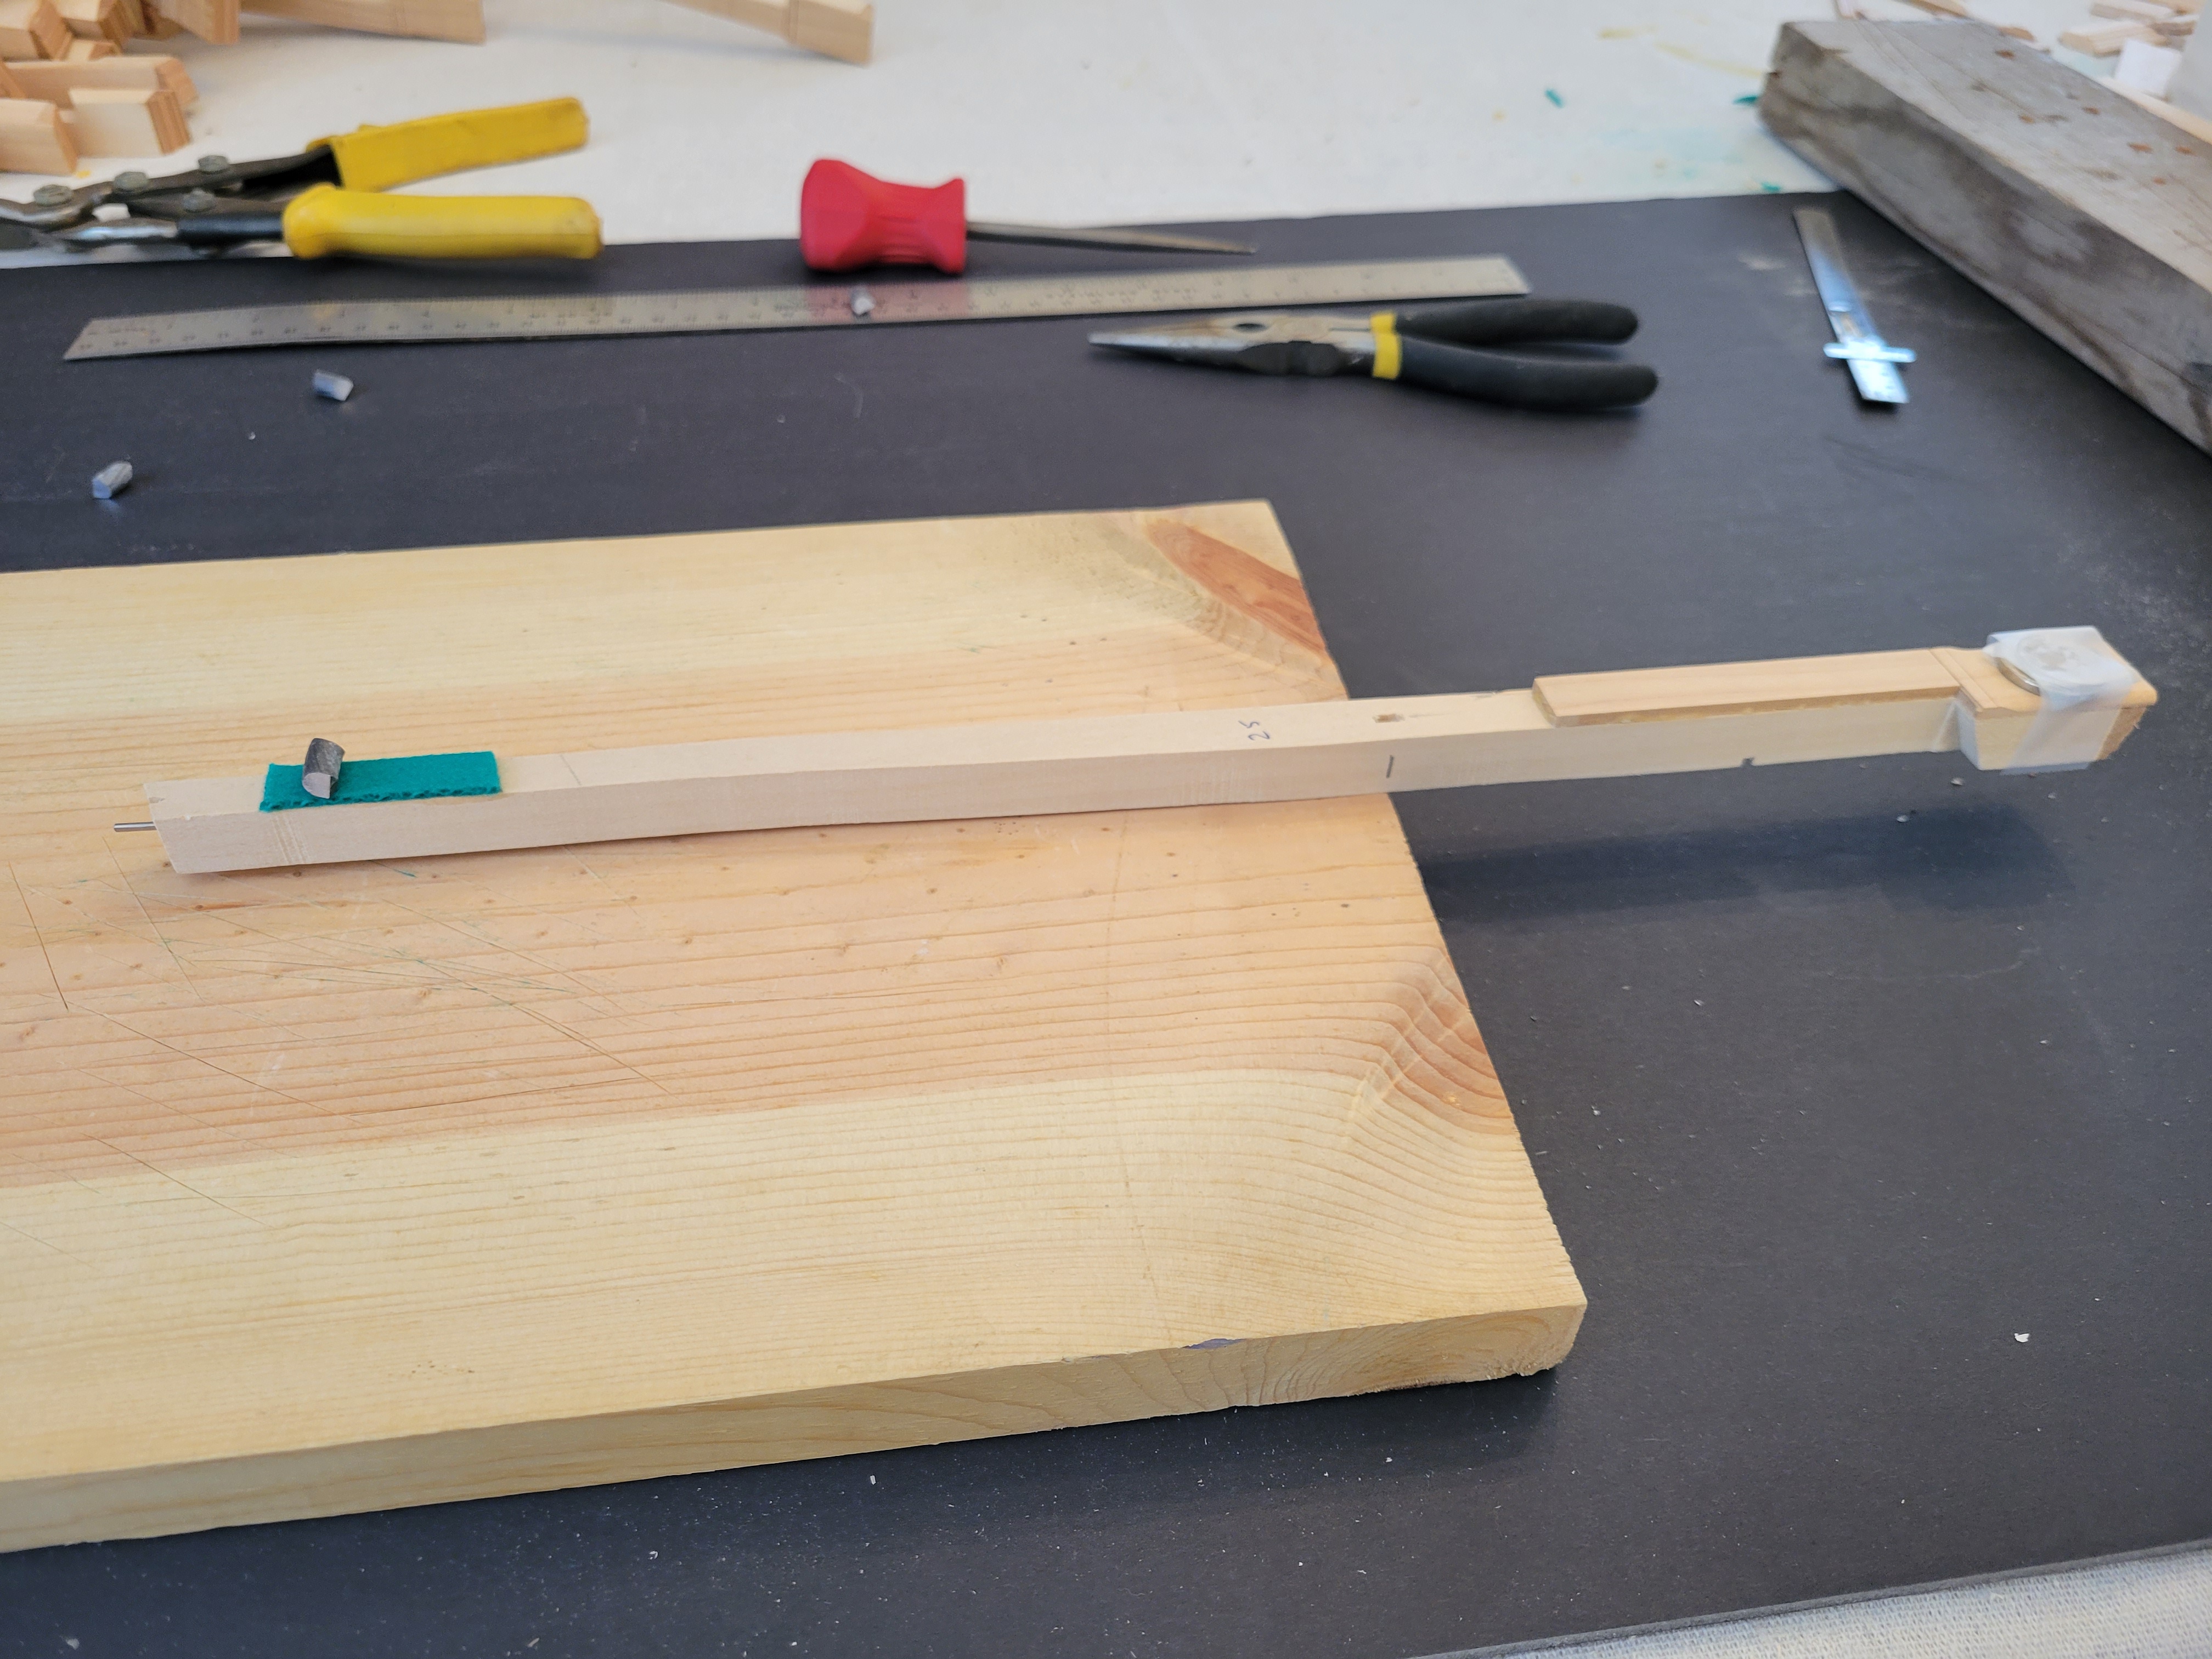
Then it’s a matter of moving a lead chunk back and forth to achieve a kind of hovering of the tail end of the key off the board.
After a balance point is found, a 17/64” hold is drilled into the side of the key. I tried not to drill all the way through the key, but sometimes I failed. The chunk of lead is inserted, and then struck with a hammer or nail punch until it expands to fill the hole. What you want to avoid is splitting the key, and I’m glad that never happened. Here’s one that’s a lot less ugly than some of the others:
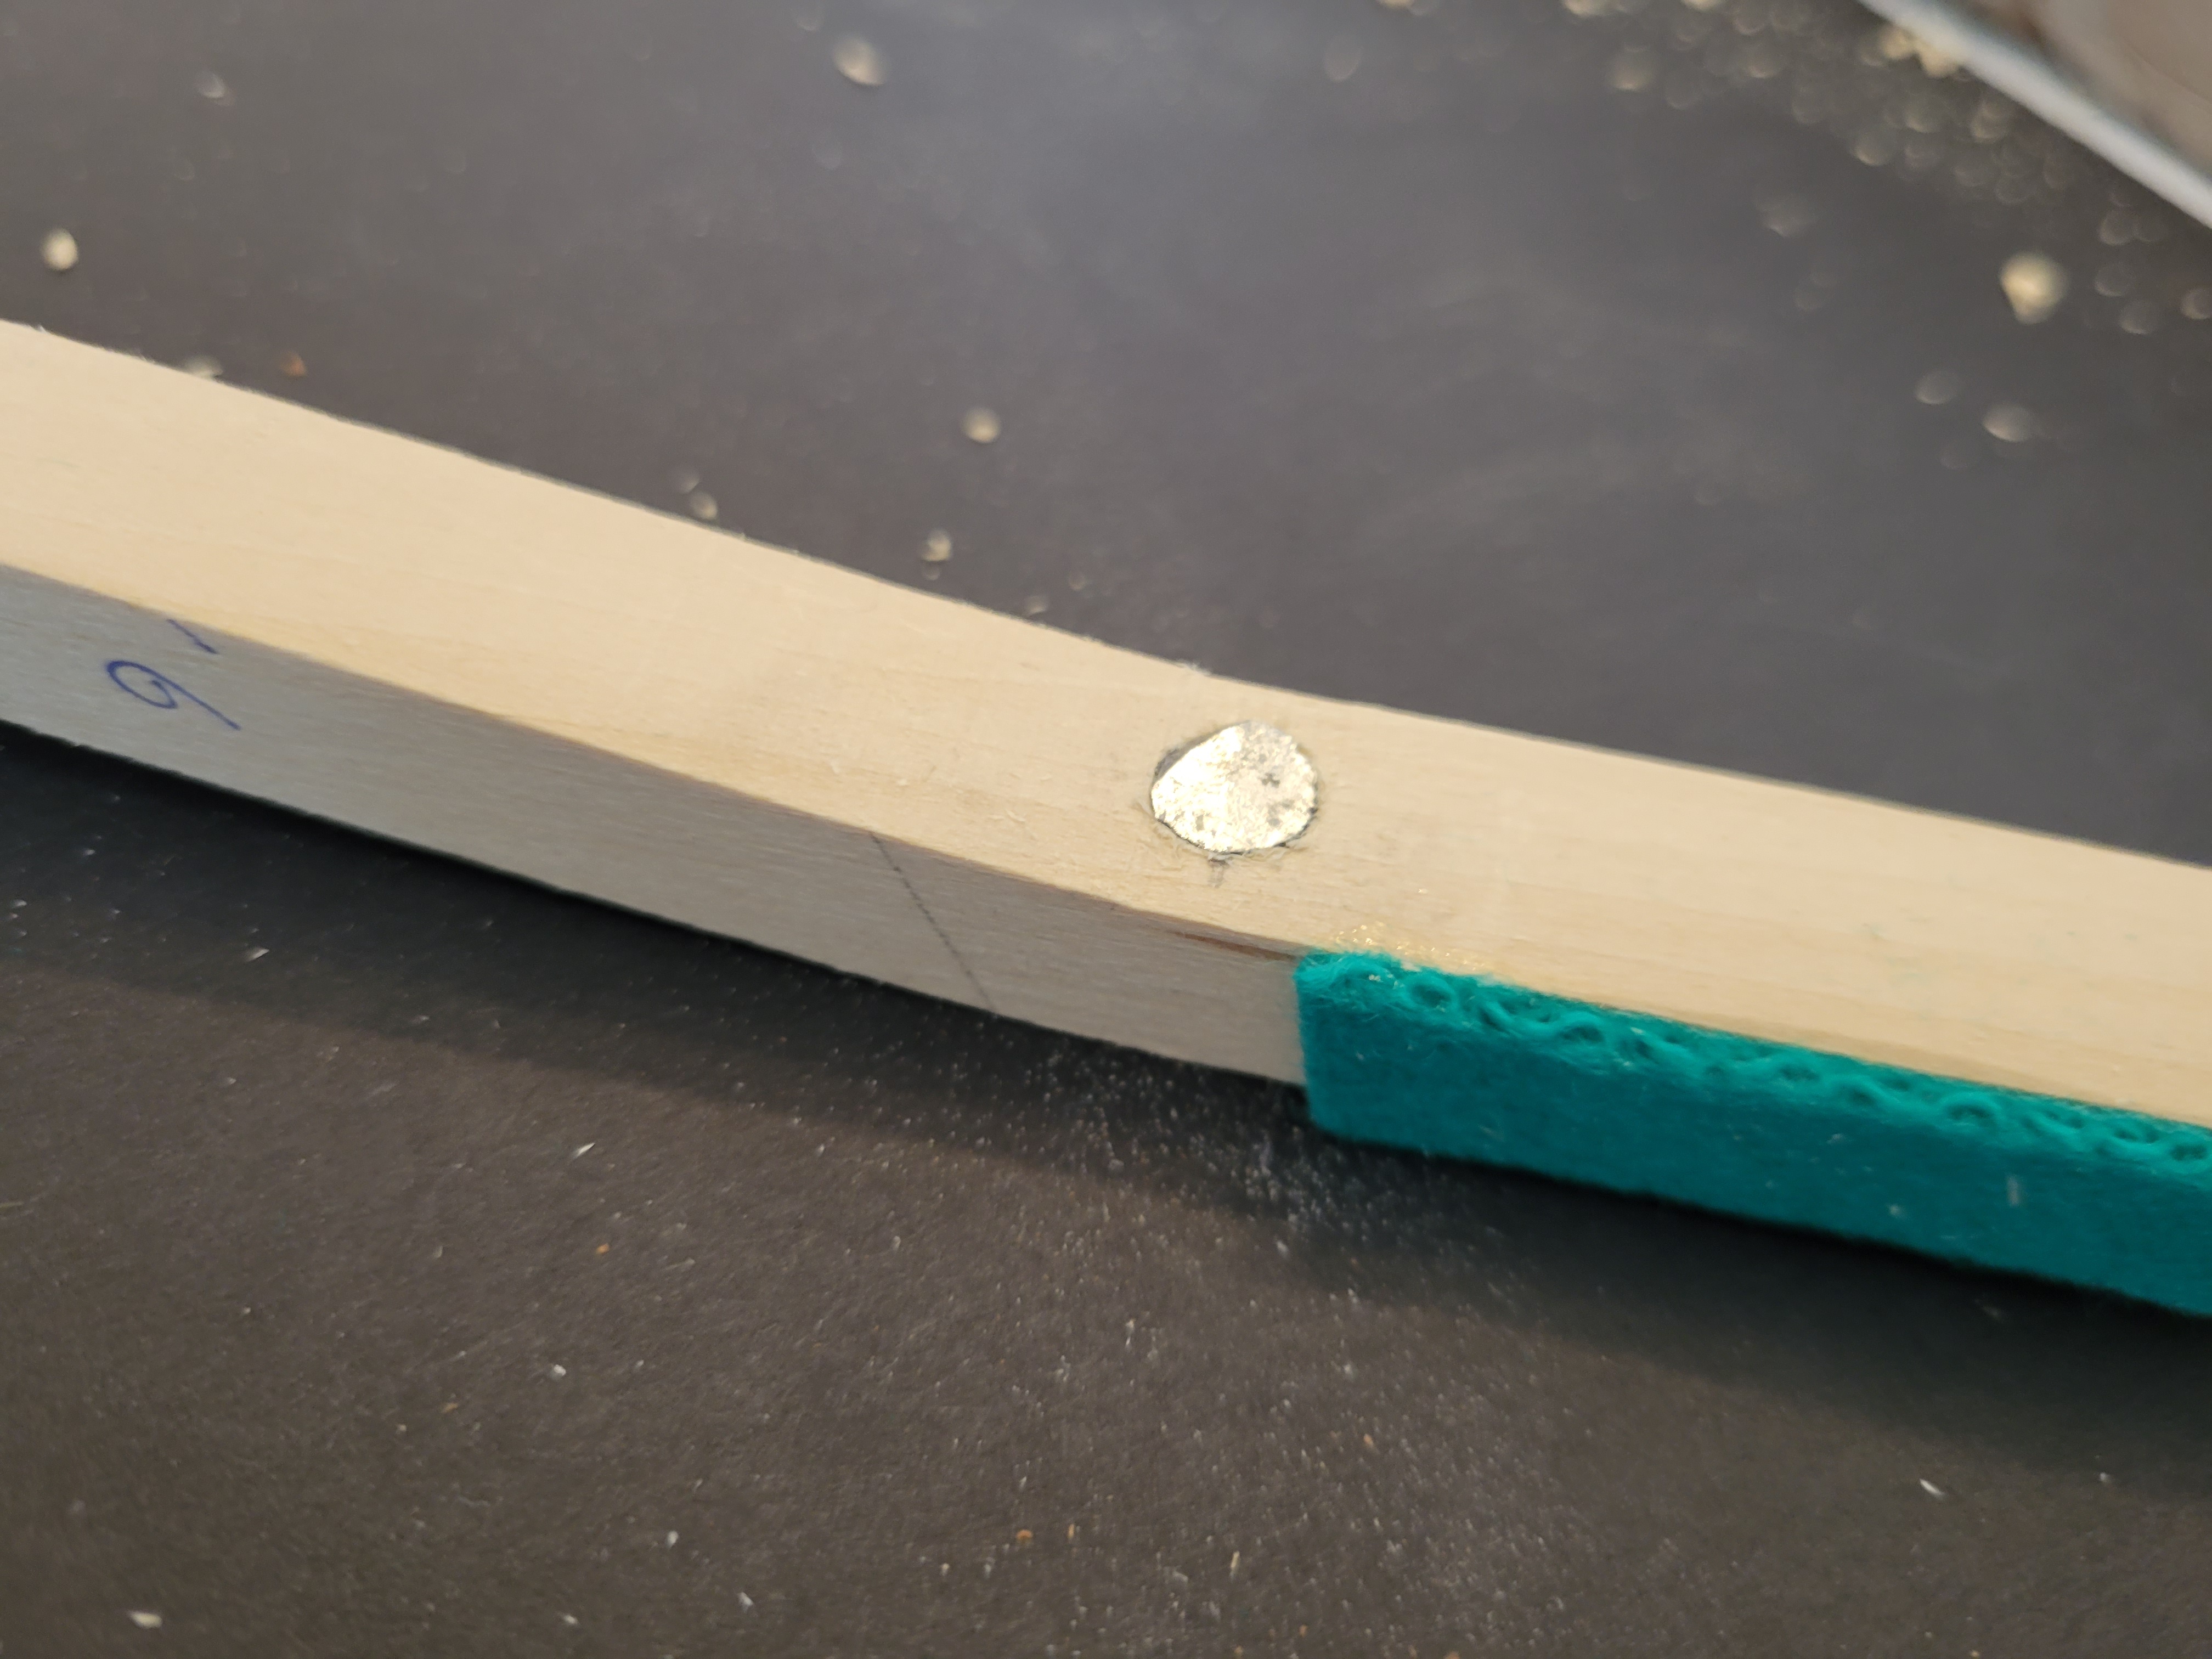
Sometimes two pieces of lead were needed, and for the key at the far right, I used three. Pieces that fell out of their holes were secured with a drop of a cyanoacrylate-based adhesive. But using the glue was much clumsier when I inadvertently drilled all the way through the key. Before beginning work on the virginal, I was thinking about buying a small drill press but I did not. This is where it would have helped to drill holes of a maximum depth.
Although I was happier with my approach to balancing the keys, it’s still (as Kottick says) “not that exact a science” (p. 37). I tried to be consistent at least. I won’t know if I’ve succeeded until I use the keyboard to play.
Here are all the balanced naturals lined up for inspection. The placement of the lead weights would probably exhibit more of a pattern if they were all the same size.
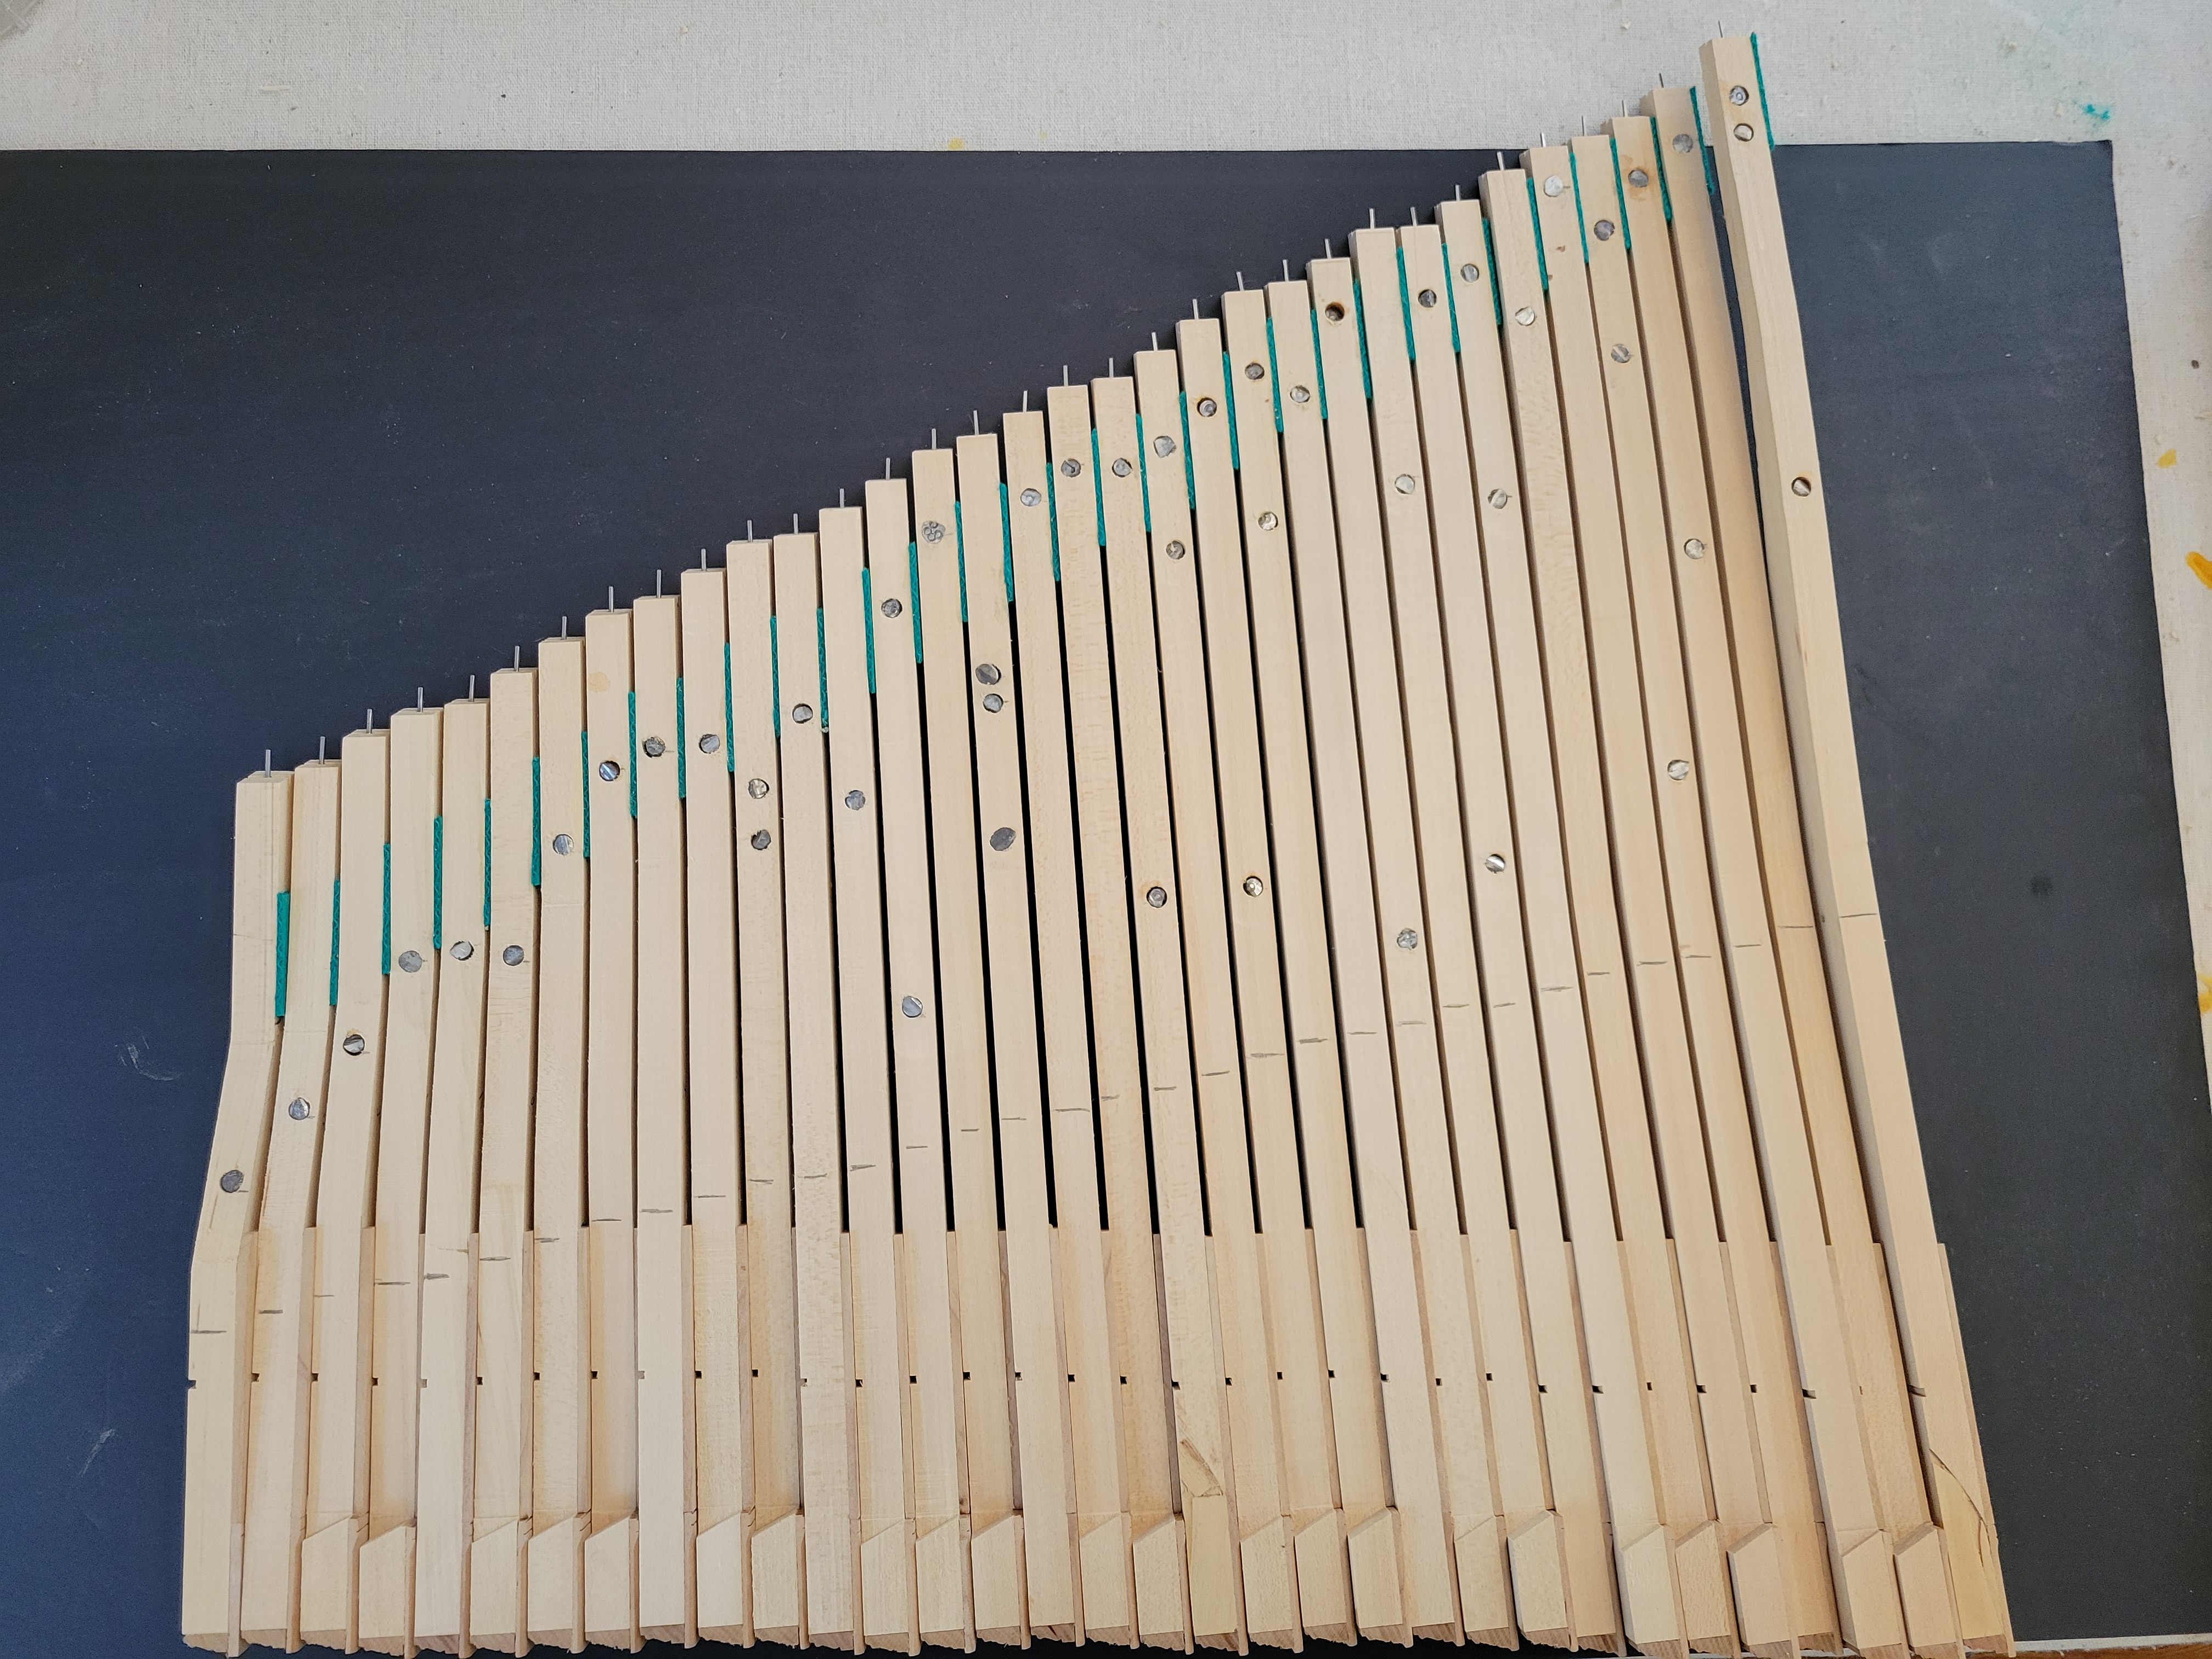
Inspection consisted of individually smacking the keys against my palm trying to dislodge the metal slugs. Any that came out were glued back in.
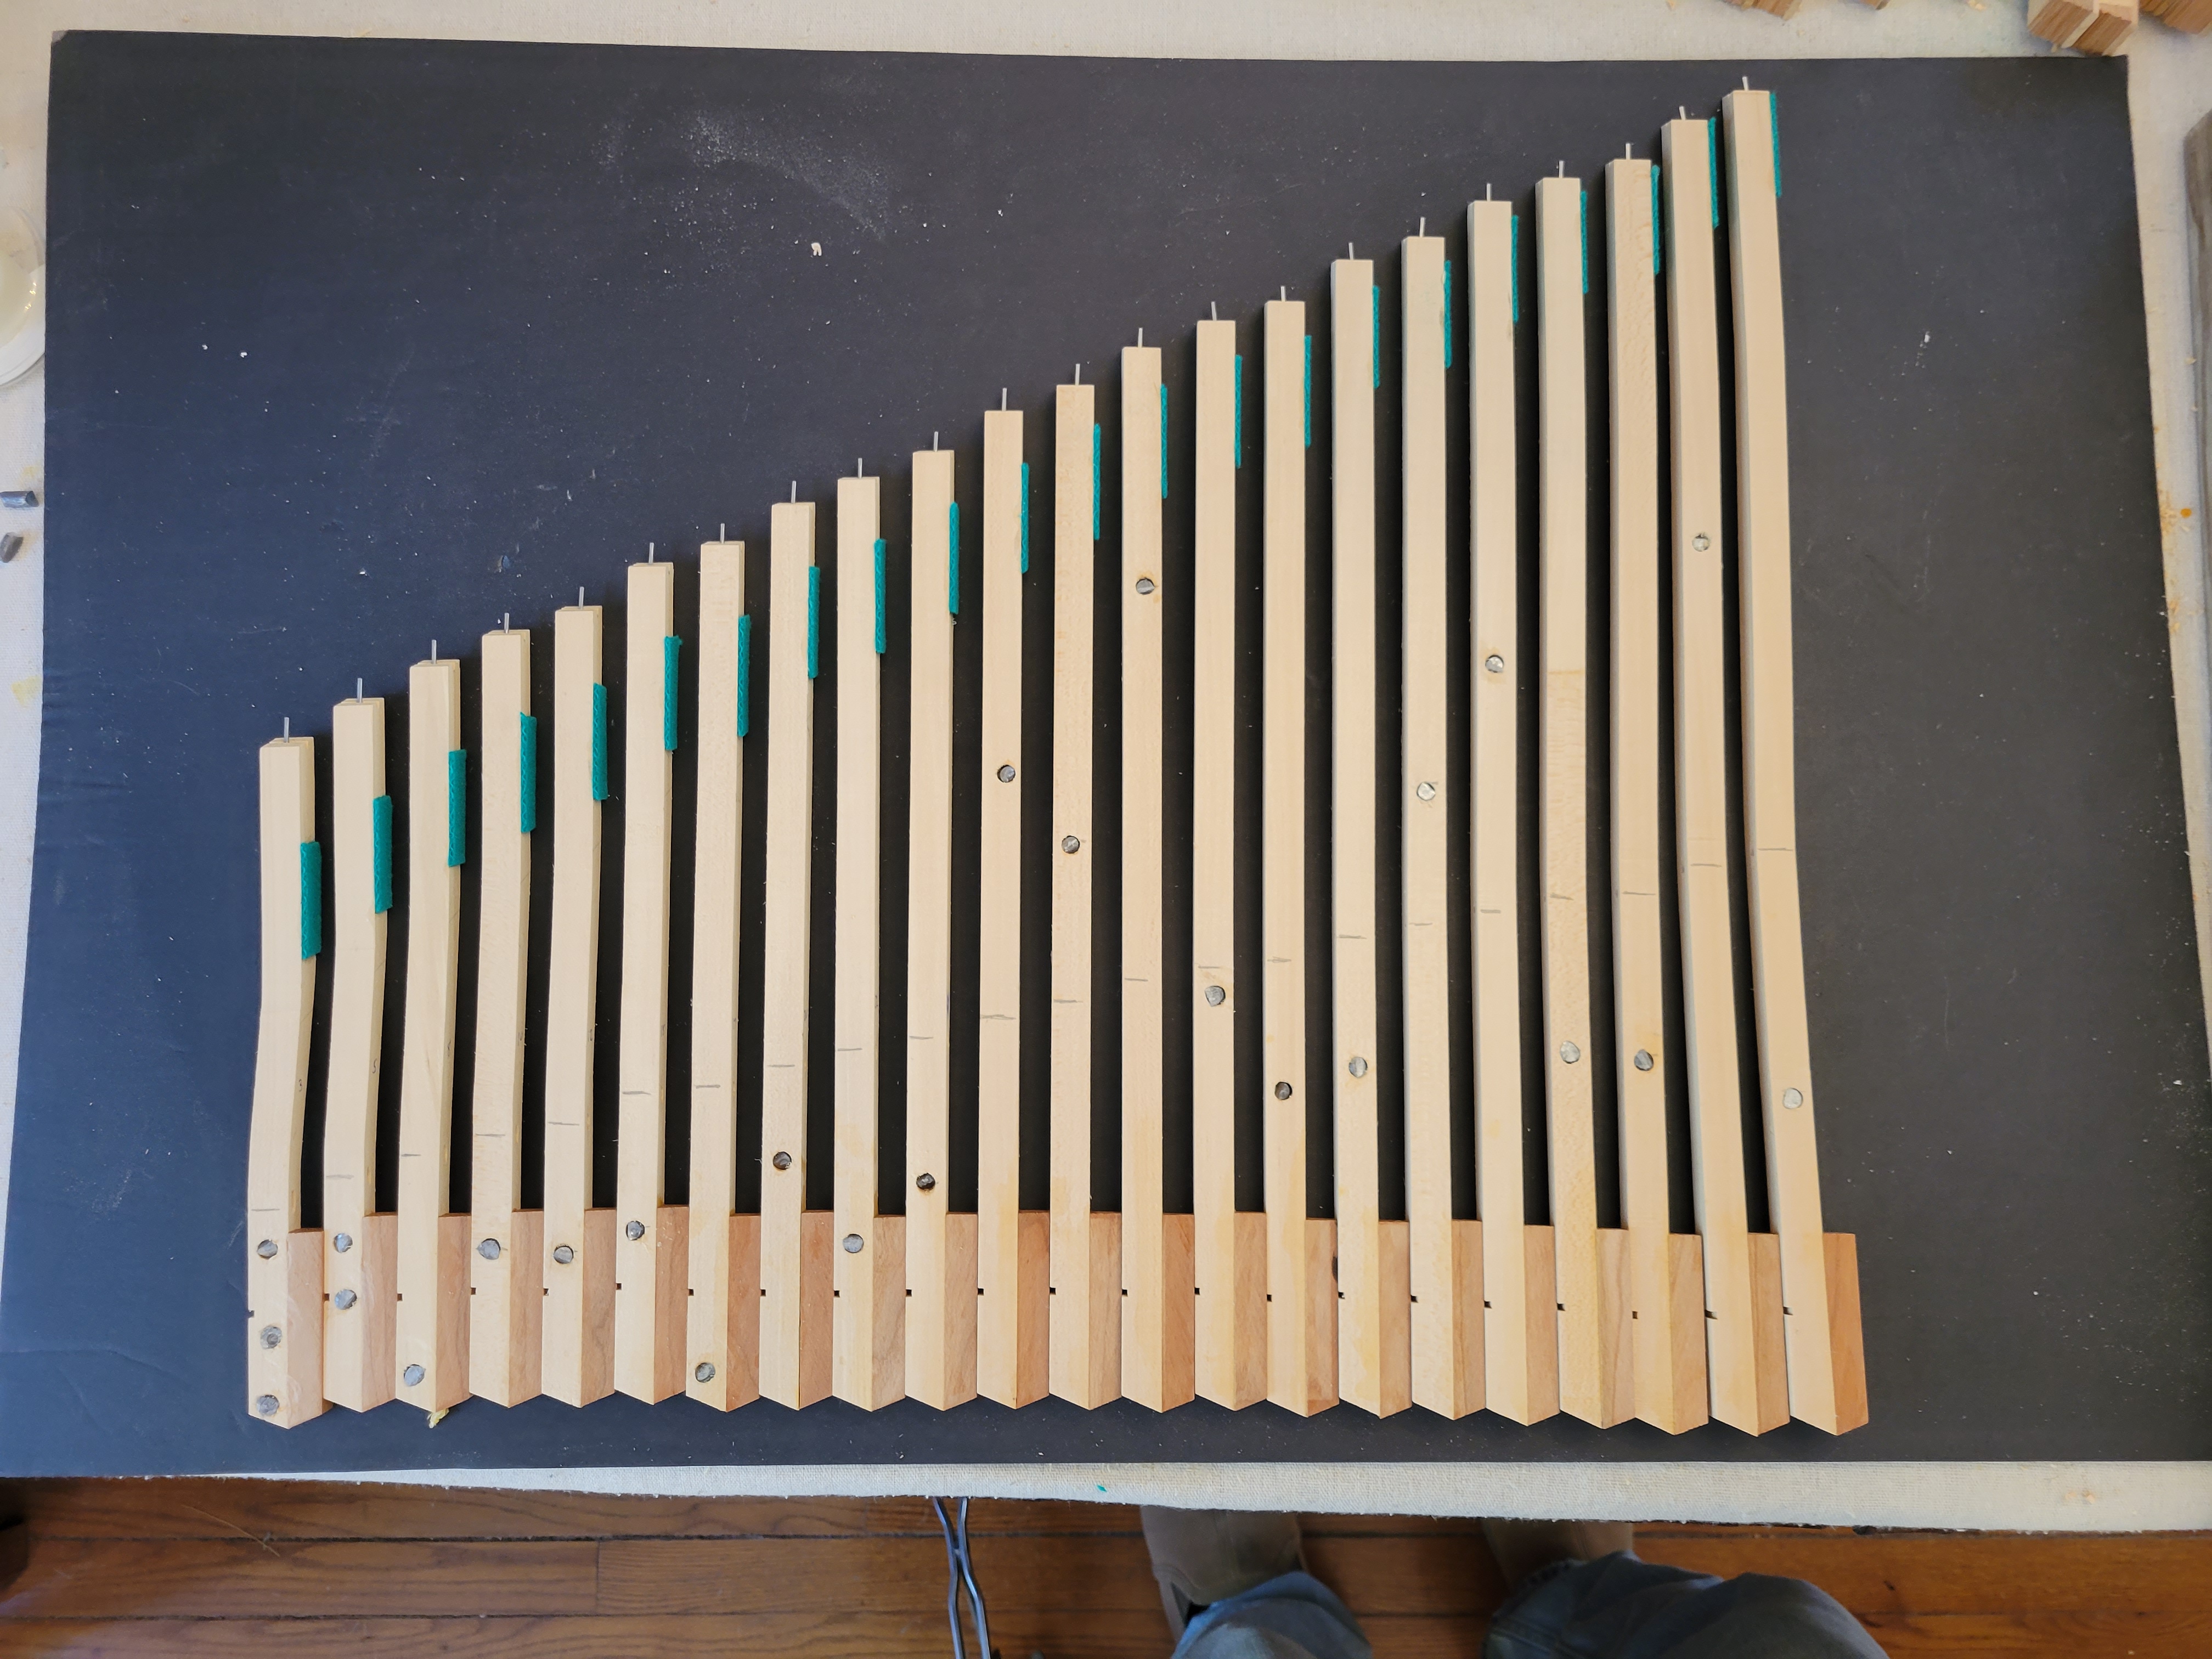
When balancing the keyboard sharps, I found it convenient to cut my lead pieces in half -- 3/16” long rather than 3/8". In some cases, weights were required in front of the pivot points:
Did it disturb me that when lining all the sharps up for inspection, the placement of the lead weights seemed quite erratic? Yes it did!
If I had to do this job over again, I would cut the lead weights to ¼” or use a drill press to control the drilling of the holes. It was definitely harder to work with a key that I had neglectfully drilled all the way through. I would also use a different tool to cut the lead. The heavy clippers I used left the ends with an angled shape.
I’d also rethink the balancing job once again, and try to find an approach that felt less like a kludge.