Building a Virginal: Assembling the Case
March 28, 2023
Roscoe, N.Y.
I began building my Zuckermann Troubadour Virginal with the keyboard frame and then performing some early work on the keys called easing. Usually, however, the construction of a harpsichord or virginal begins with assembling the case, which makes sense because almost everything else goes into the case.
Assembling the case is not described in The Troubadour Virginal: Construction and Maintenance Manual PDF by Ed Kottick, the designer of the Troubadour Virginal. Instead, the good folks at Zuckermann made a 1 hour 48 minute video that shows the process and throws in a bunch of handy woodworking tips as well:
I watched this video before I ordered a Troubadour Virginal kit and probably four or five times before I took delivery of it. It’s so well done that I guarantee that you’ll undoubtedly be craving detailed videos of the rest of the Troubadour construction. Those, alas, do not exist. There are a few videos on specific topics, but for much of the rest of the project you’ll need to go to the printed Manual and the several photographs that accompany it.
The assembly of the case that I describe in this blog entry took place over three days: March 12, 26, and 27 (days 3, 4, and 5 of construction). Because my wife and I live in New York City, and I’m building the virginal at our little house in the Catskills, my work schedule is erratic.
I followed the video fairly closely, and one of the first things I did was put all the pieces together in a mock-up to see approximately what it’ll look like when I’m done:
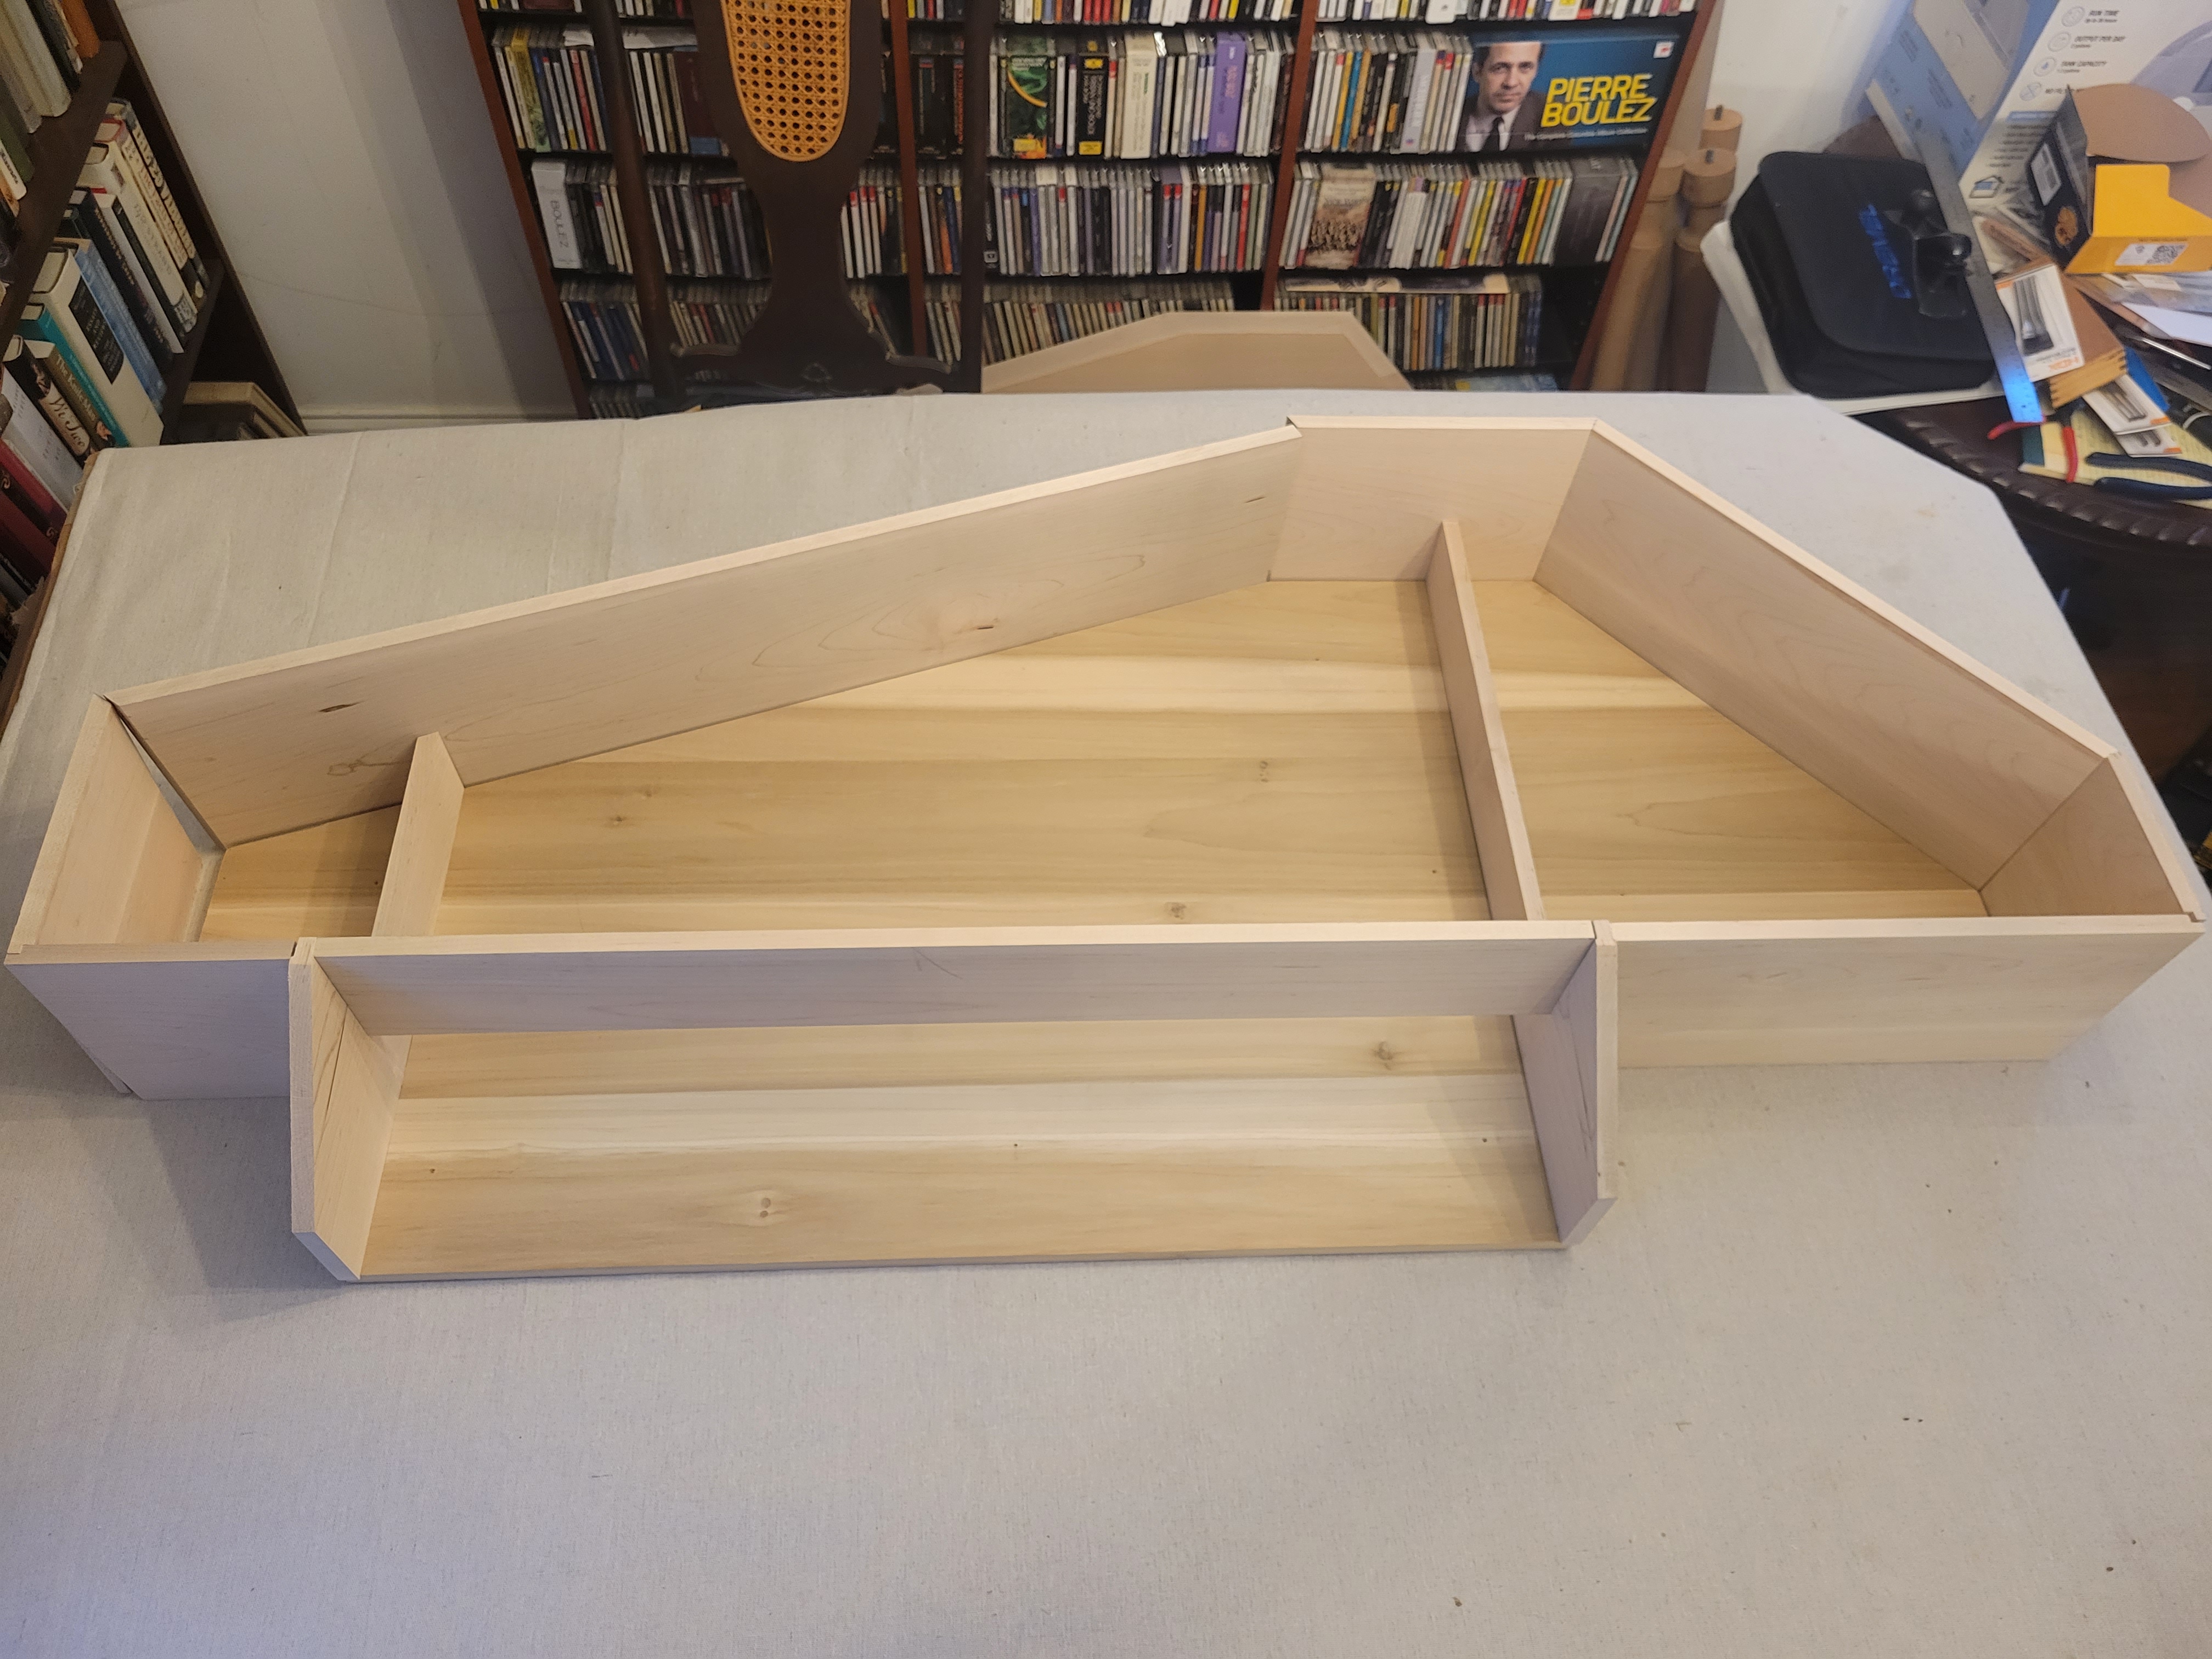
Don’t touch it or it’ll all fall apart!
This is the underside of the bottom of the virginal case:

I’ve drilled holes for attaching the cheeks and I’ve attached eight little plexiglass blocks at the corners. These are temporary and serve to hold the sides in place as they are attached.
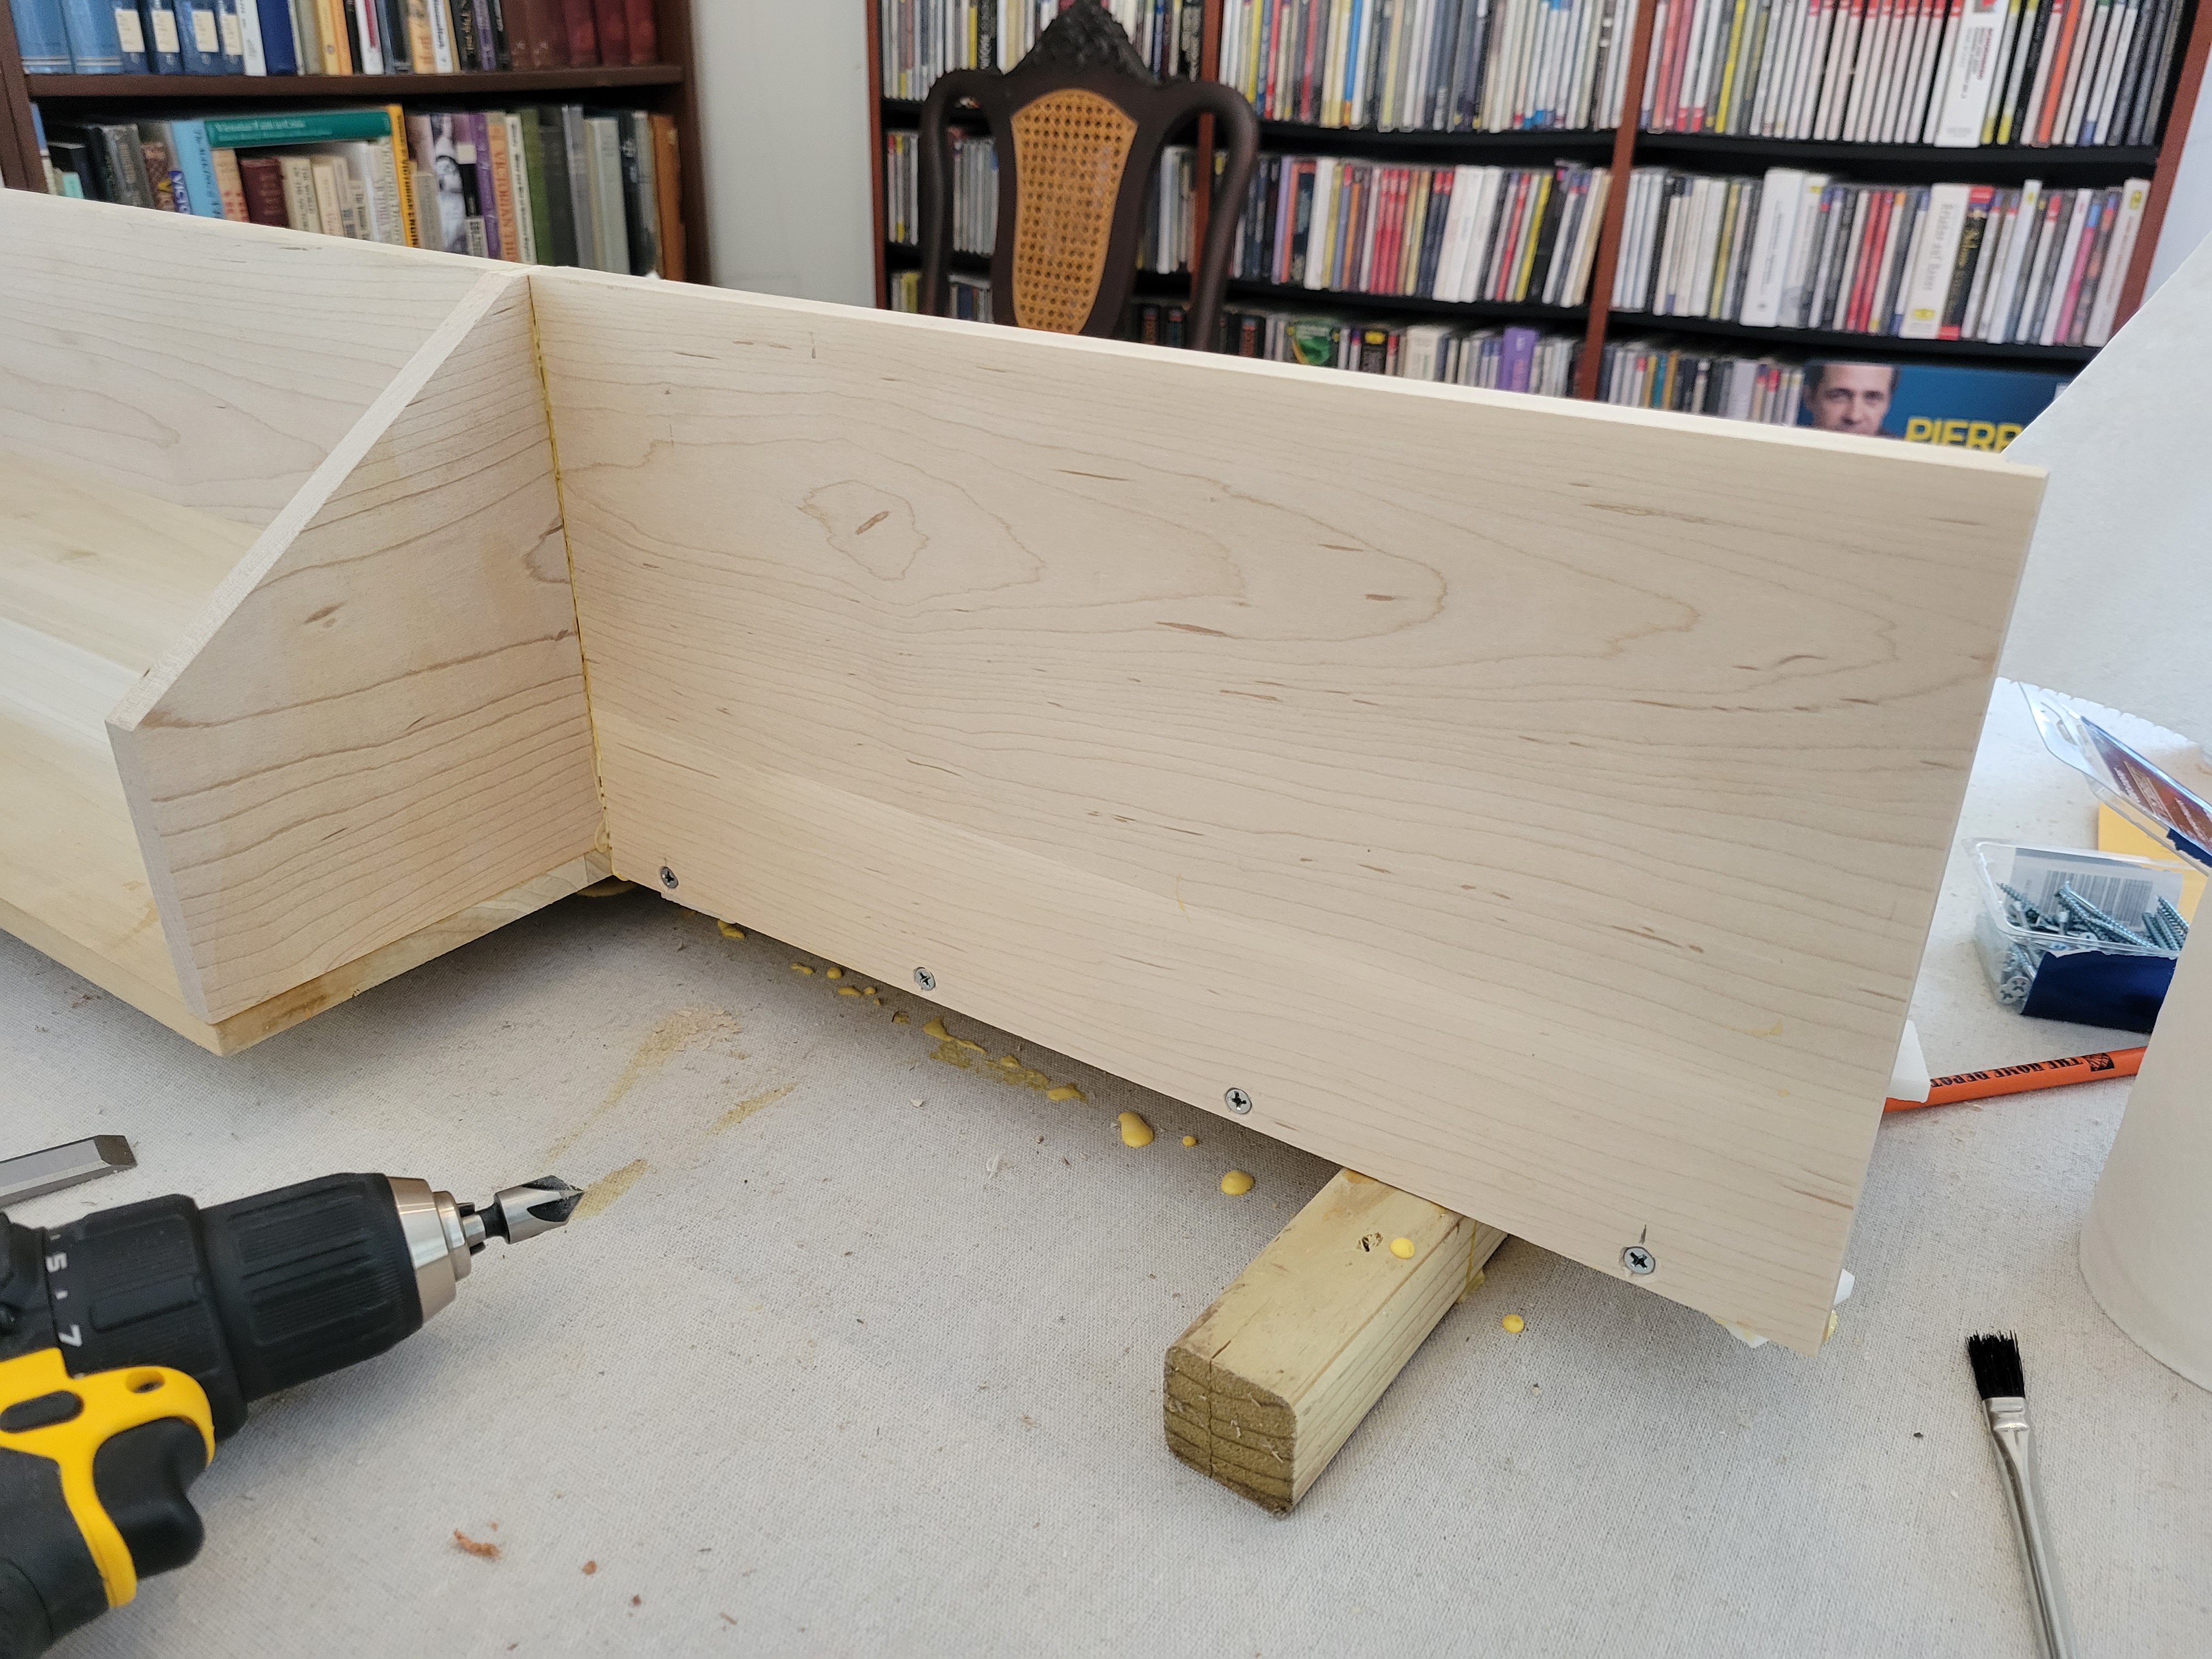
The two cheeks that surround the keyboard are positioned in the dados that are pre-cut in the base, and then clamped into place:
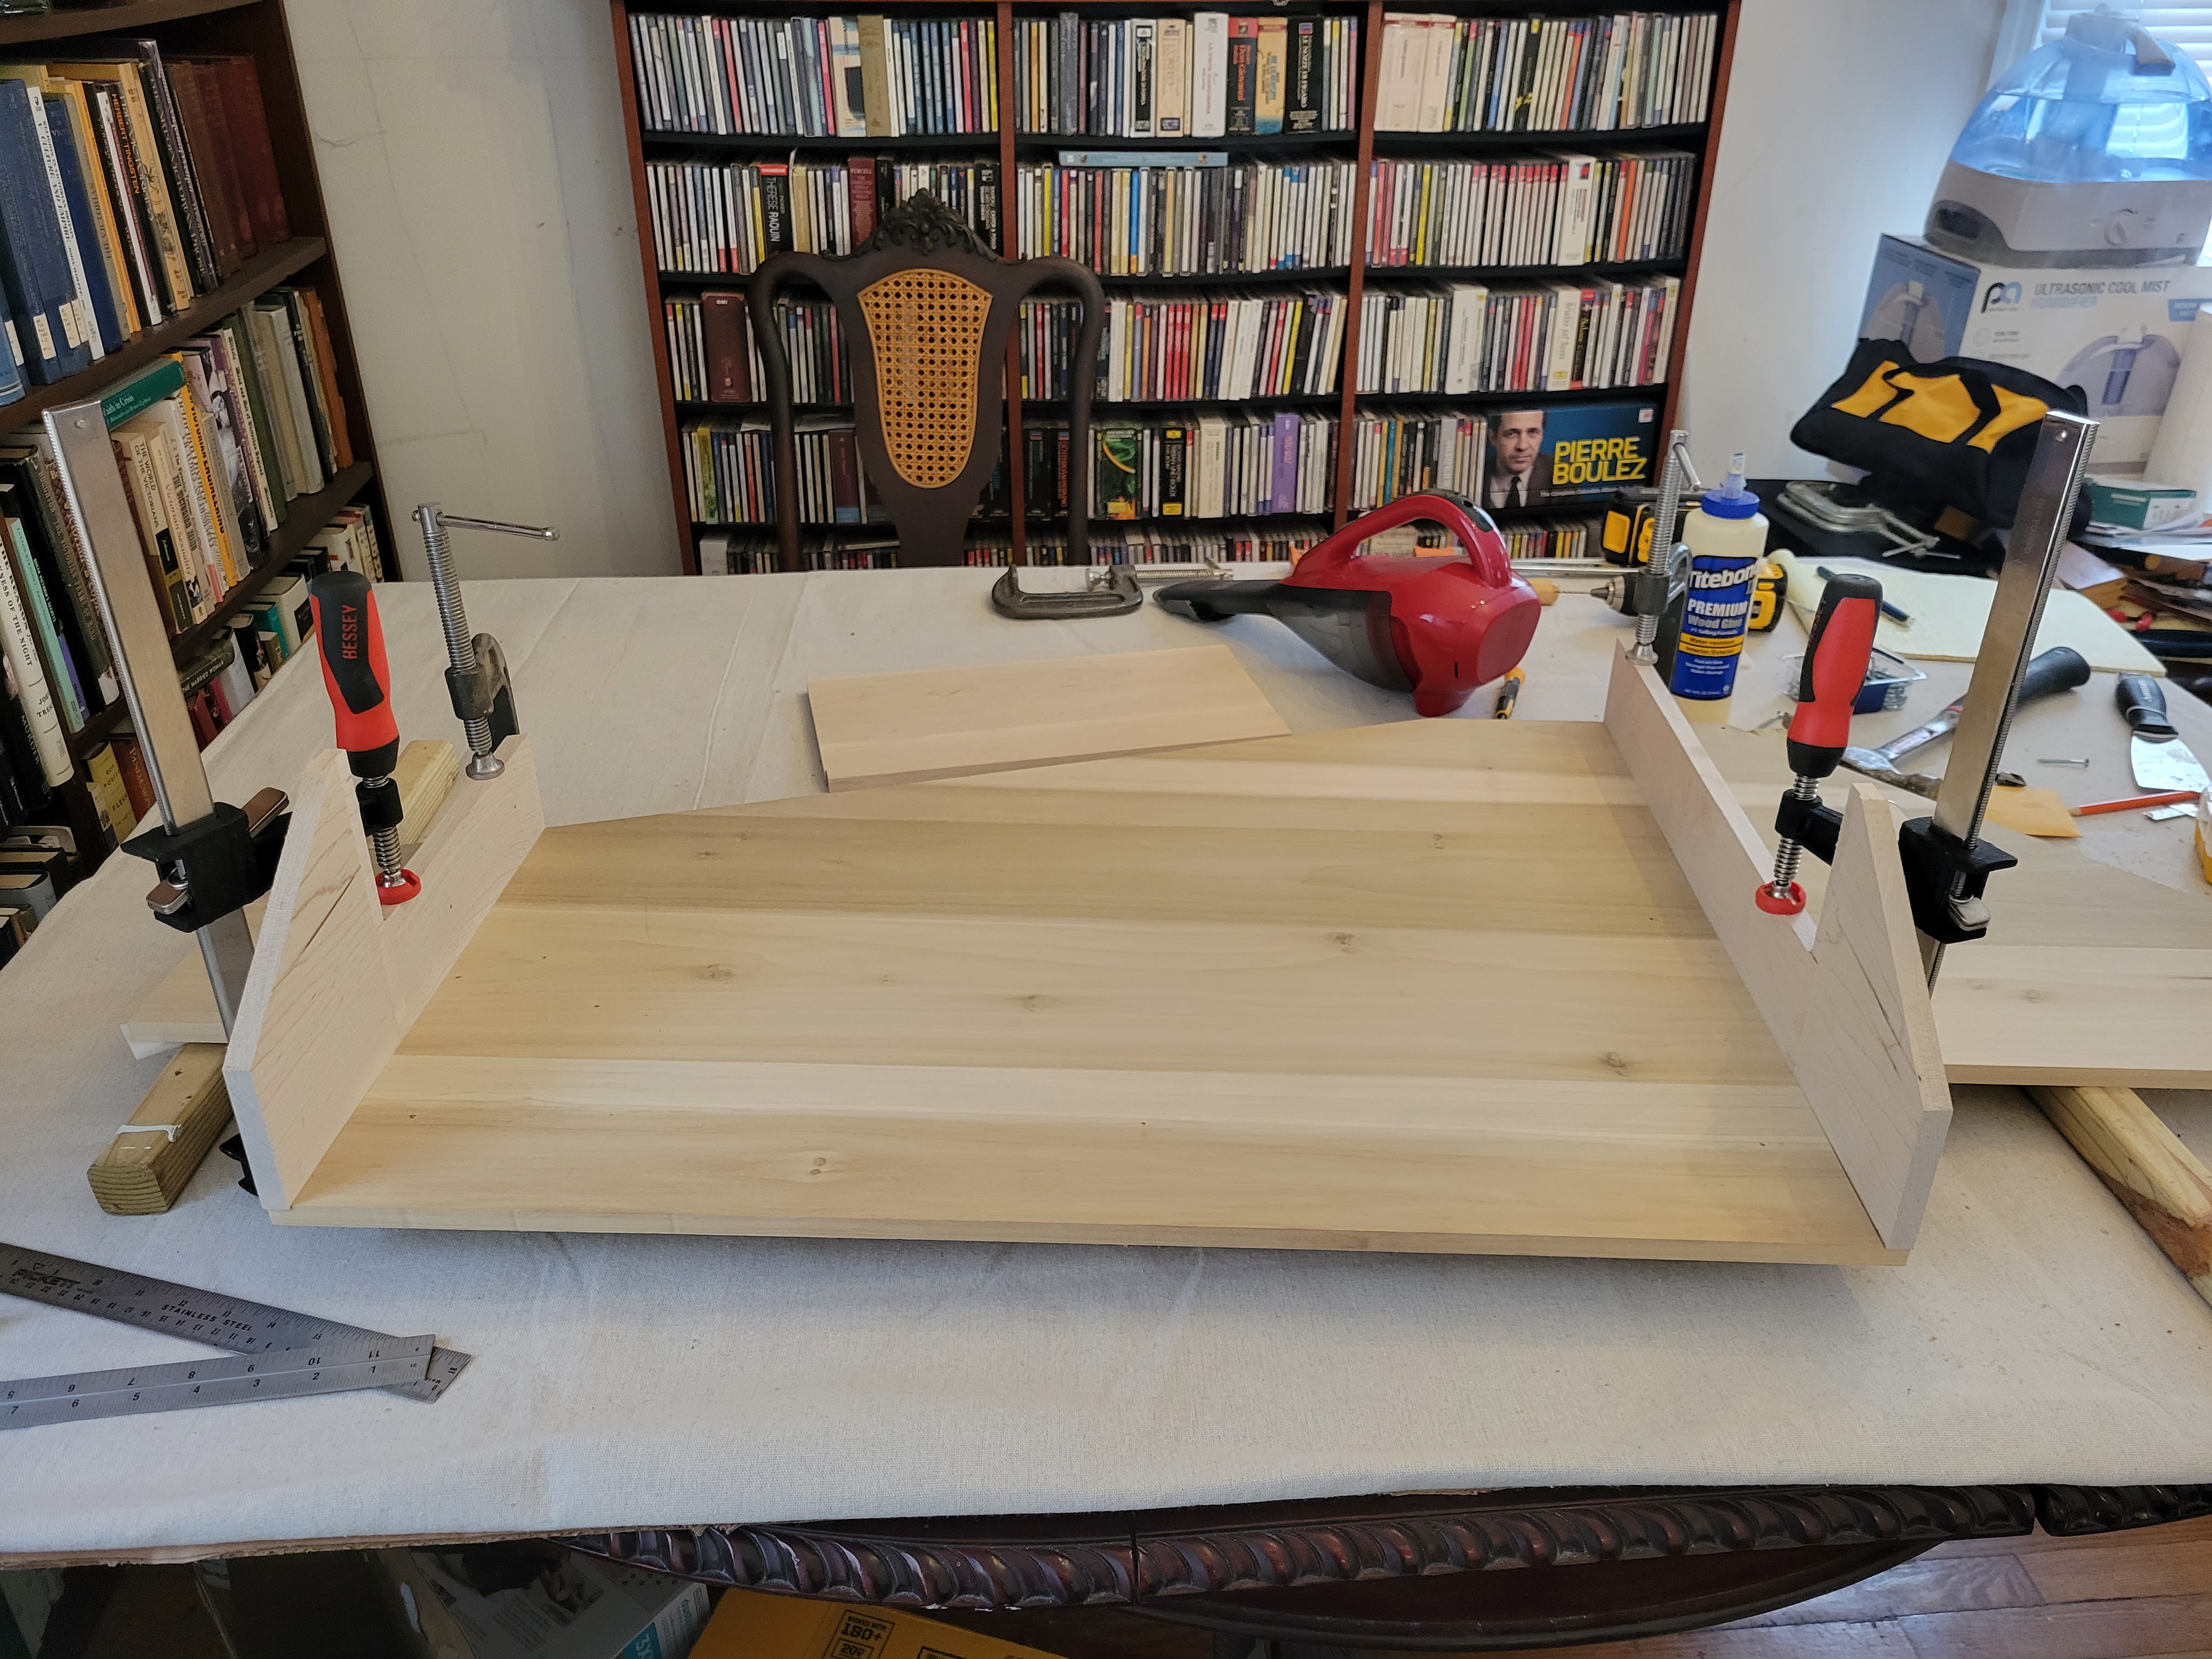
With the clamps in place, the case is flipped over, pilot holes are drilled into the cheeks, and wood screws hold the cheeks in place. Clamps and screws are then removed, wood glue is applied, and then the screws go back in to pull the cheeks to the base:
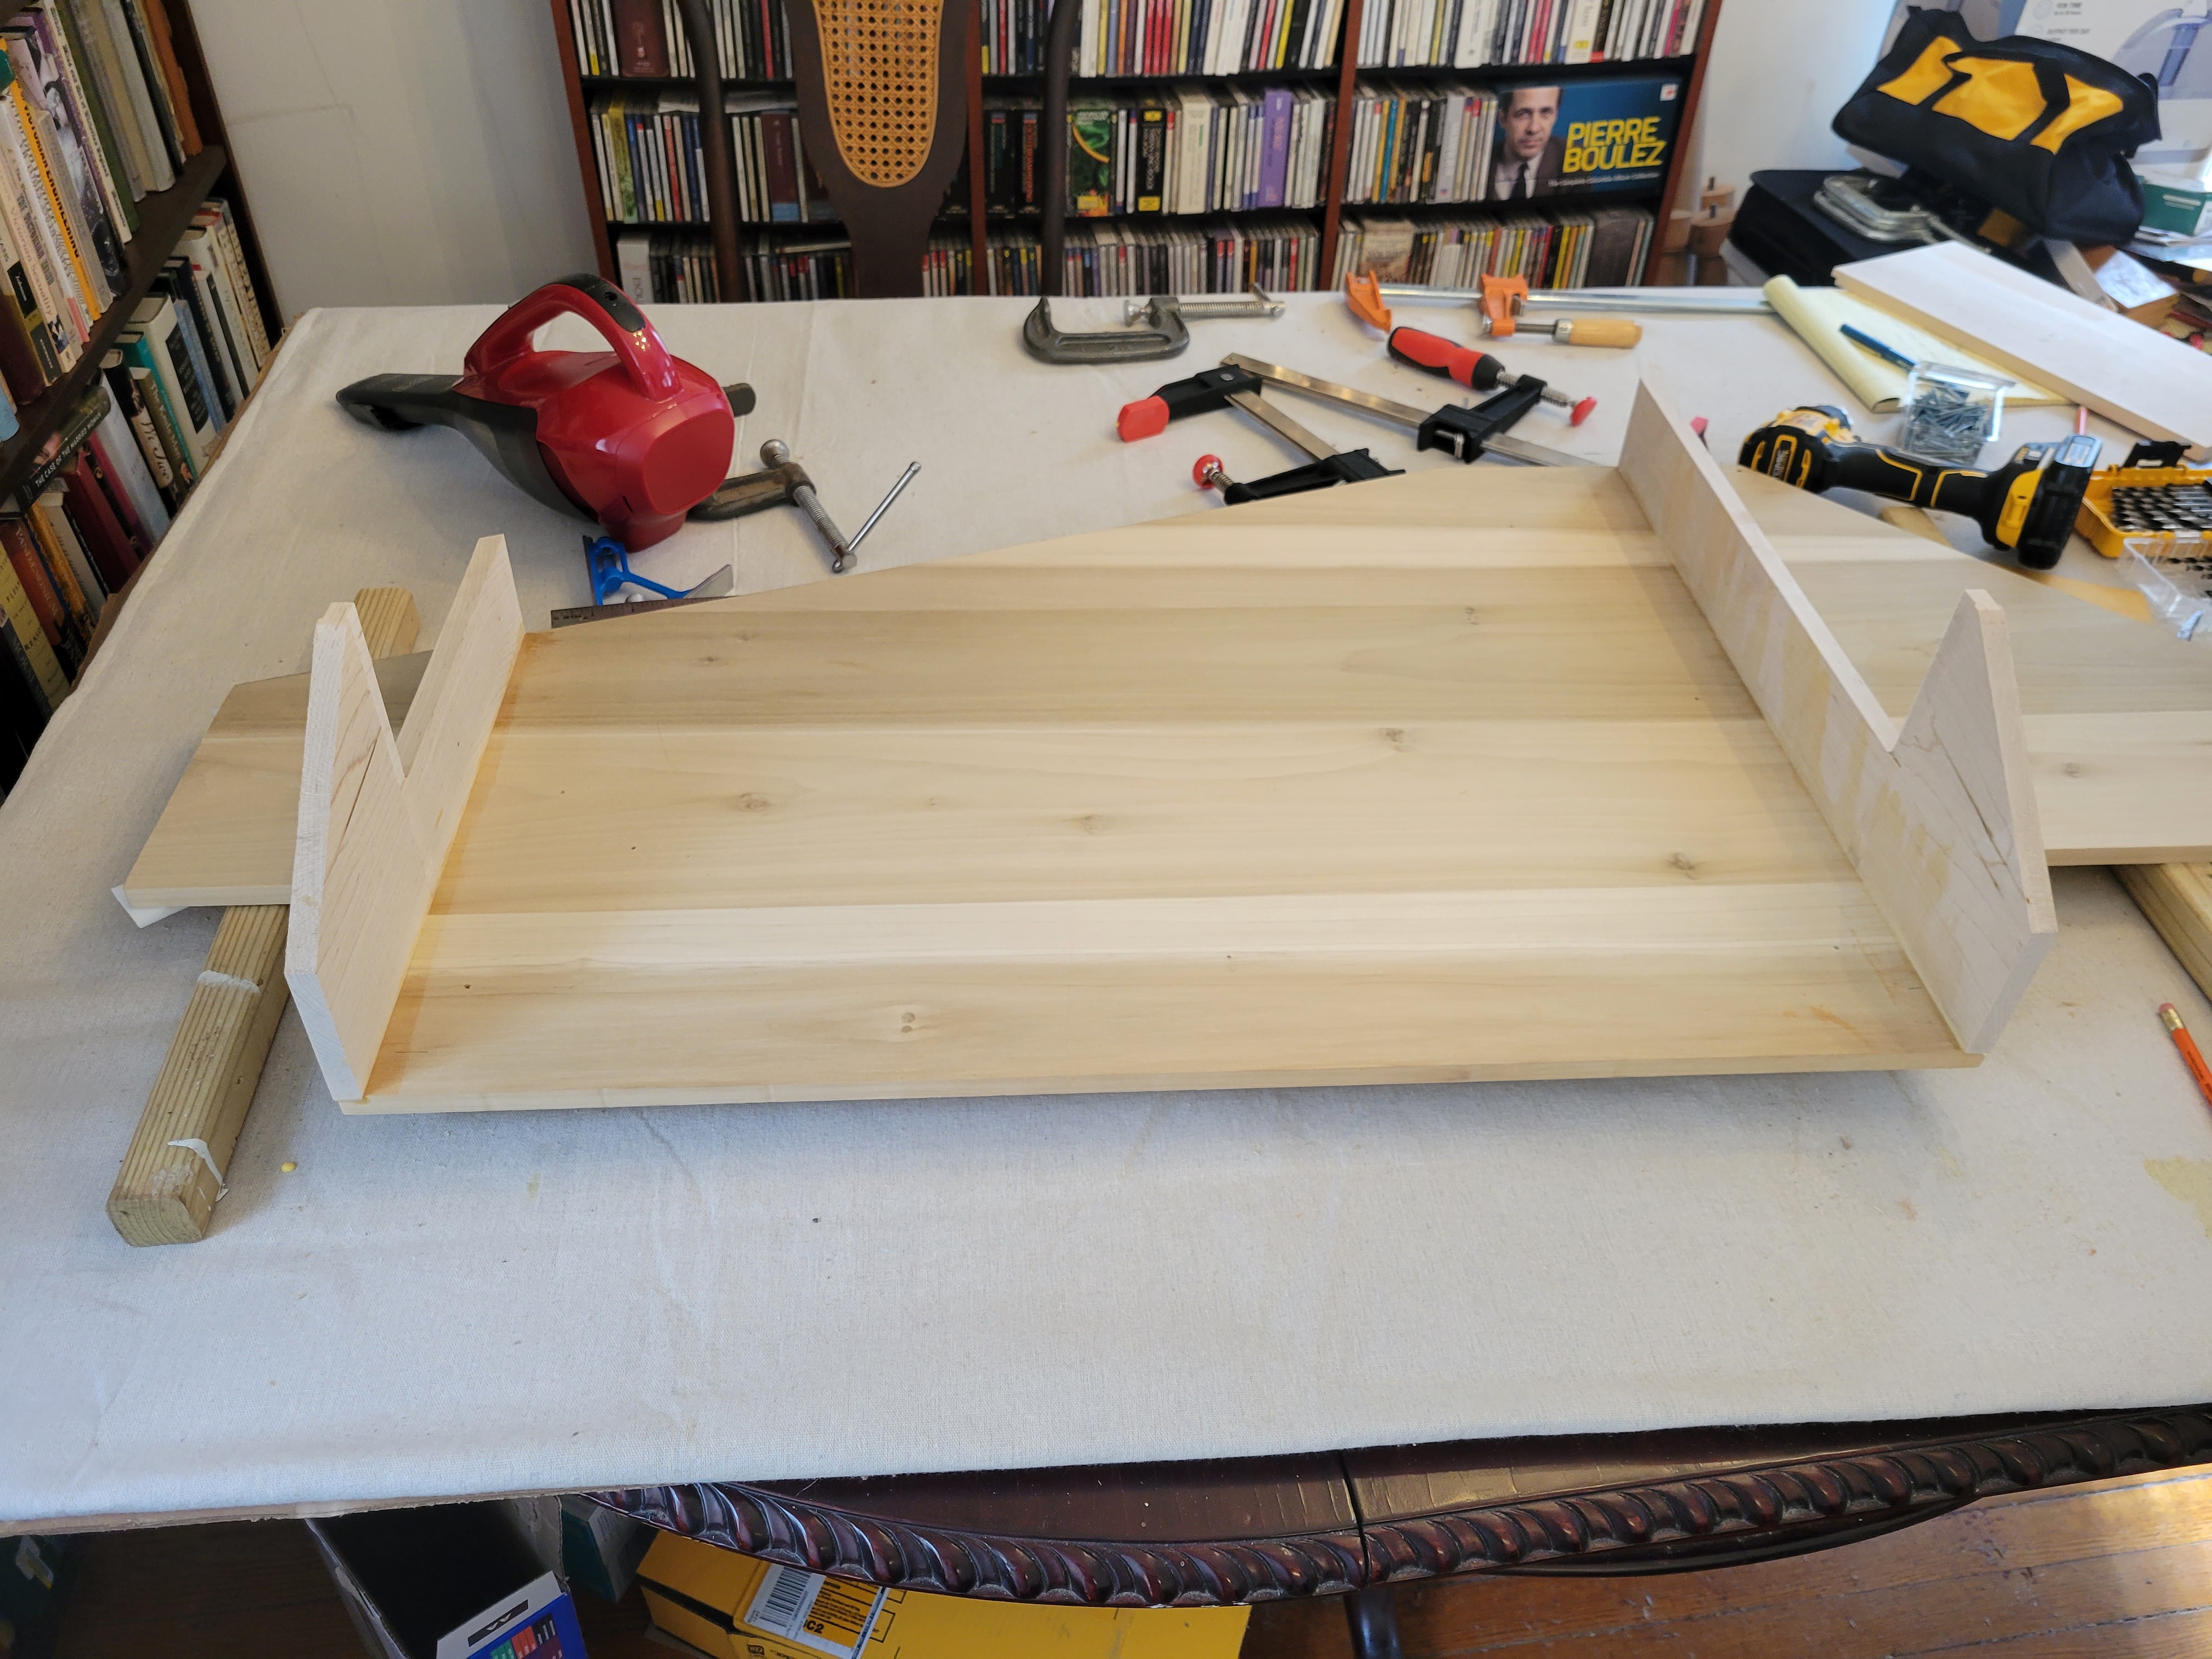
Next is another board between the two cheeks. Like everything else in the case, it is both glued and screwed.
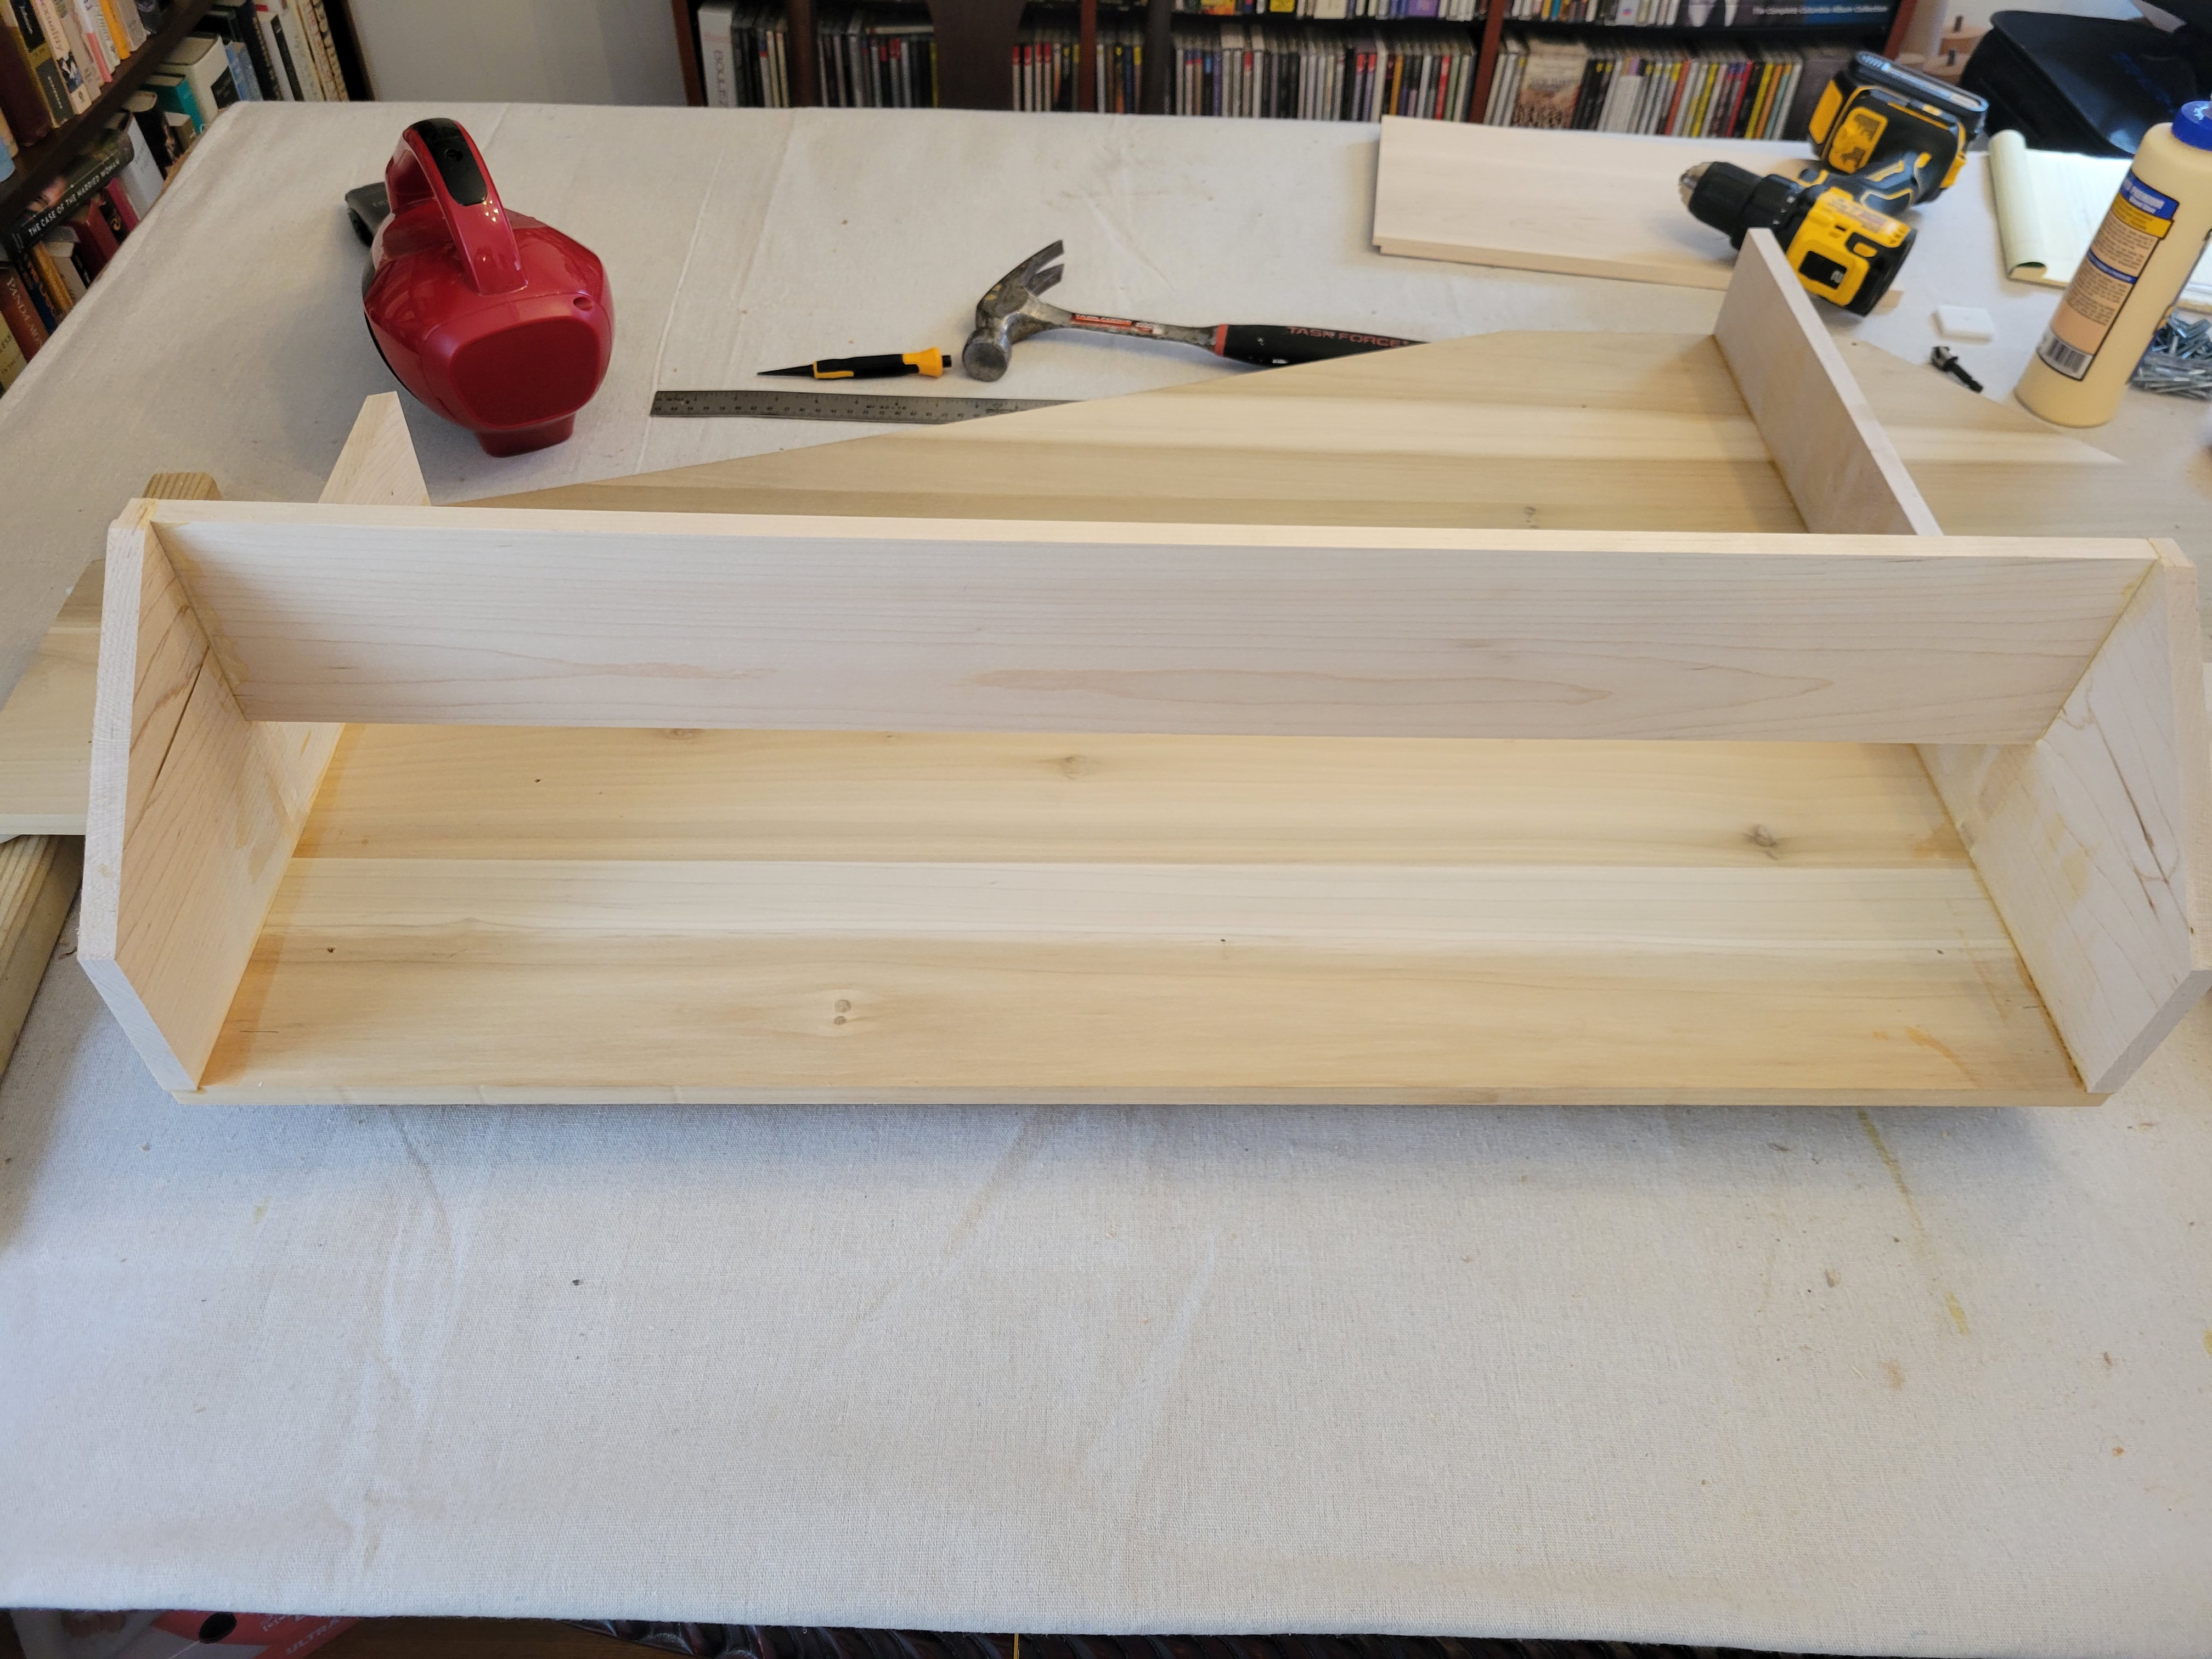
The construction video refers to this board as the “nameboard,” which I find a bit confusing. It is not the board on which the builder’s name appears.
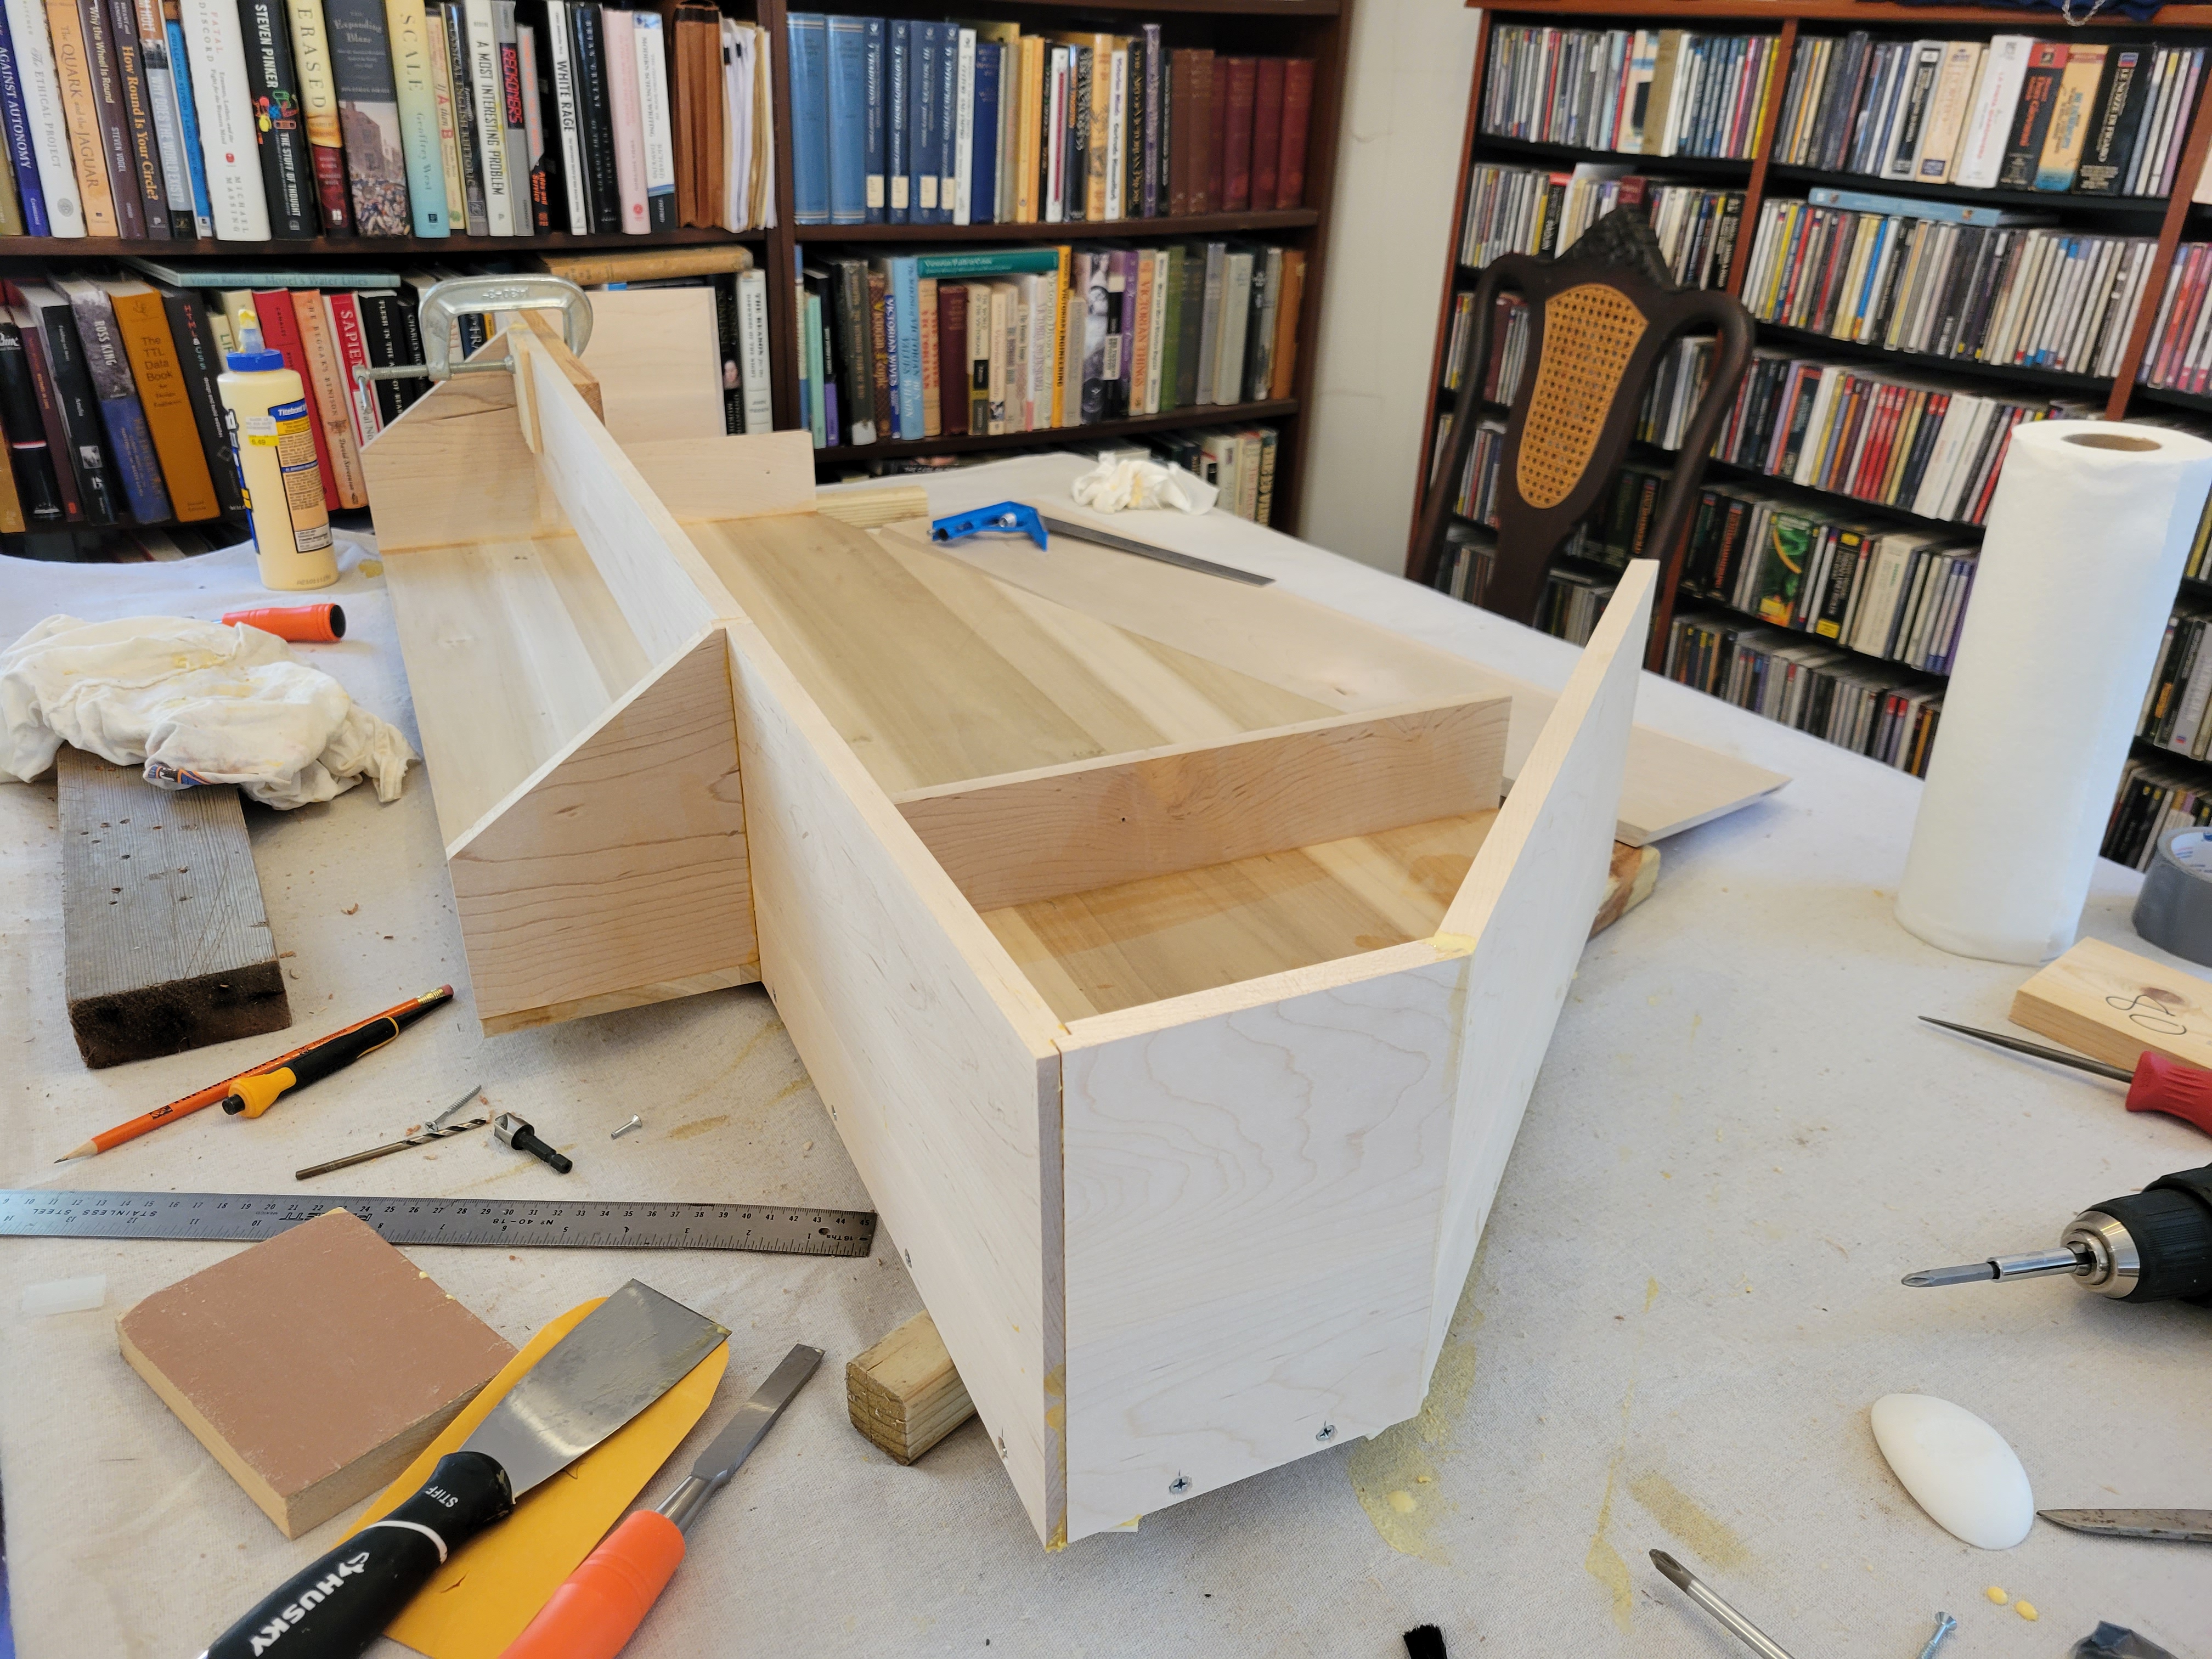
Some virginals are rectangular. The Troubadour has a polygonal case with seven sides. For each side (which I will sometimes refer to as a “panel"), the process is the same: First, make sure the side fits where it’s supposed to be. Then drill holes in the side for wood screws to pass through, and a countersink so the heads are recessed. Screw it on. Check it out. Then remove the screws, apply wood glue and screw it back on. If you’ve used sufficient wood glue, some squeezes out as you screw it down. The technical term for this is “squeeze-out,” and you can see some glue dripping down on my work surface, which is a canvas dropcloth over a large piece of cardboard (the box the kit came in) on our dining-room table:
That’s the right front panel. The screws are recessed and later covered with molding.
This photo shows the left front panel, and the left side panel:

There are three screwups here. The first is that I neglected to put a little soap on one of the screws, and just by hand cranking, so much heat can be generated that the screw comes apart:
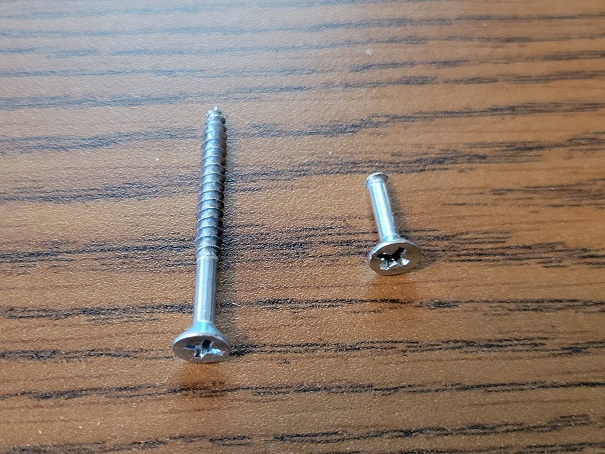
You’re left with just the top part of the screw and the rest is buried in the wood. The only real solution is to drill another hole, which you can see in the photo.
What you probably can’t quite see is that the left front panel is a little warped from bottom to top. I should have not proceeded until I fixed that, probably with some good strong clamps or maybe with a hot iron. But I tried to ignore the problem (always unwise), and moved on to the next panel, which was somehow affected by the problem with the preceding panel and is a little lopsided. You can see that where the two panels meet at the top.
Unfortunately, that wasn’t my worst screwup of the day.
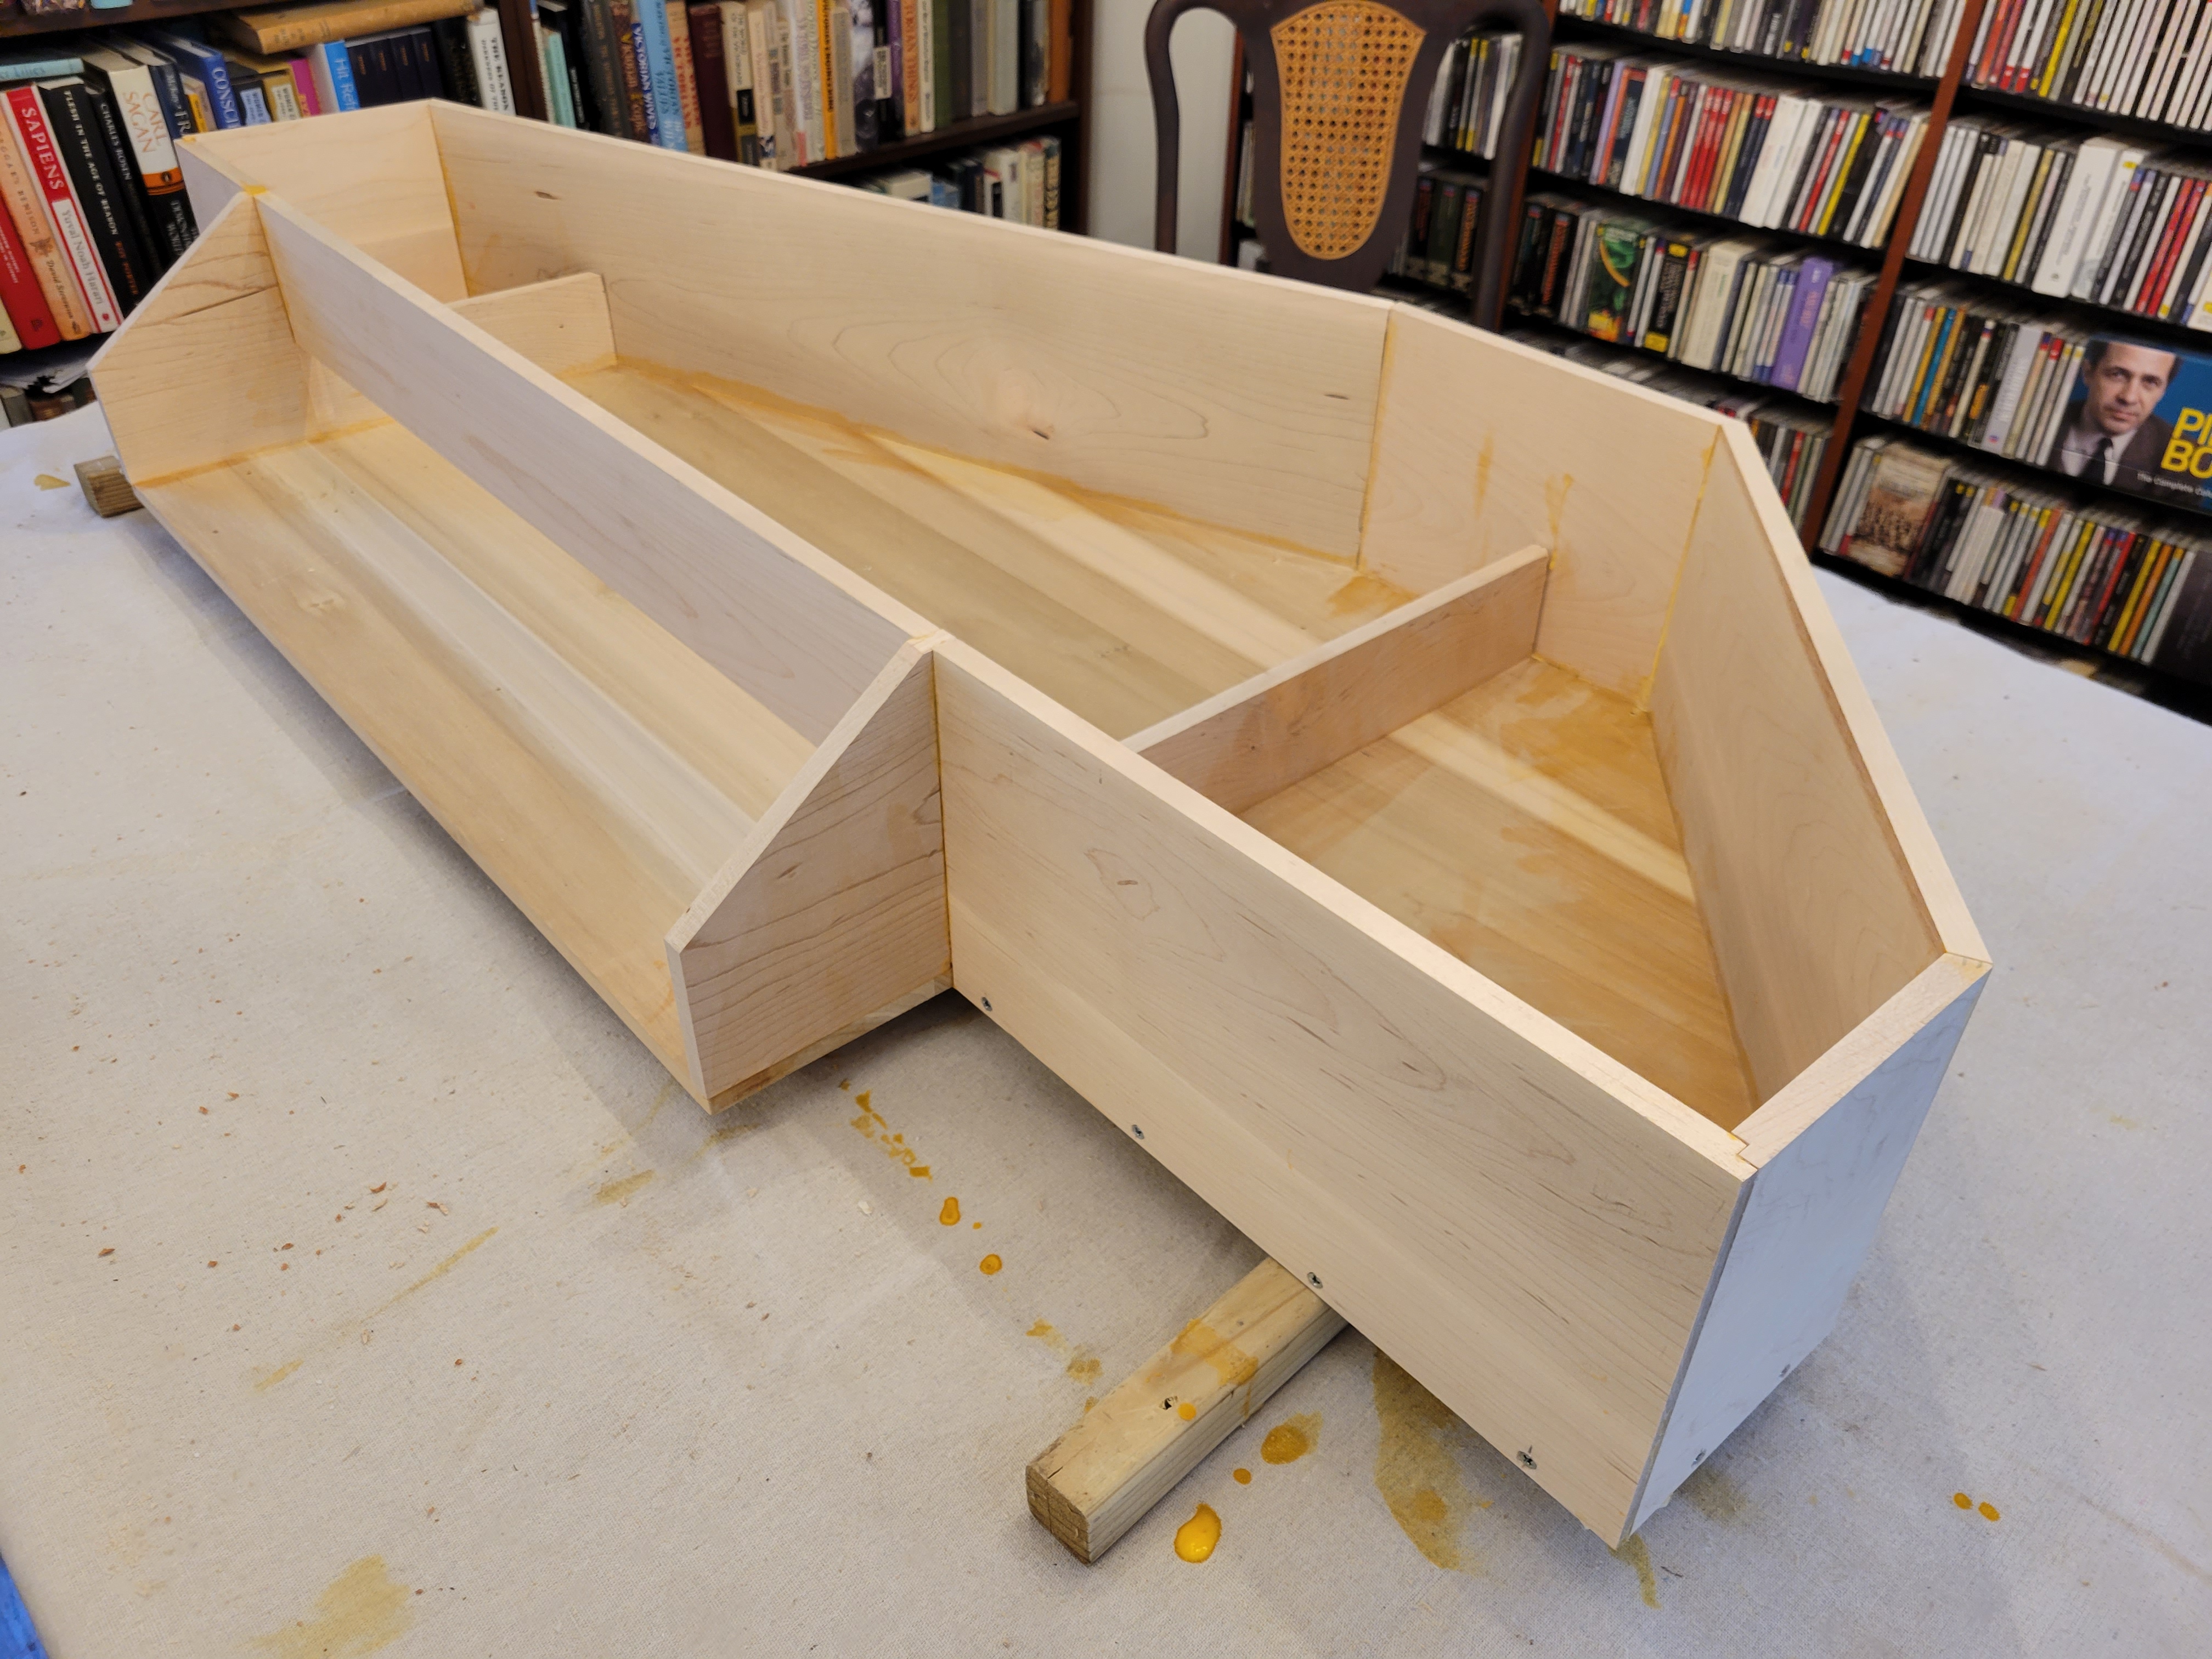
Here are the three side panels on the right side of the case:
The long panel at the back I had no problem with. But the shorter panel at the very rear (called the spine) did not fit. It was too wide. I probably should have taken it down to the basement and cut off a little with our chop saw, but instead I tried sanding it and then using a sanding accessory on the Dremel. I finally got it to fit (barely) but now it looks like crap and I can’t even look at it without feeling a little sick. Fortunately it’s in the back, and maybe I can spruce it up later.
What I know for sure is that if I were to do this again, I’d do it better.
For this photo, I managed to find a good view of the entire case that doesn’t embarass me:
Here is where the 1 hour 48 minute video ends and Ed Kottick’s Construction and Maintenance Manual begins. He begins with eight corner blocks, which give more support to the case and also support the “liners,” which in turn support the all-important soundboard. But Kottick’s descriptions of these parts (pages 13 to 14) isn’t sufficient in itself. You need to consult the terrific life-size Mylar drawing that Zuckermann supplies with the Troubadour kit, and I found it was essential for me to position the wooden pieces on the drawing to see where they go and how they are oriented.
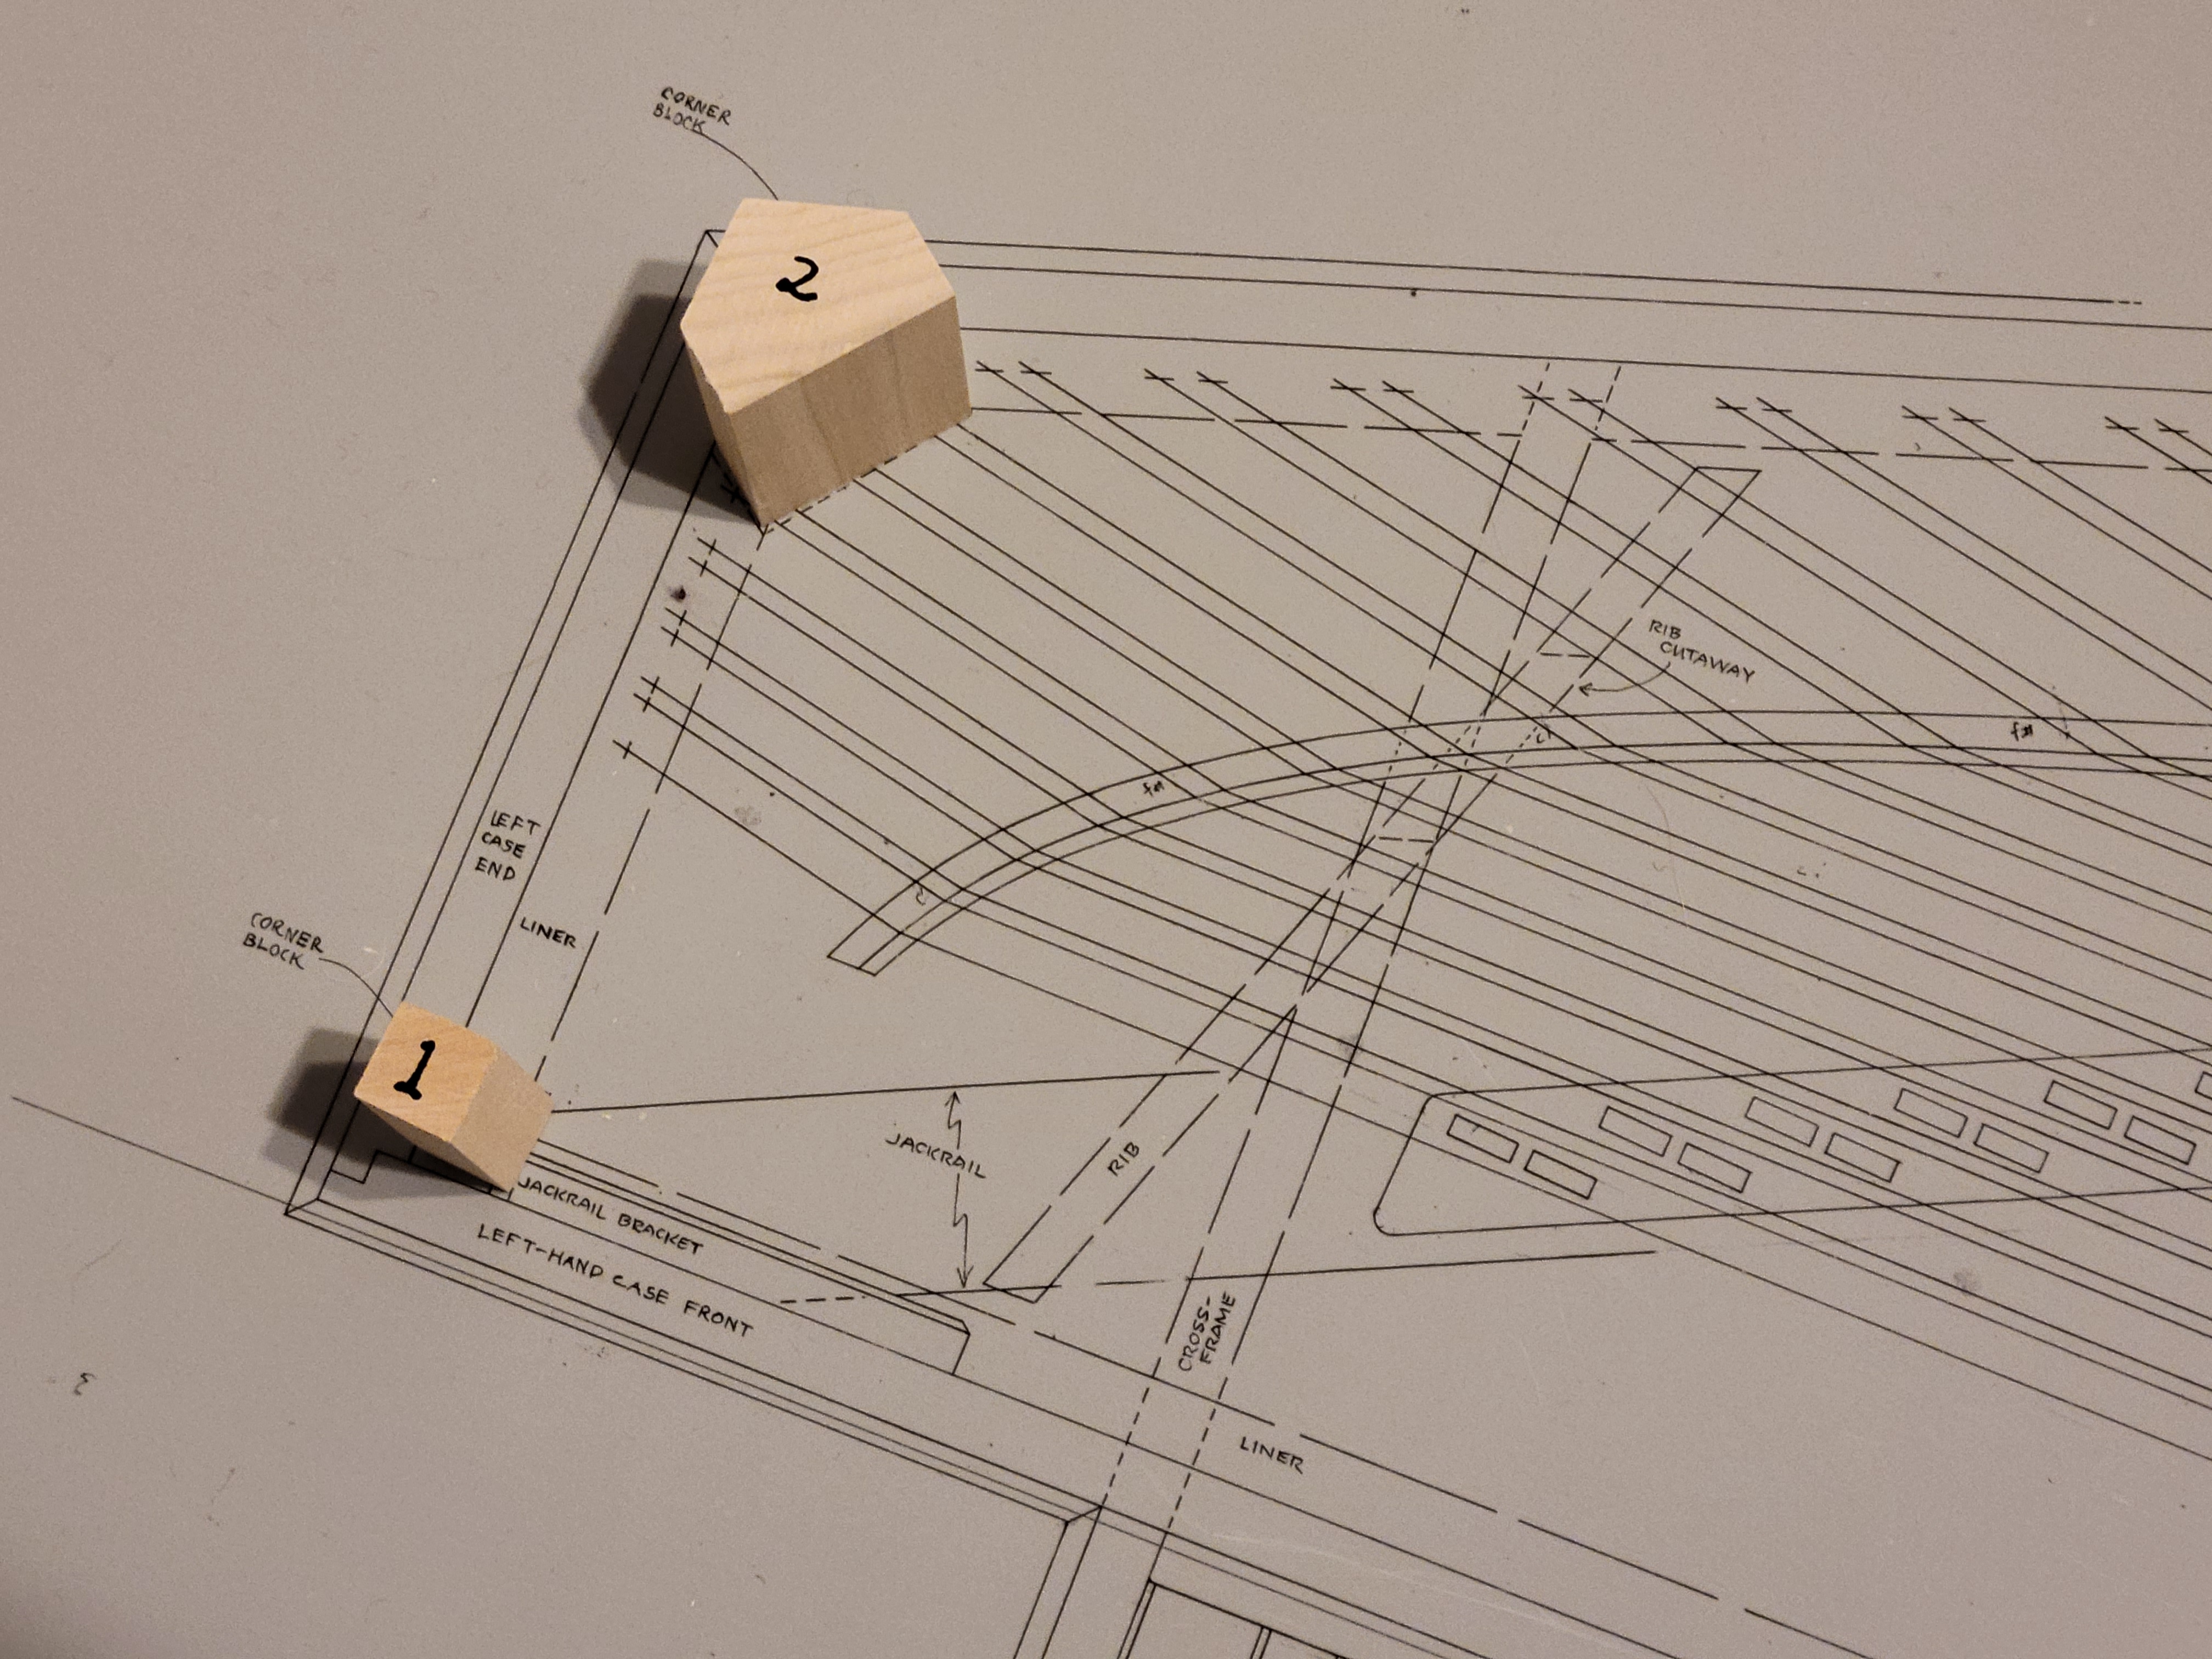
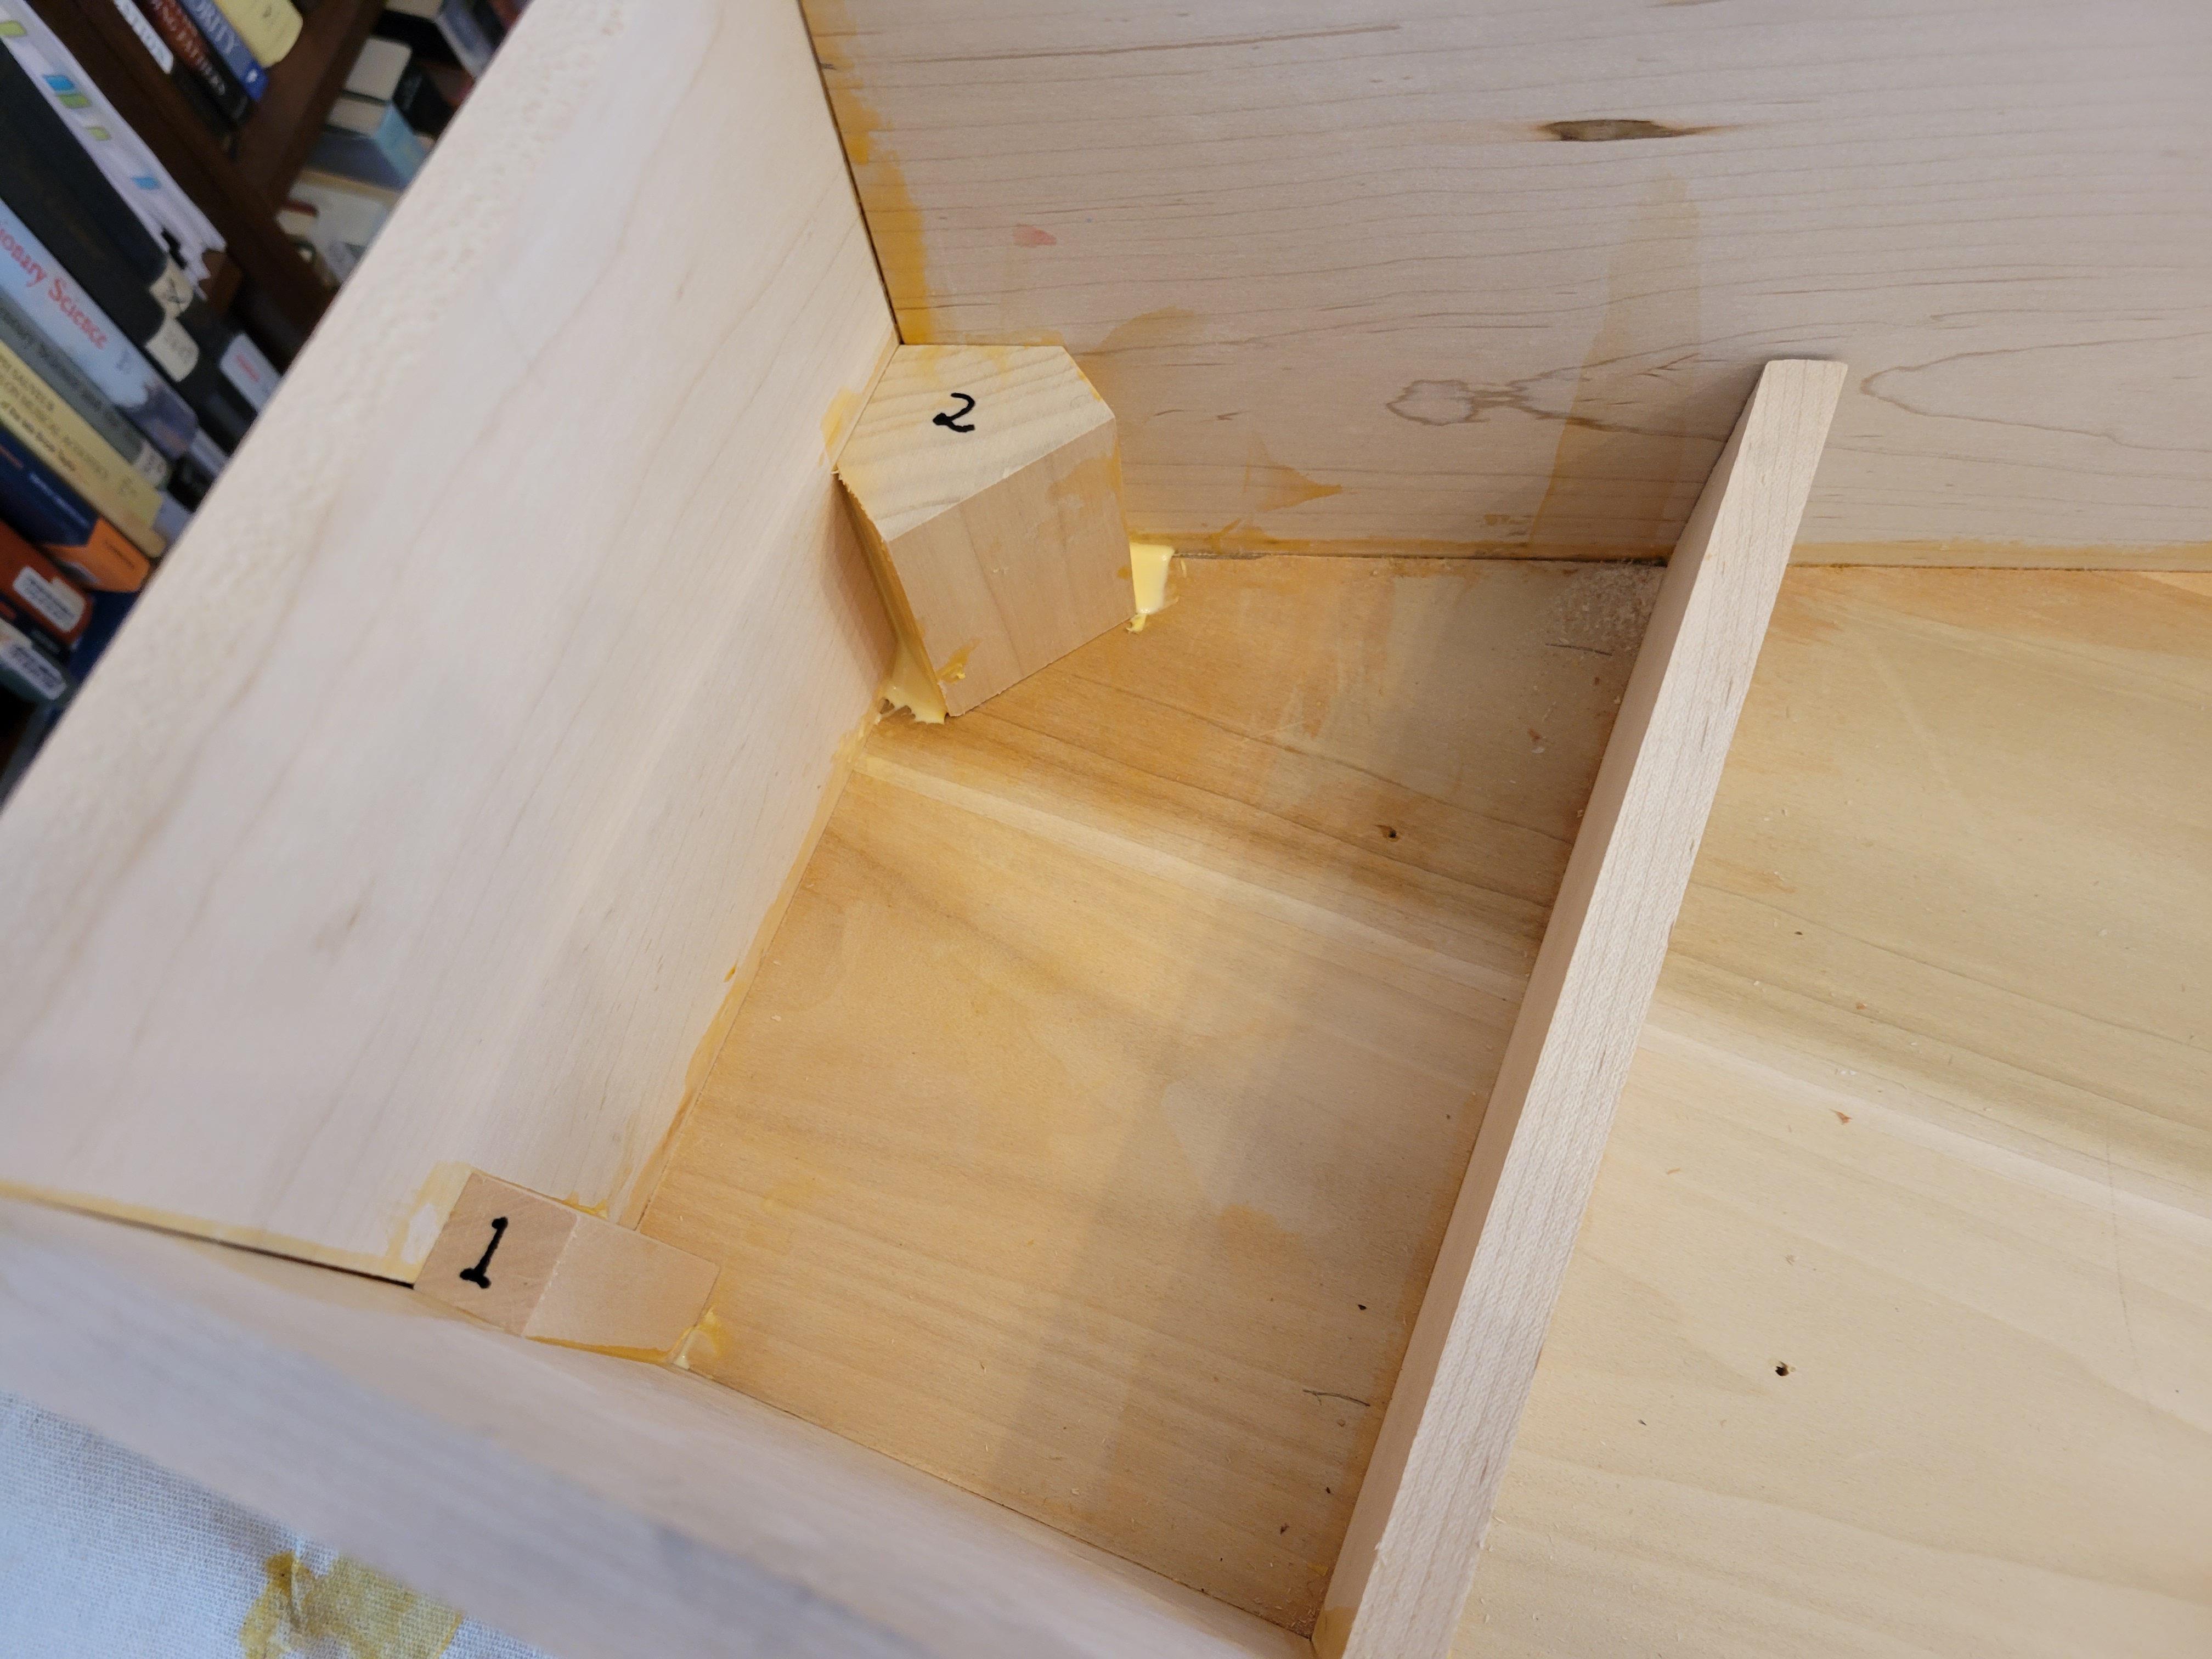
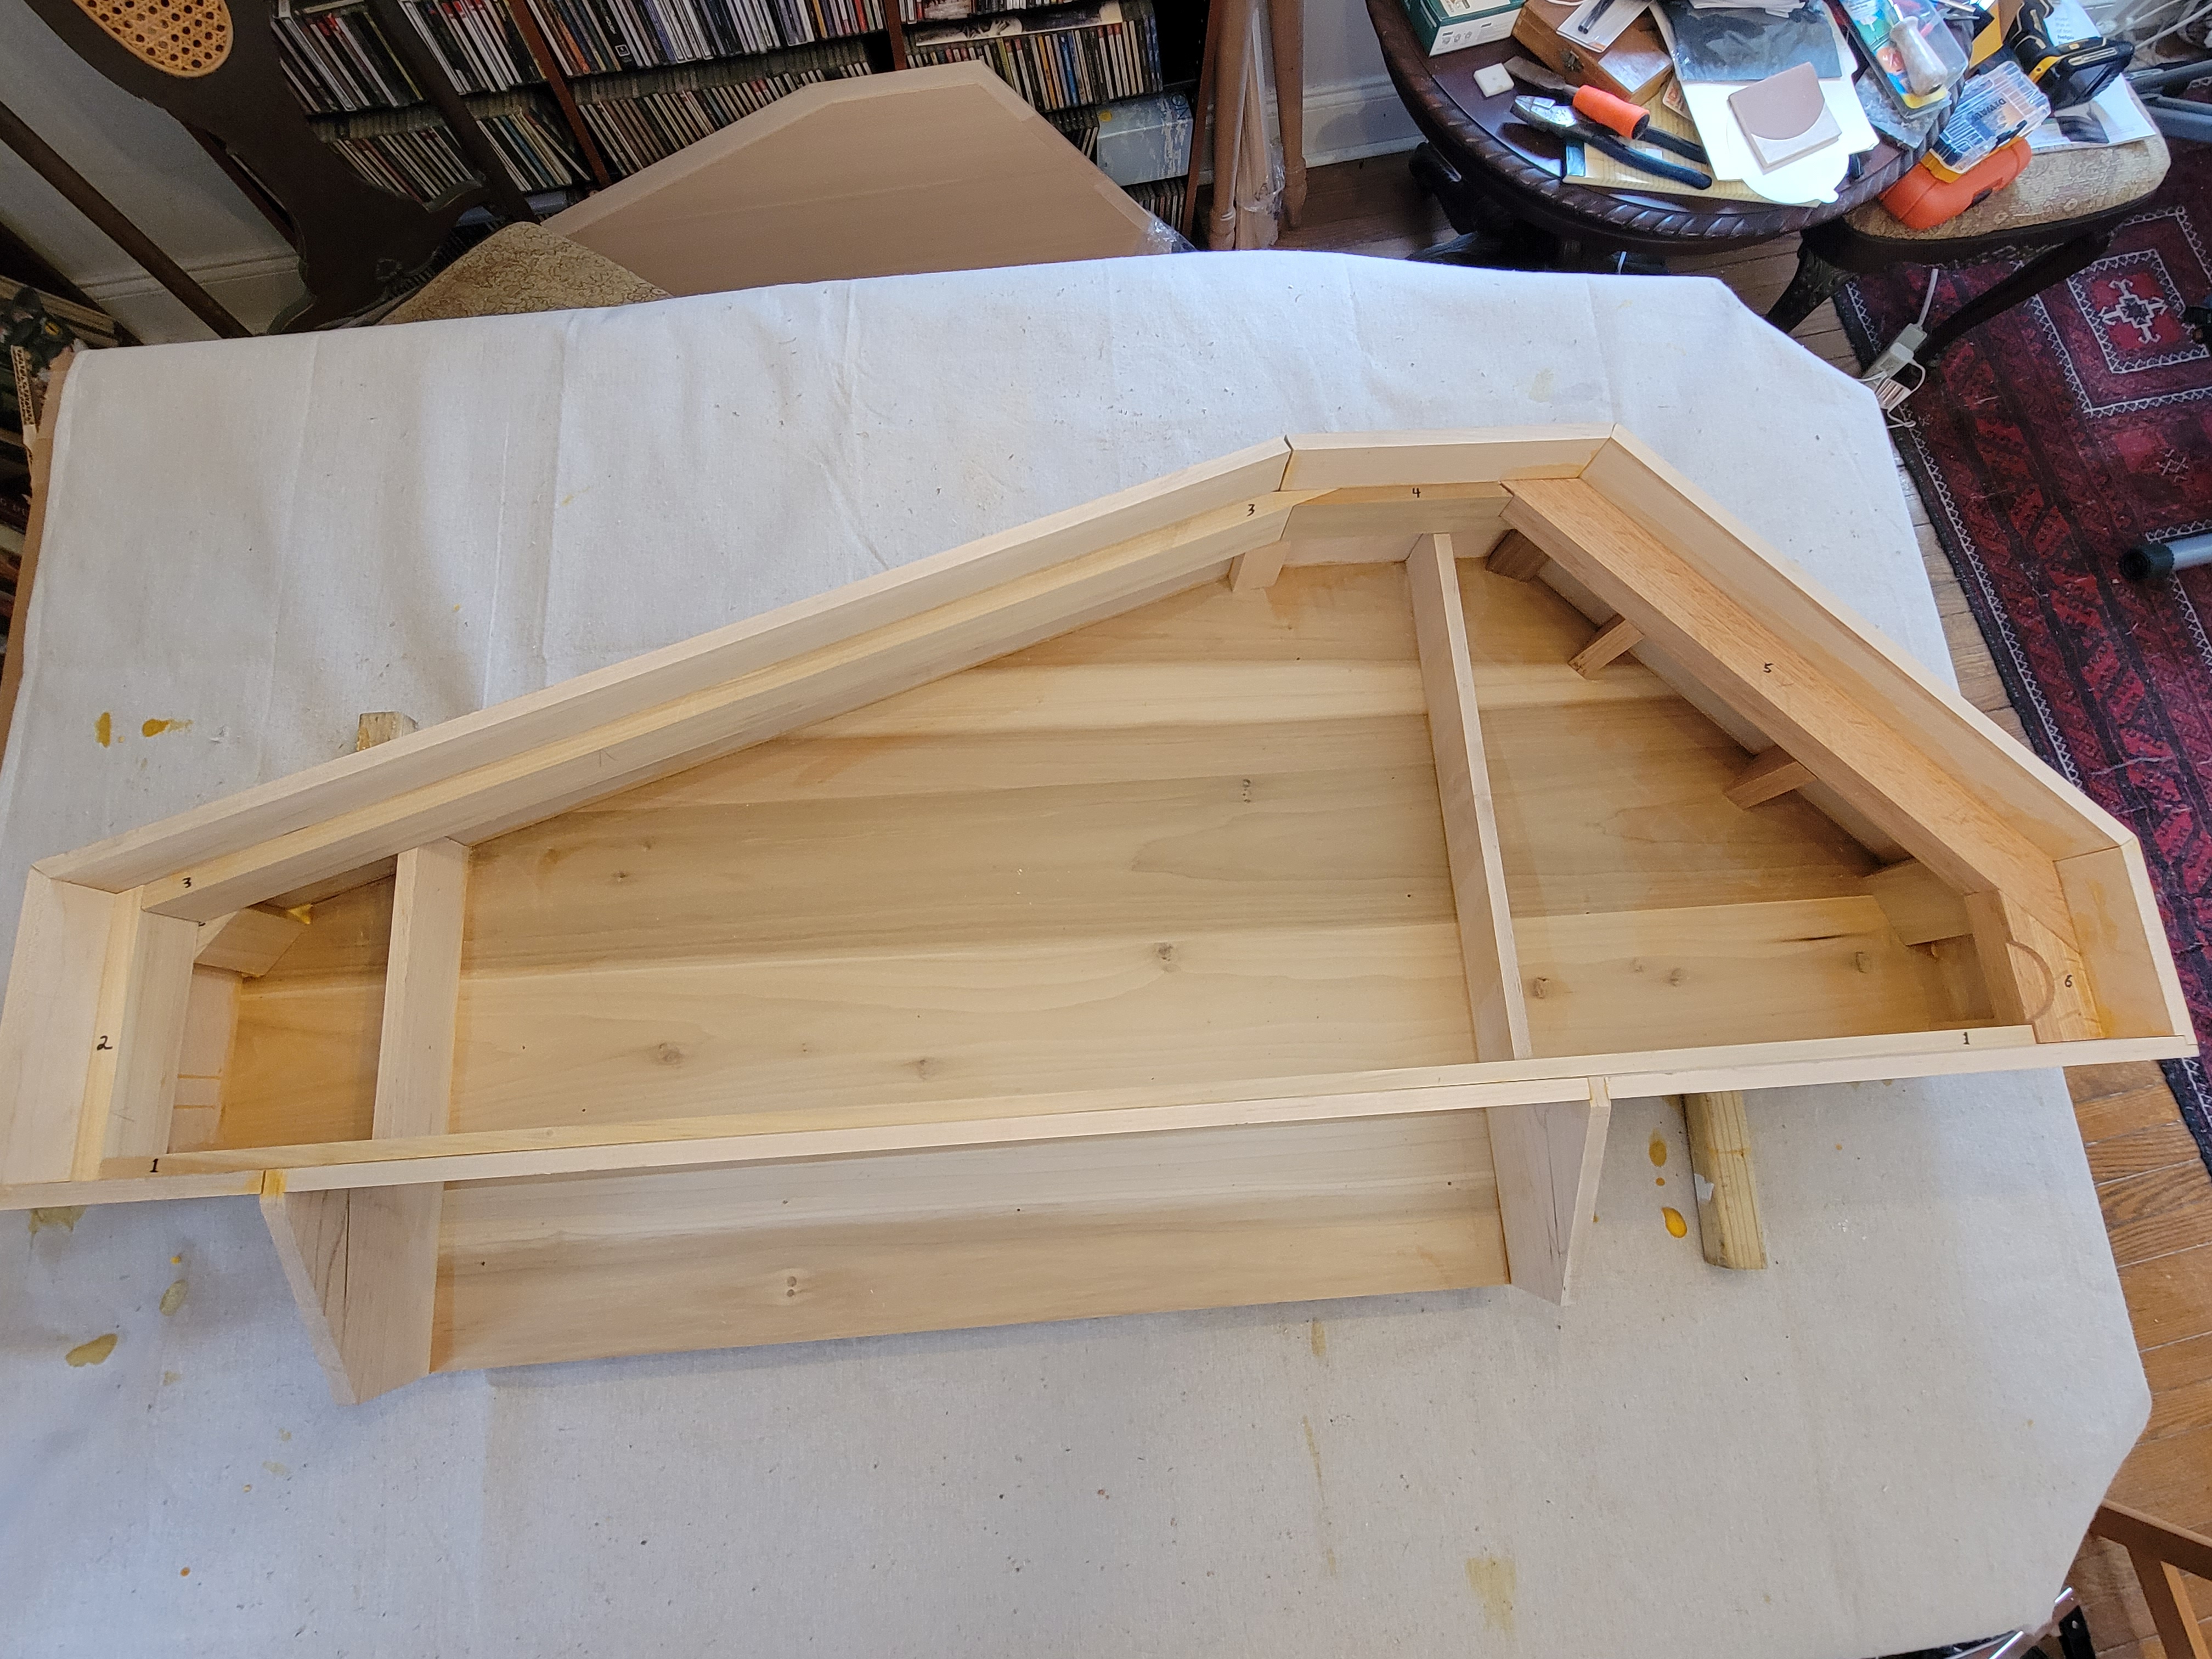
Let’s first look at the liners. Here are the three liners at the left side of the virginal. I’ve numbered them in a clockwise direction:
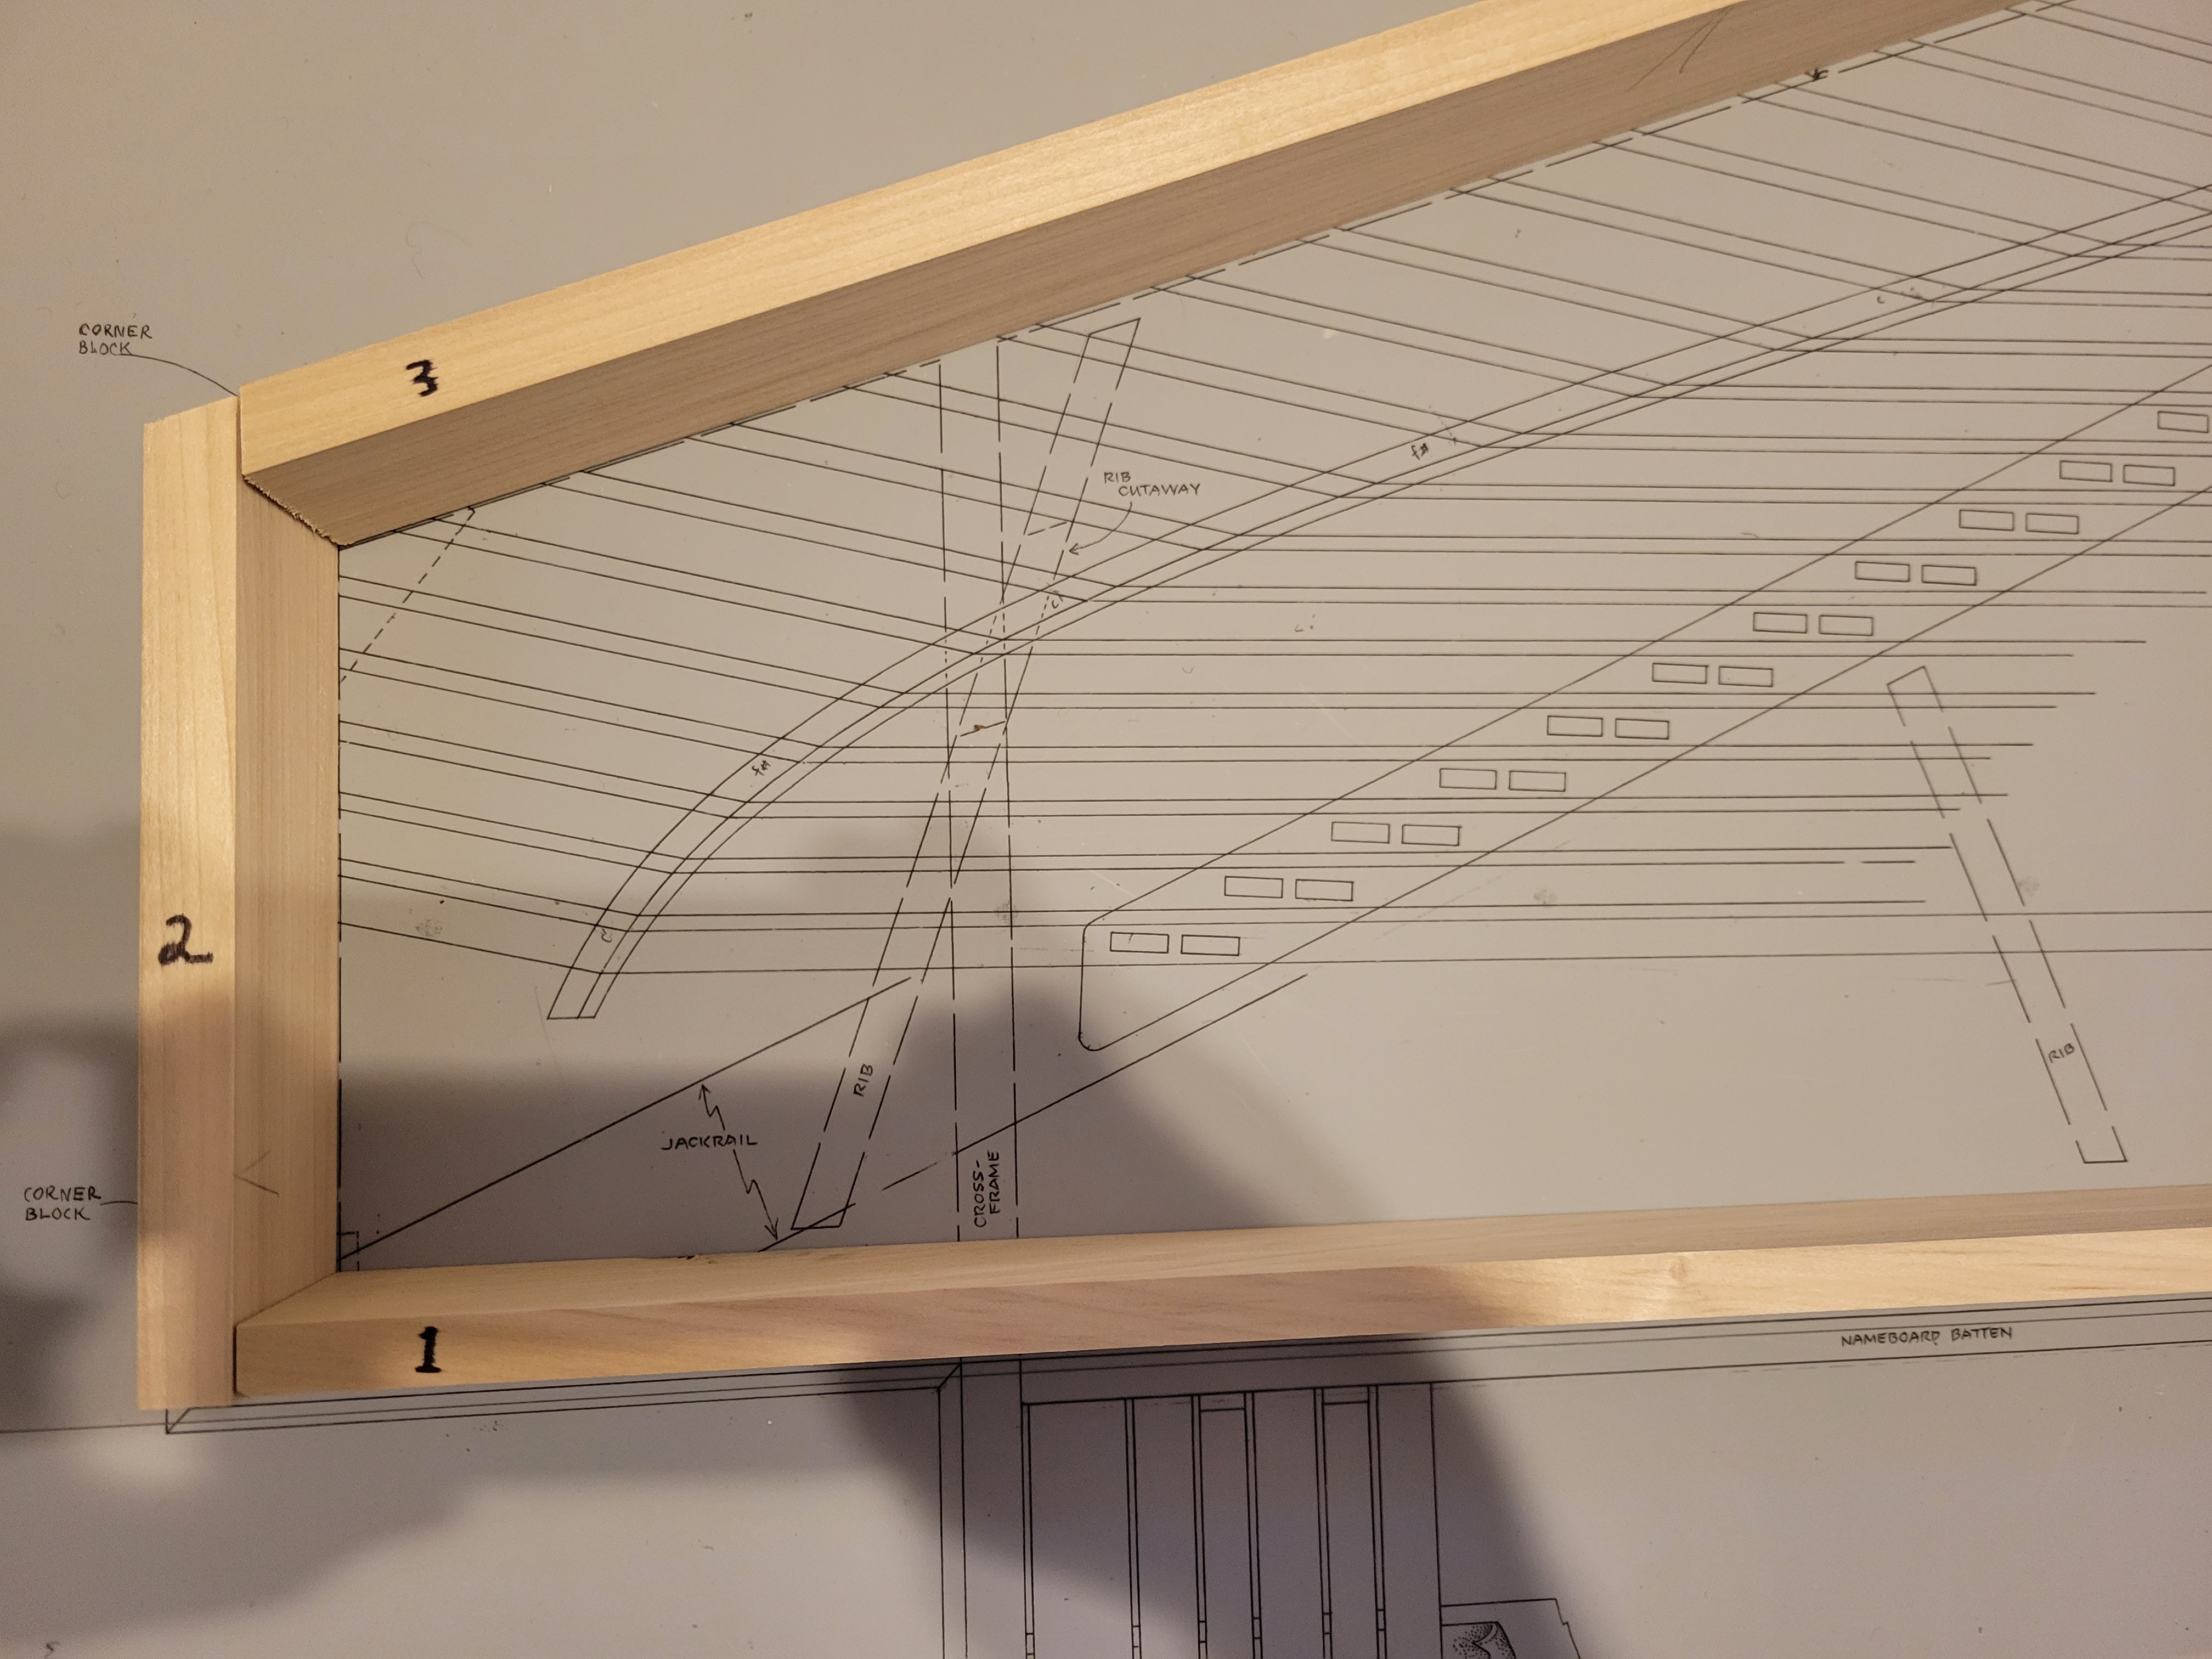
Two of those liners are also seen in this view of the right side:
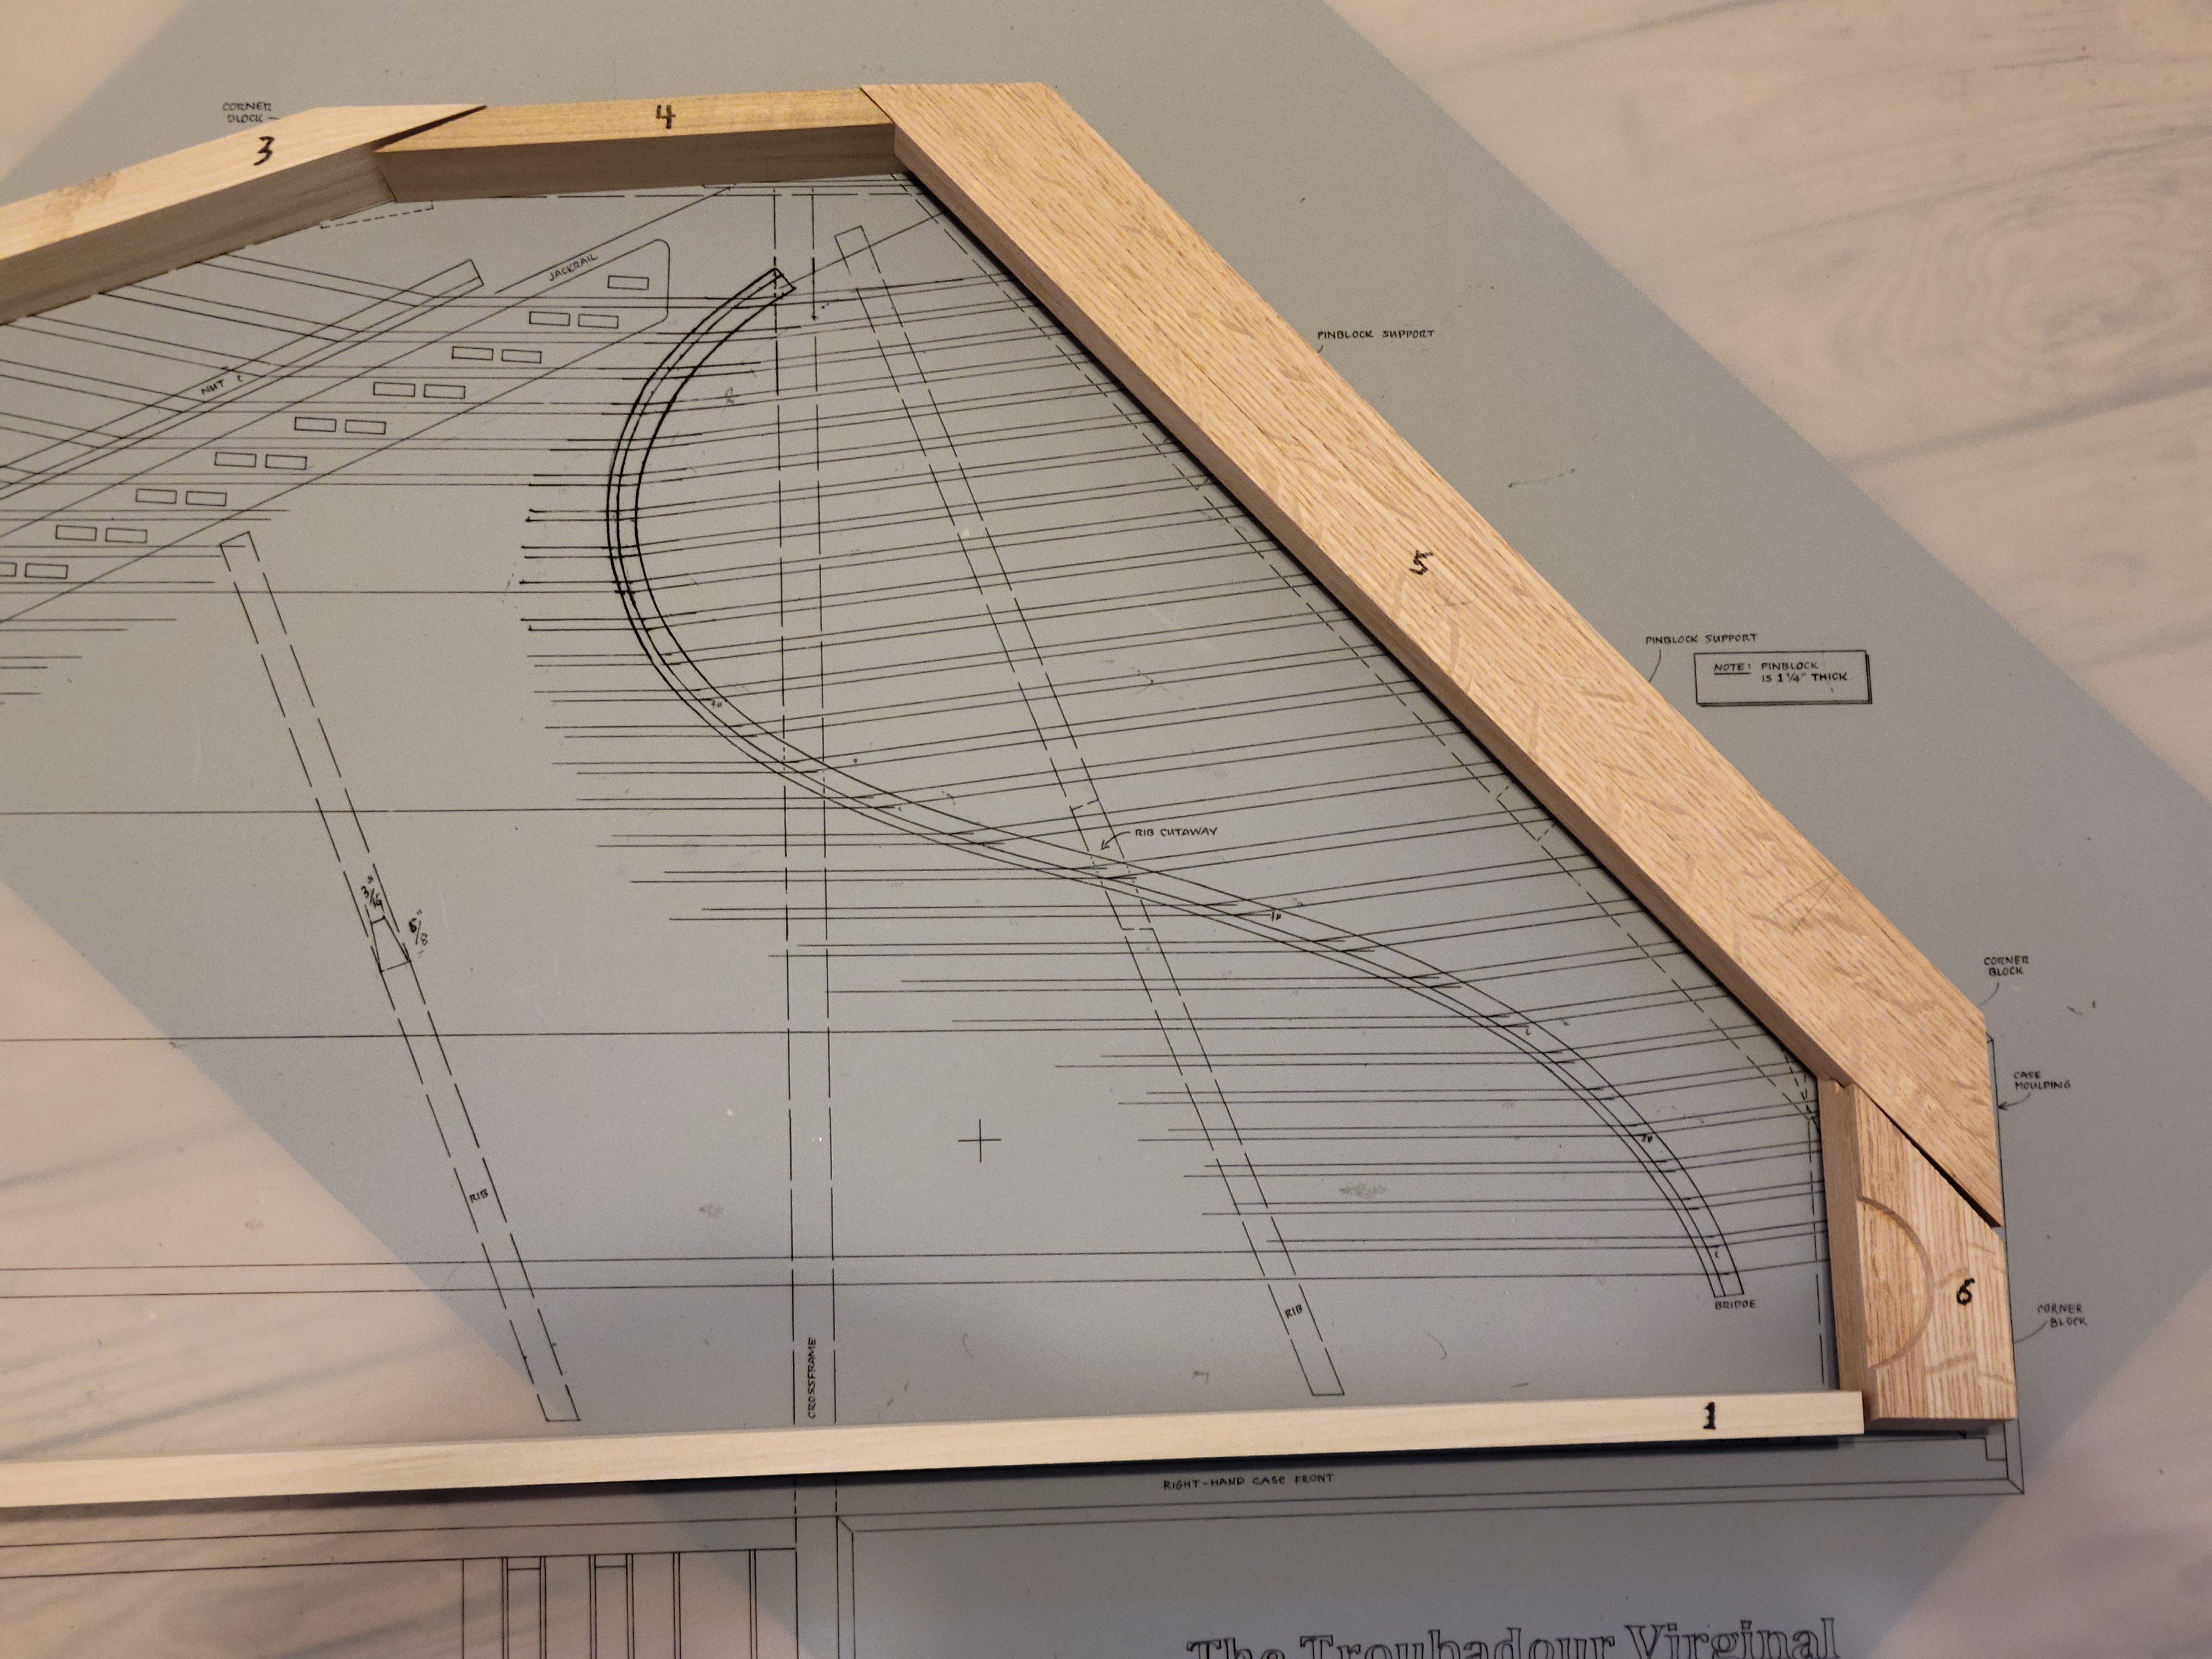
The two thicker bars comprise the pinblock or wrestplank. This is where the tuning pins are inserted.
The liners and wrestplank are held up by corner blocks, two on the left:
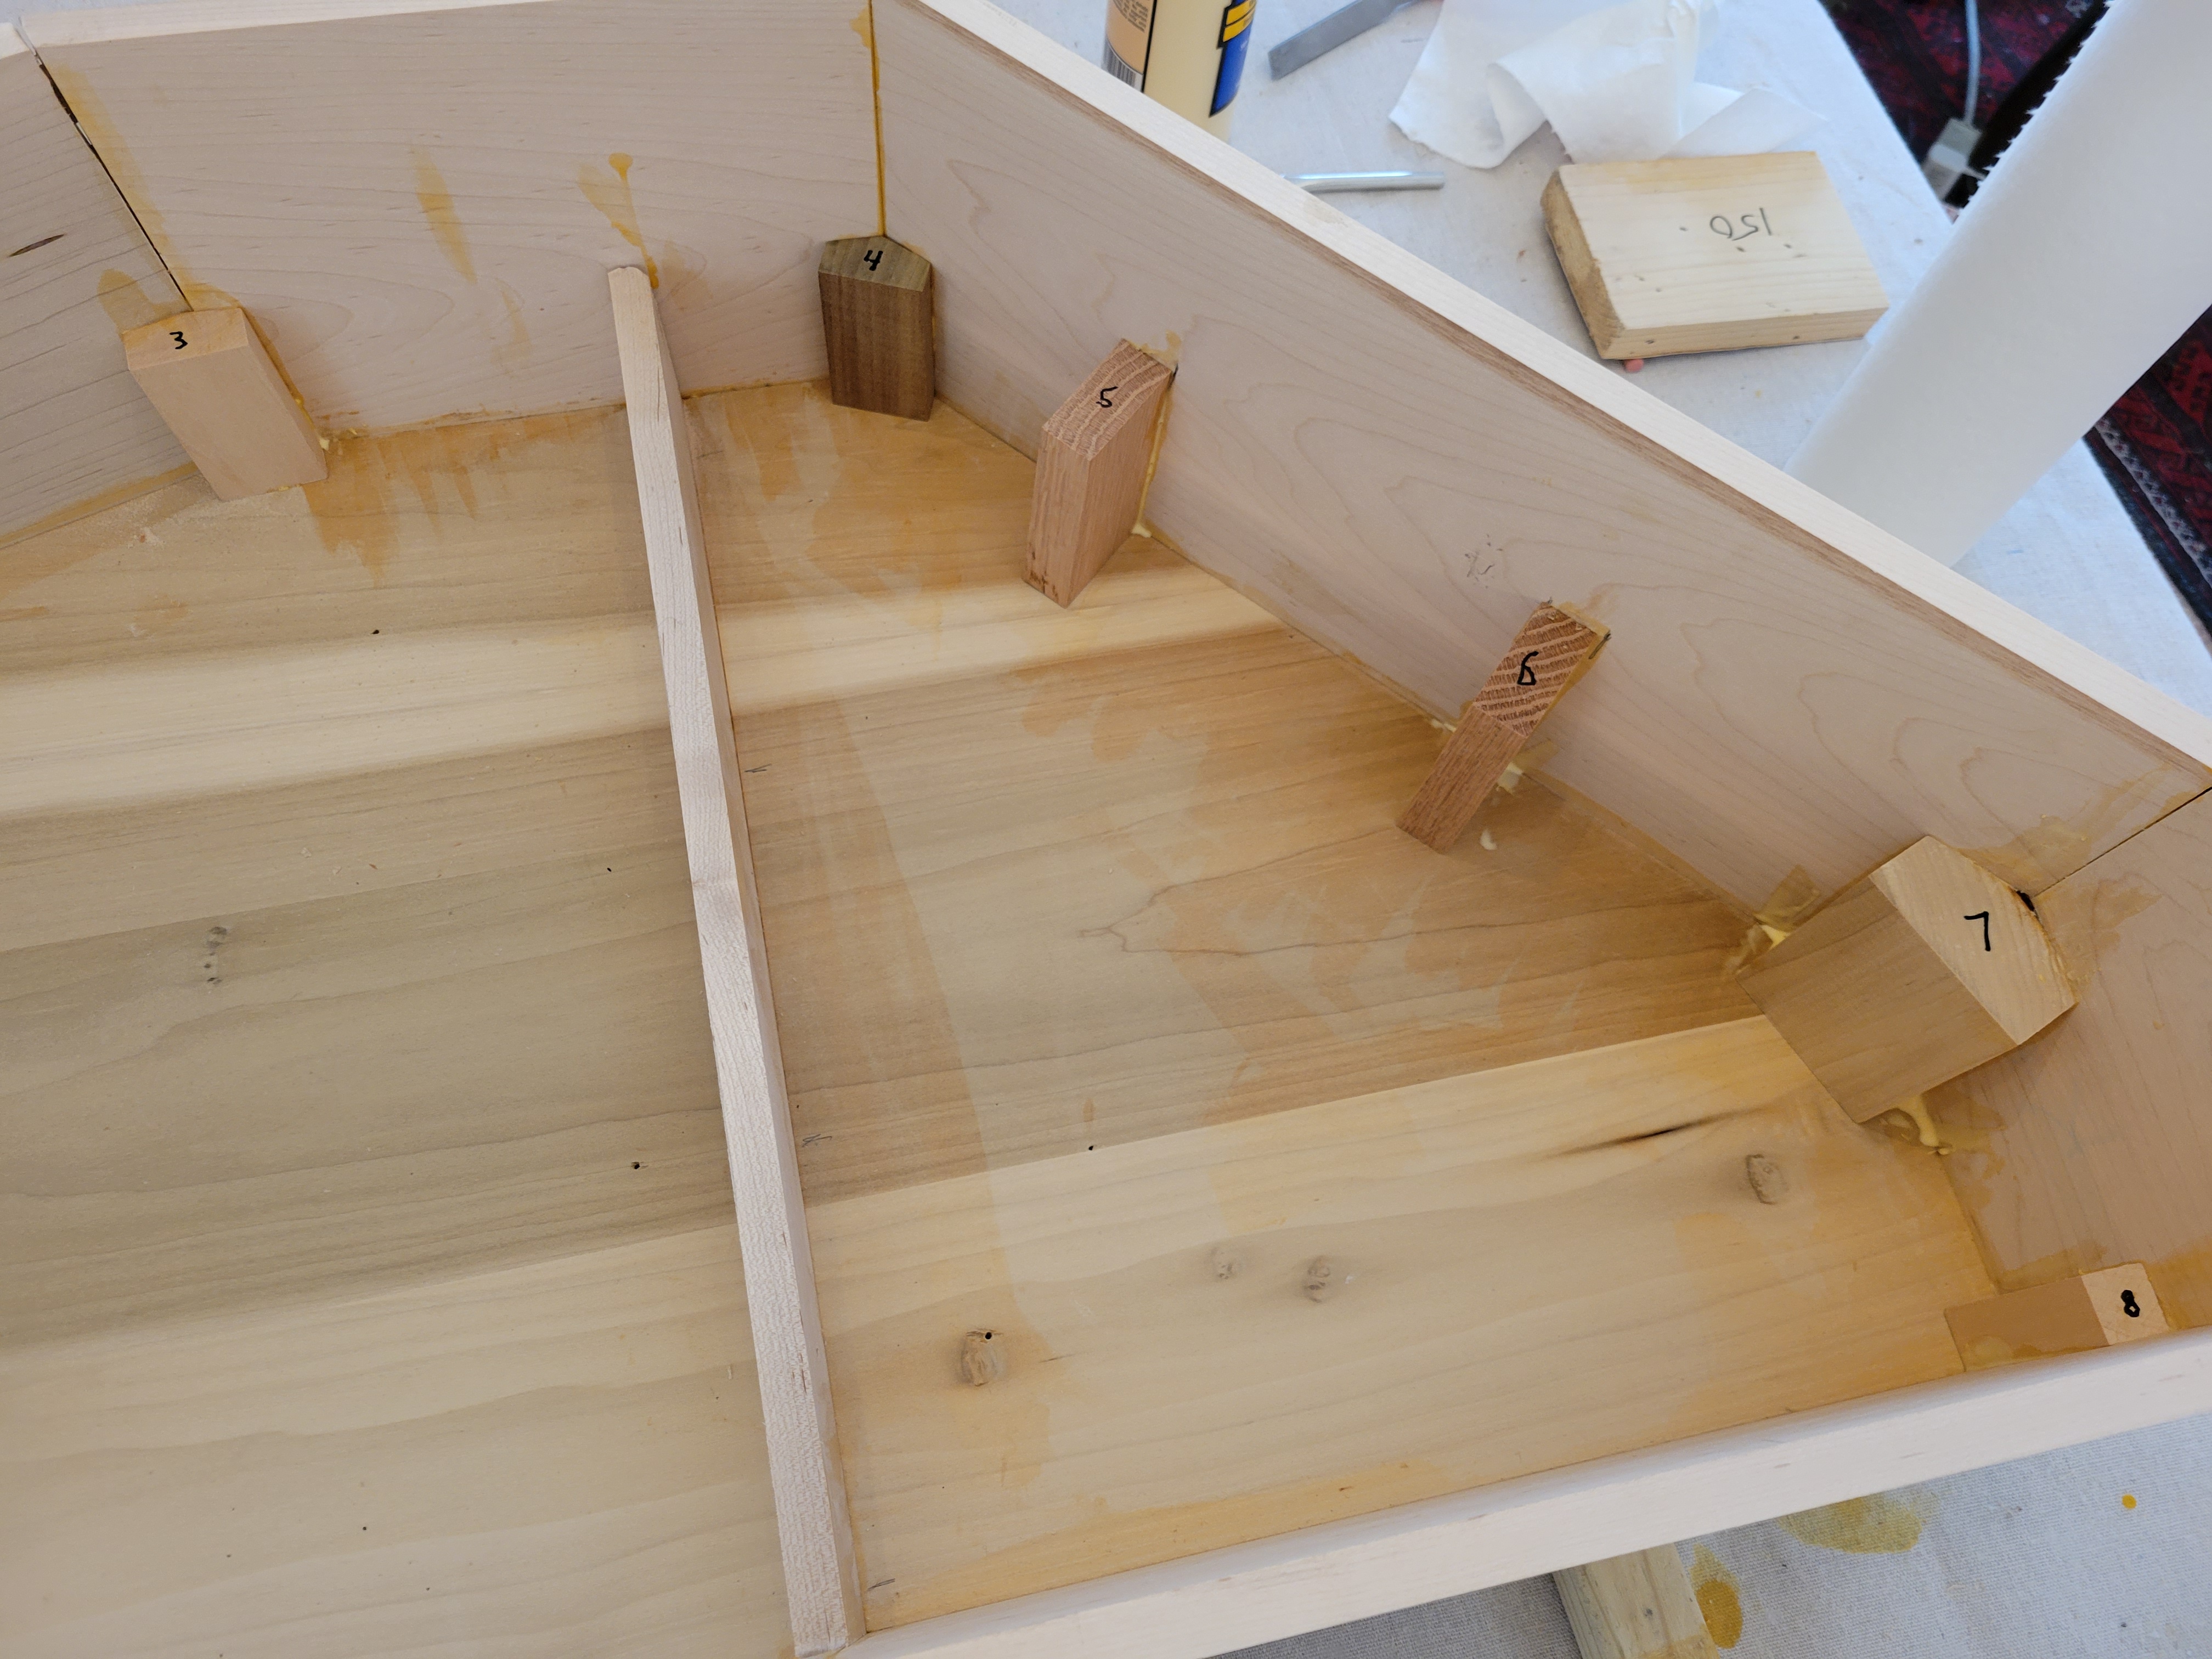
and five on the right:
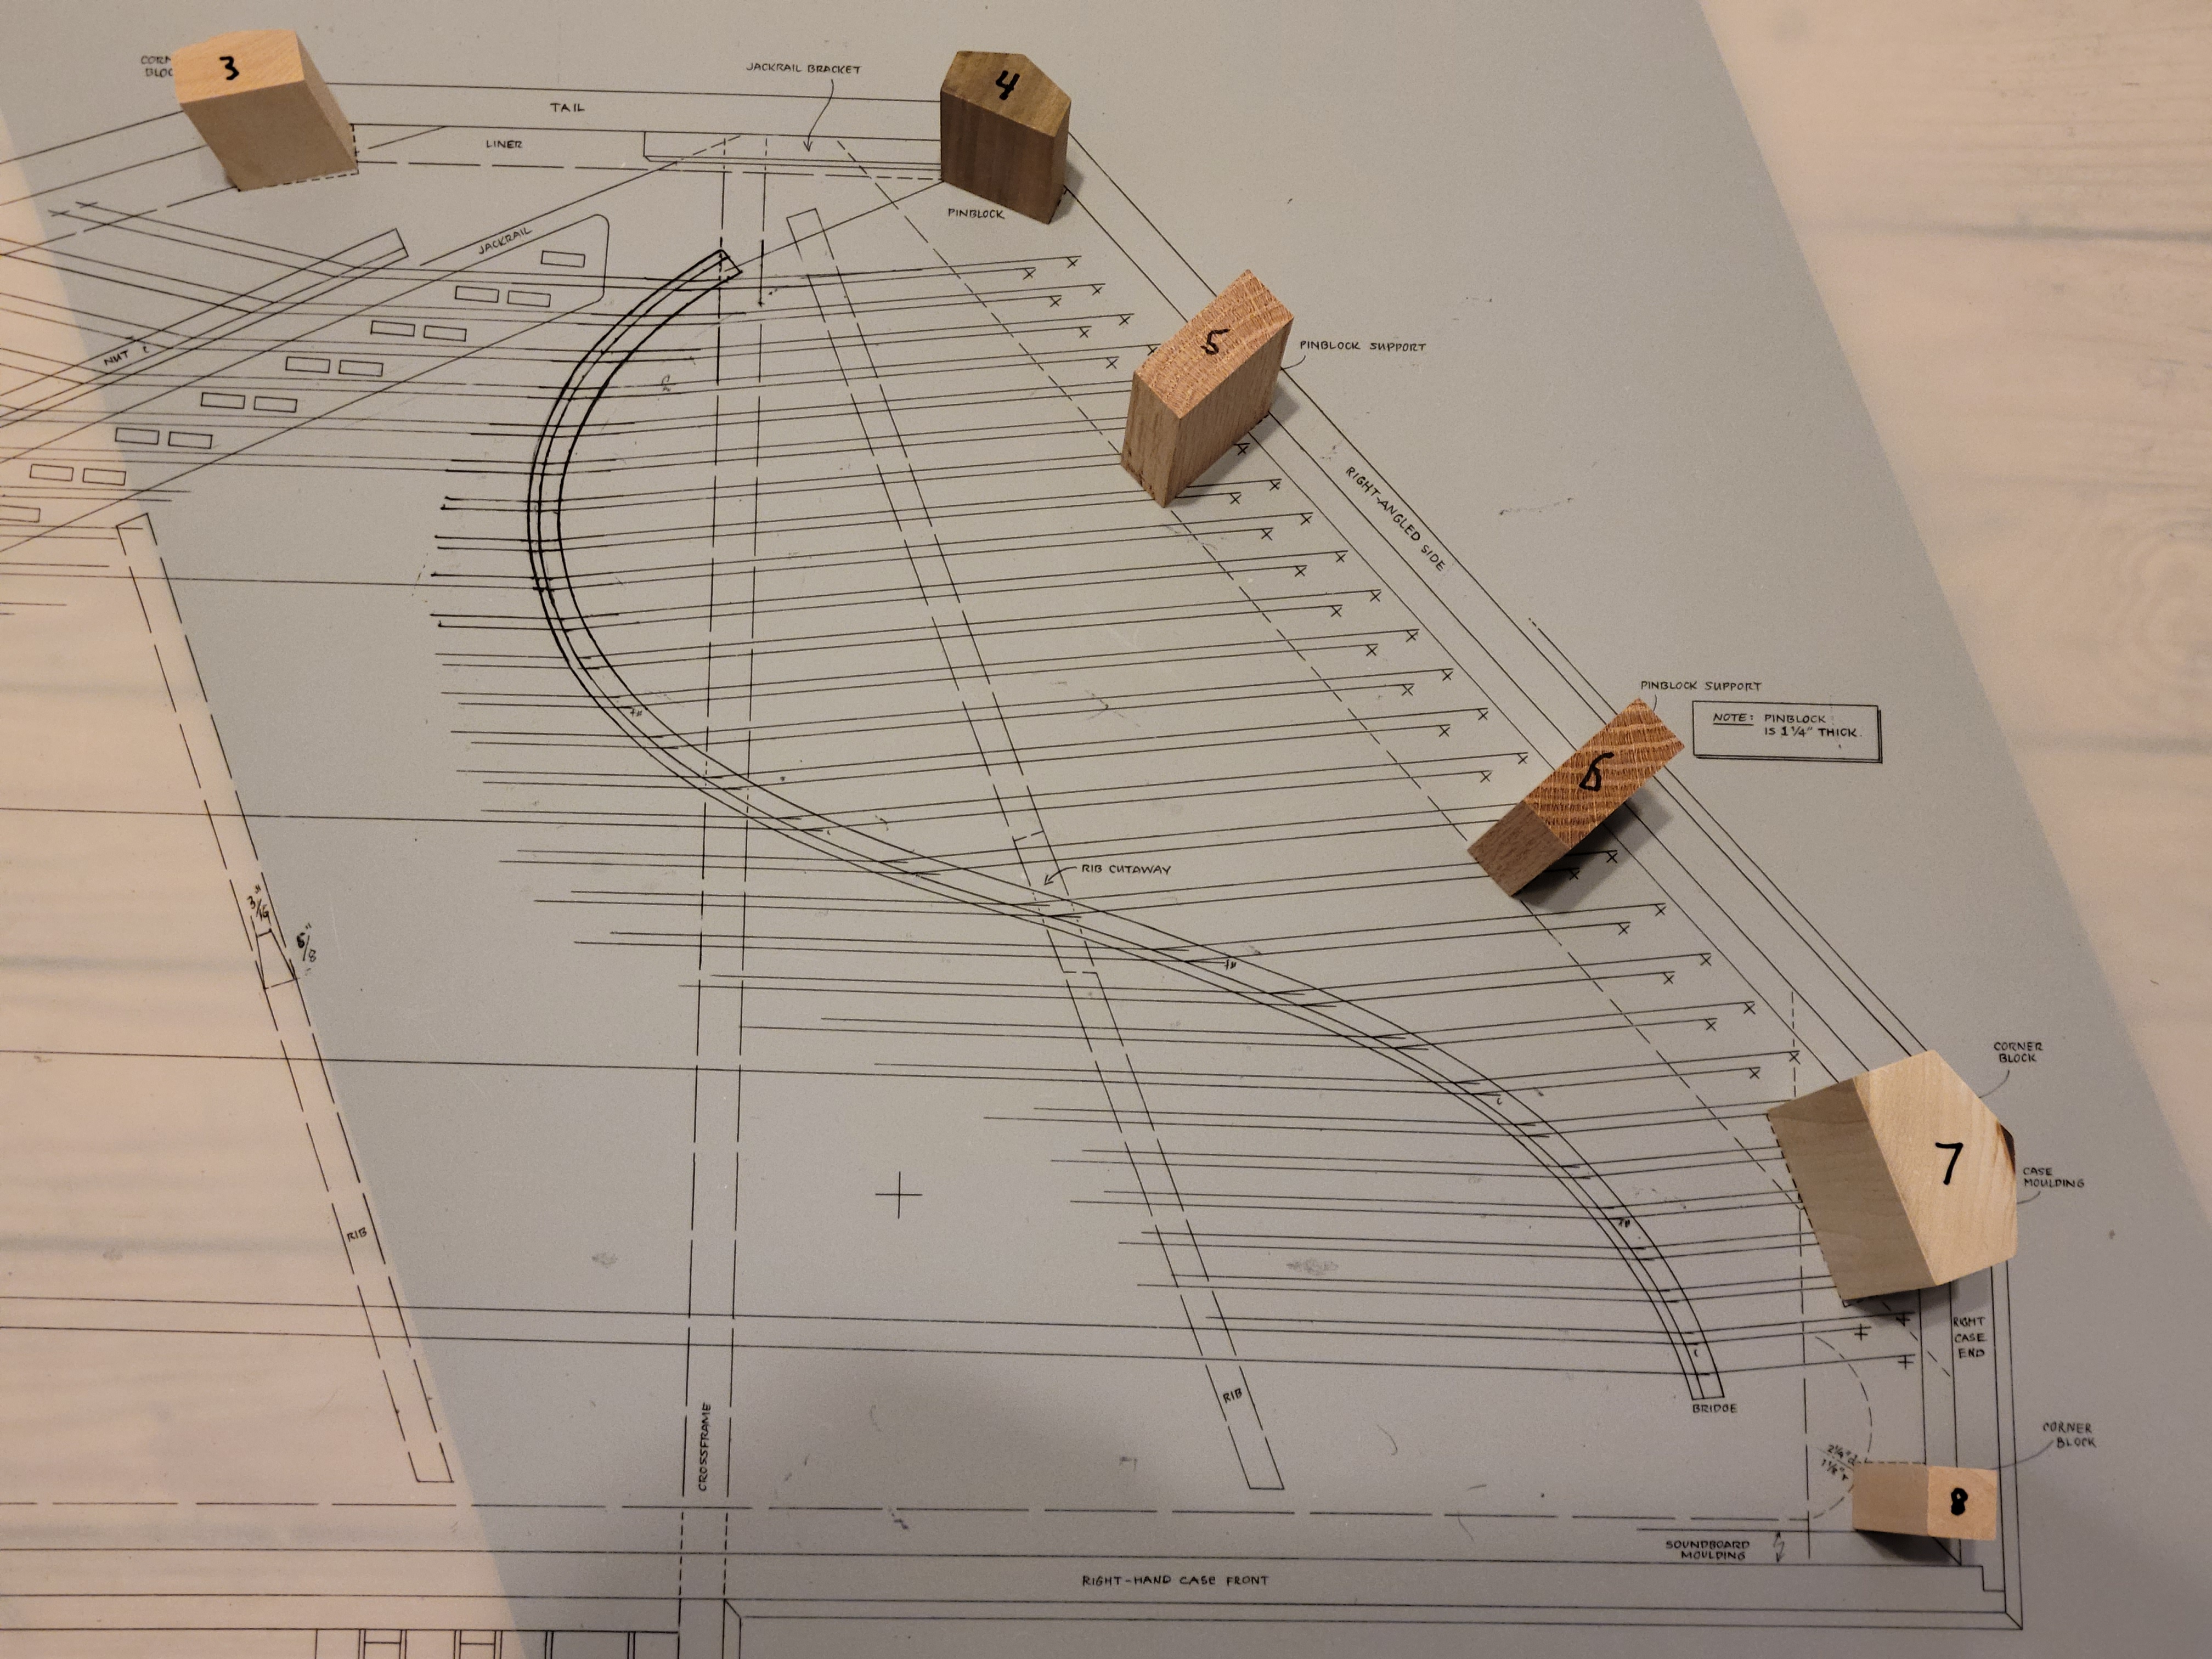
The three blocks supporting the wrestplank (numbers 5, 6, anf 7) are taller than the ones supporting the liners because the wrestplank is not as tall as the liners.
The Construction and Maintenance Manual does not indicate whether the blocks should be glued to the bottom or side of the case. But it does specify that the liners are glued to the side, so that’s how I went here:
Here are the five blocks on the right side:
Before gluing these corner blocks, dried glue should be removed from the crevice where the sides meet the bottom. Sanding the edges of the blocks also helps avoid crumbs of dried glue. It’s not necessary to clean up all the glue that squeezes out because eventually nobody will ever see this part of the virginal. However, it is necessary to keep the tops of the blocks clean for the liners.
I think the best place to start gluing the liners is at the far left:
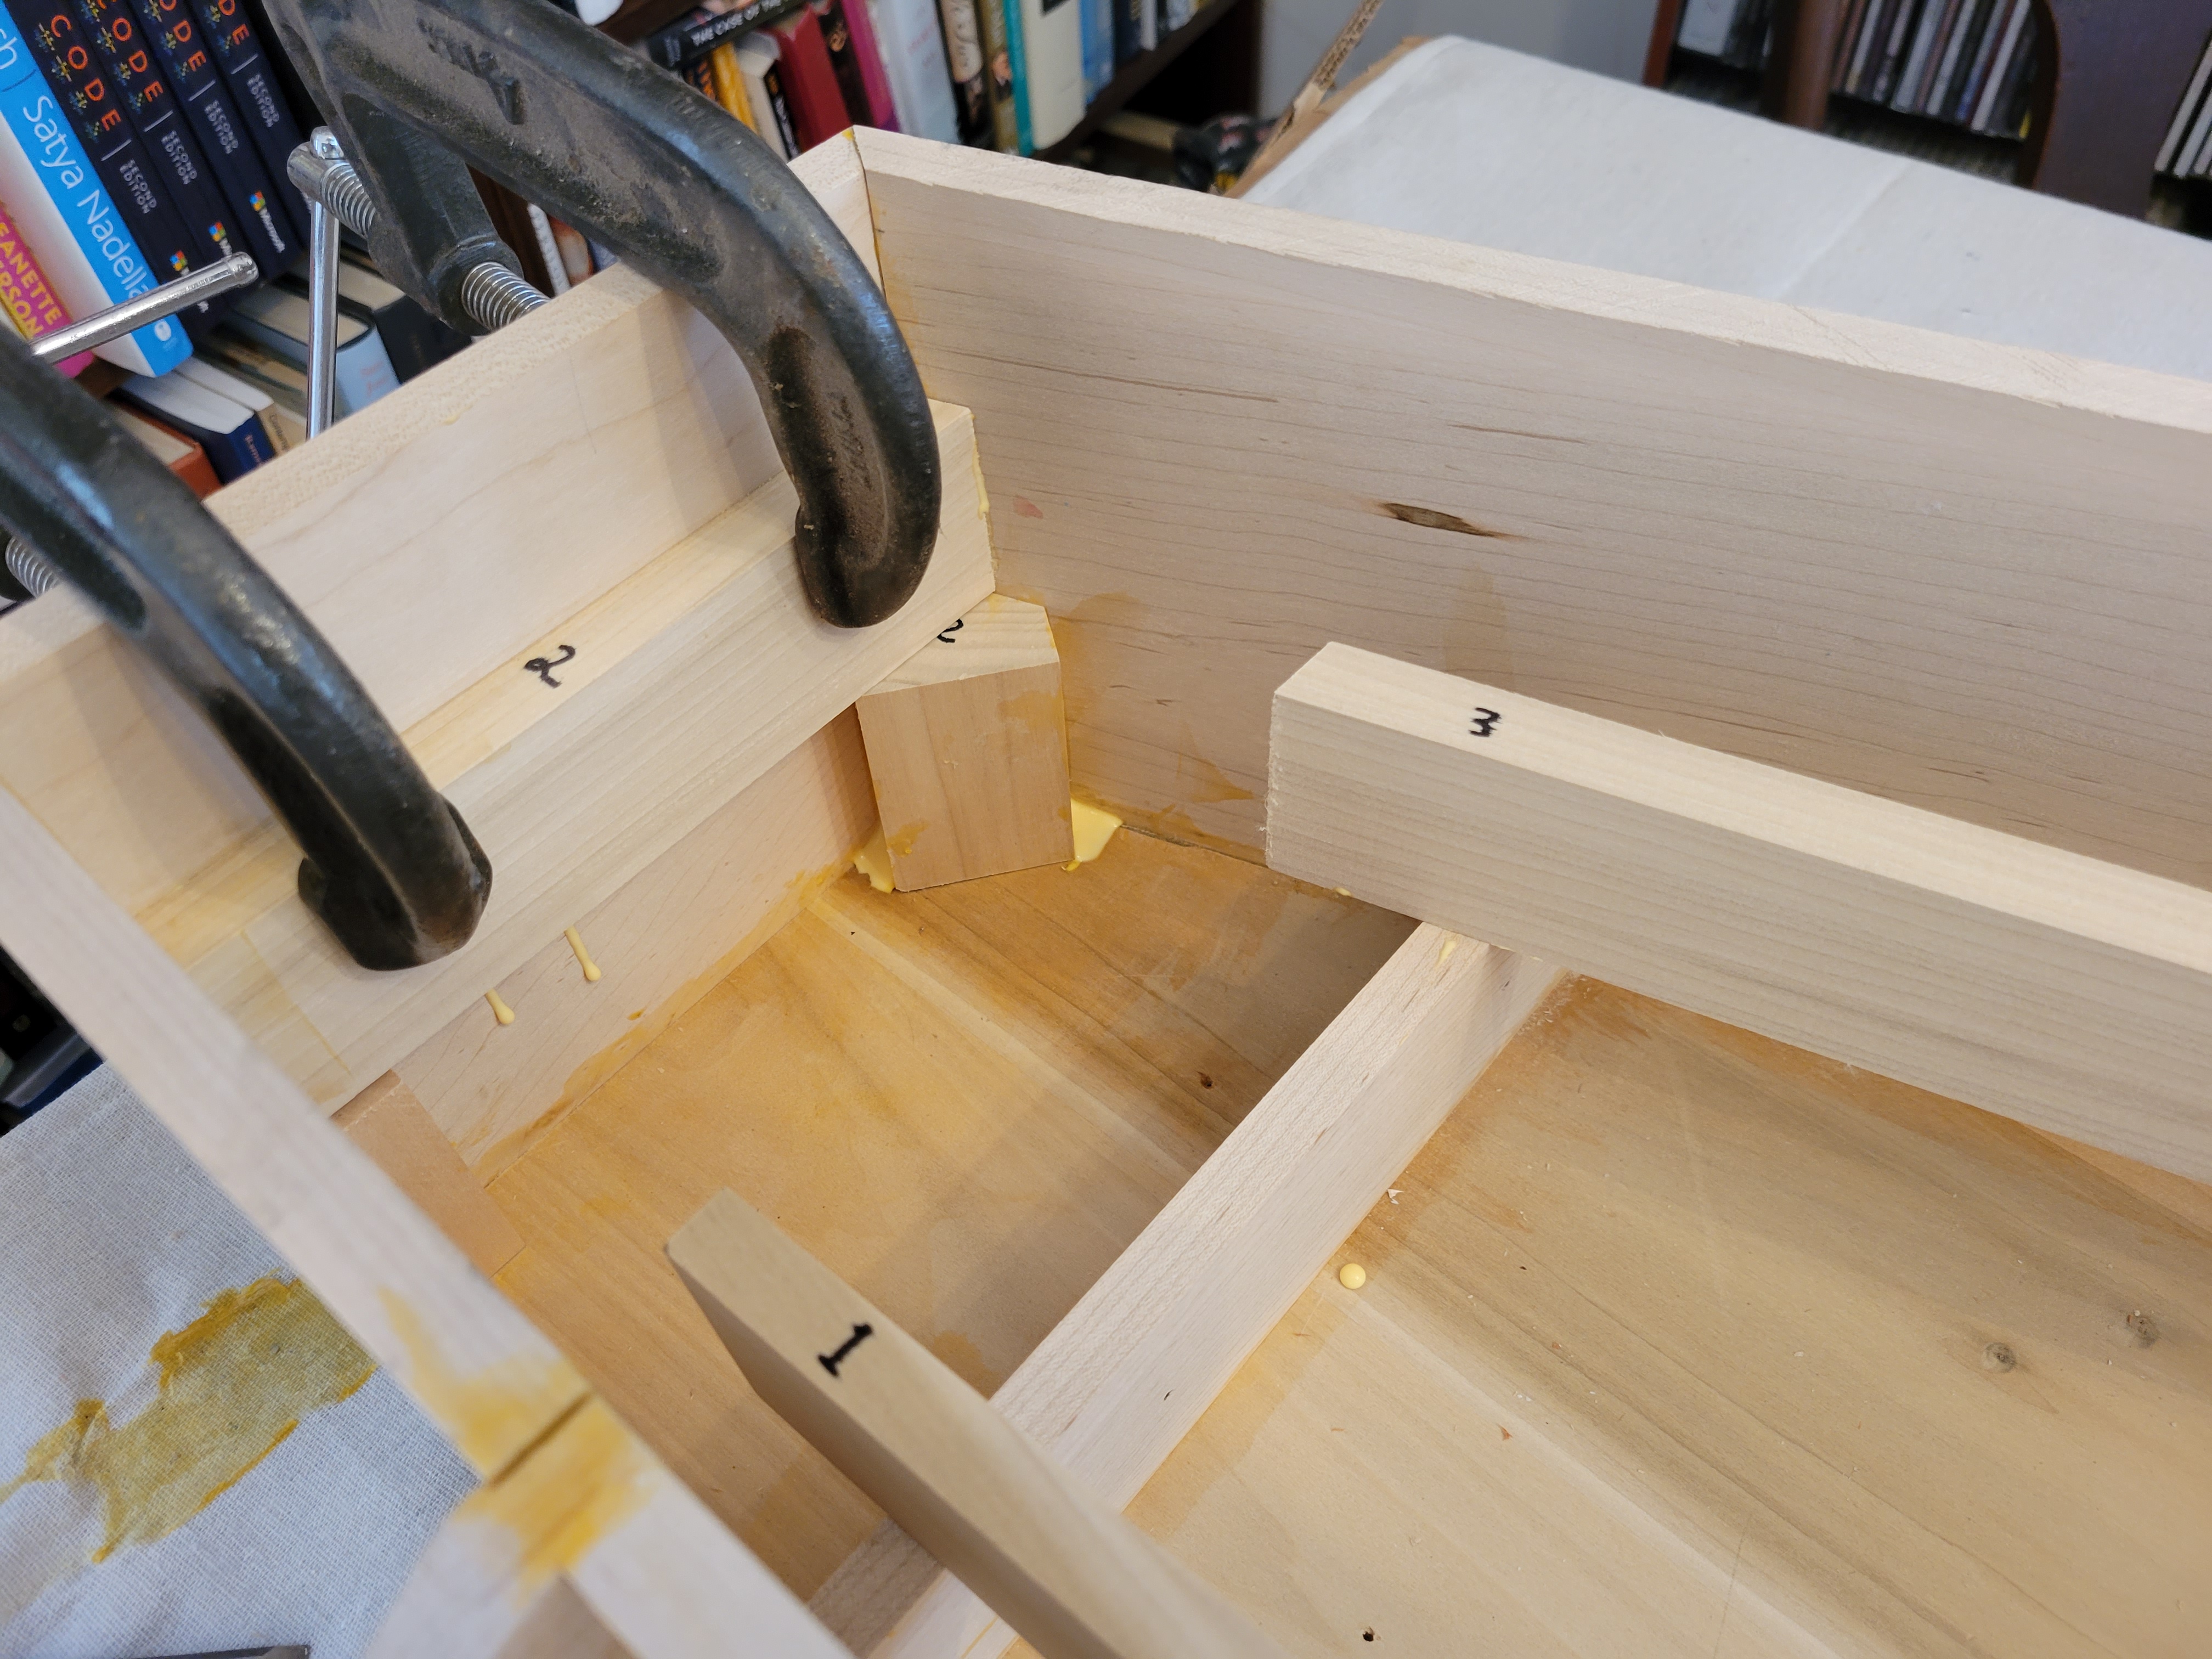
I discovered that my clamps were barely deep enough for this job, but whattaya gonna do? Make a run to the hardware store while in the midst of virginality construction rapture?
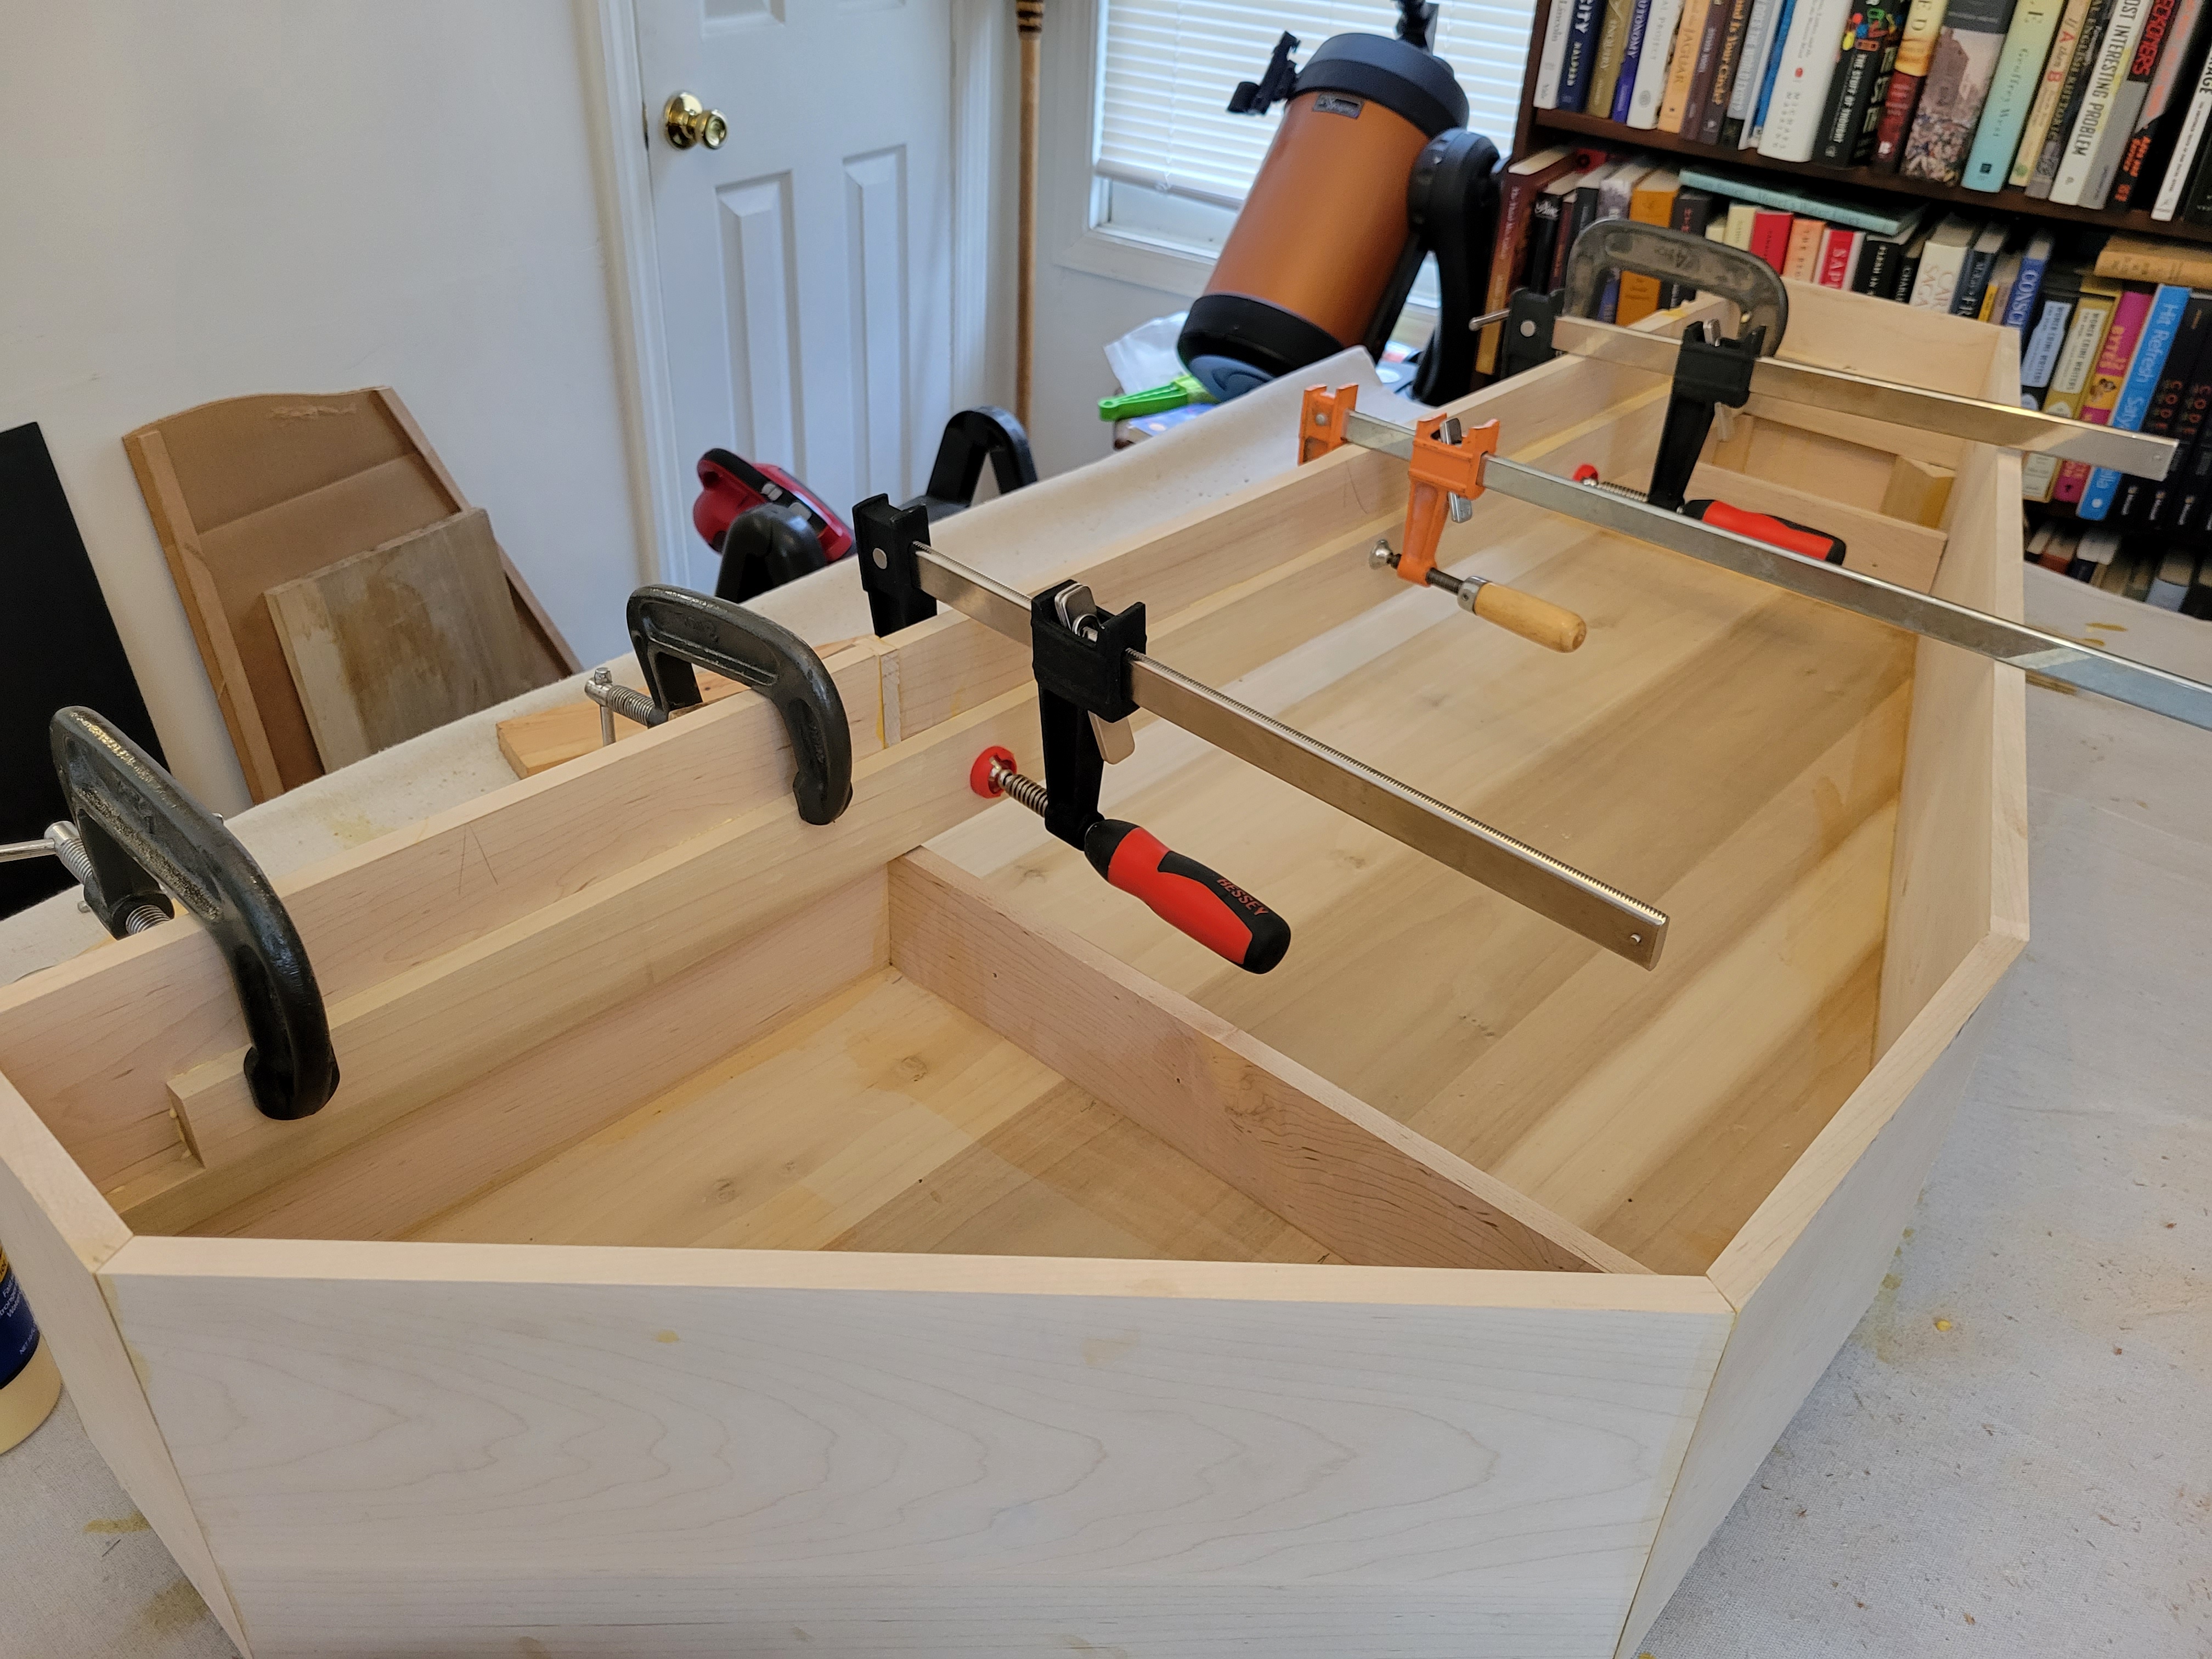
I had to use our chop saw to trim a smidgen from the front liner to get it to fit, and it nearly exhausted my supply of clamps:
The liners can reveal imperfections in earlier construction. In this case, I discovered that the nameboard was not on quite the same plane as the two front panels.
I had to improvise a little on the chop saw with this liner as well (making a miter cut!), but mostly (I suspect) because of my screwup with the rear panel:

As I continued to make little adjustments here and there with the chop saw, I stopped thinking of them as “improvisation” and started to prefer “ornamentation.” (That’s a Baroque music joke.)
A little more ornamentation (with more miter cuts) was required for the wrestplank, but all the supports for the soundboard are now ready:
Once the soundboard is in, none of this will ever be seen again.
When I flipped over the virginal case to remove the plexiglass squares and scrape off the more egregious hardened glue, I took the opportunity to install the leg pads as described in Appendix III of the Construction and Maintenance Manual:
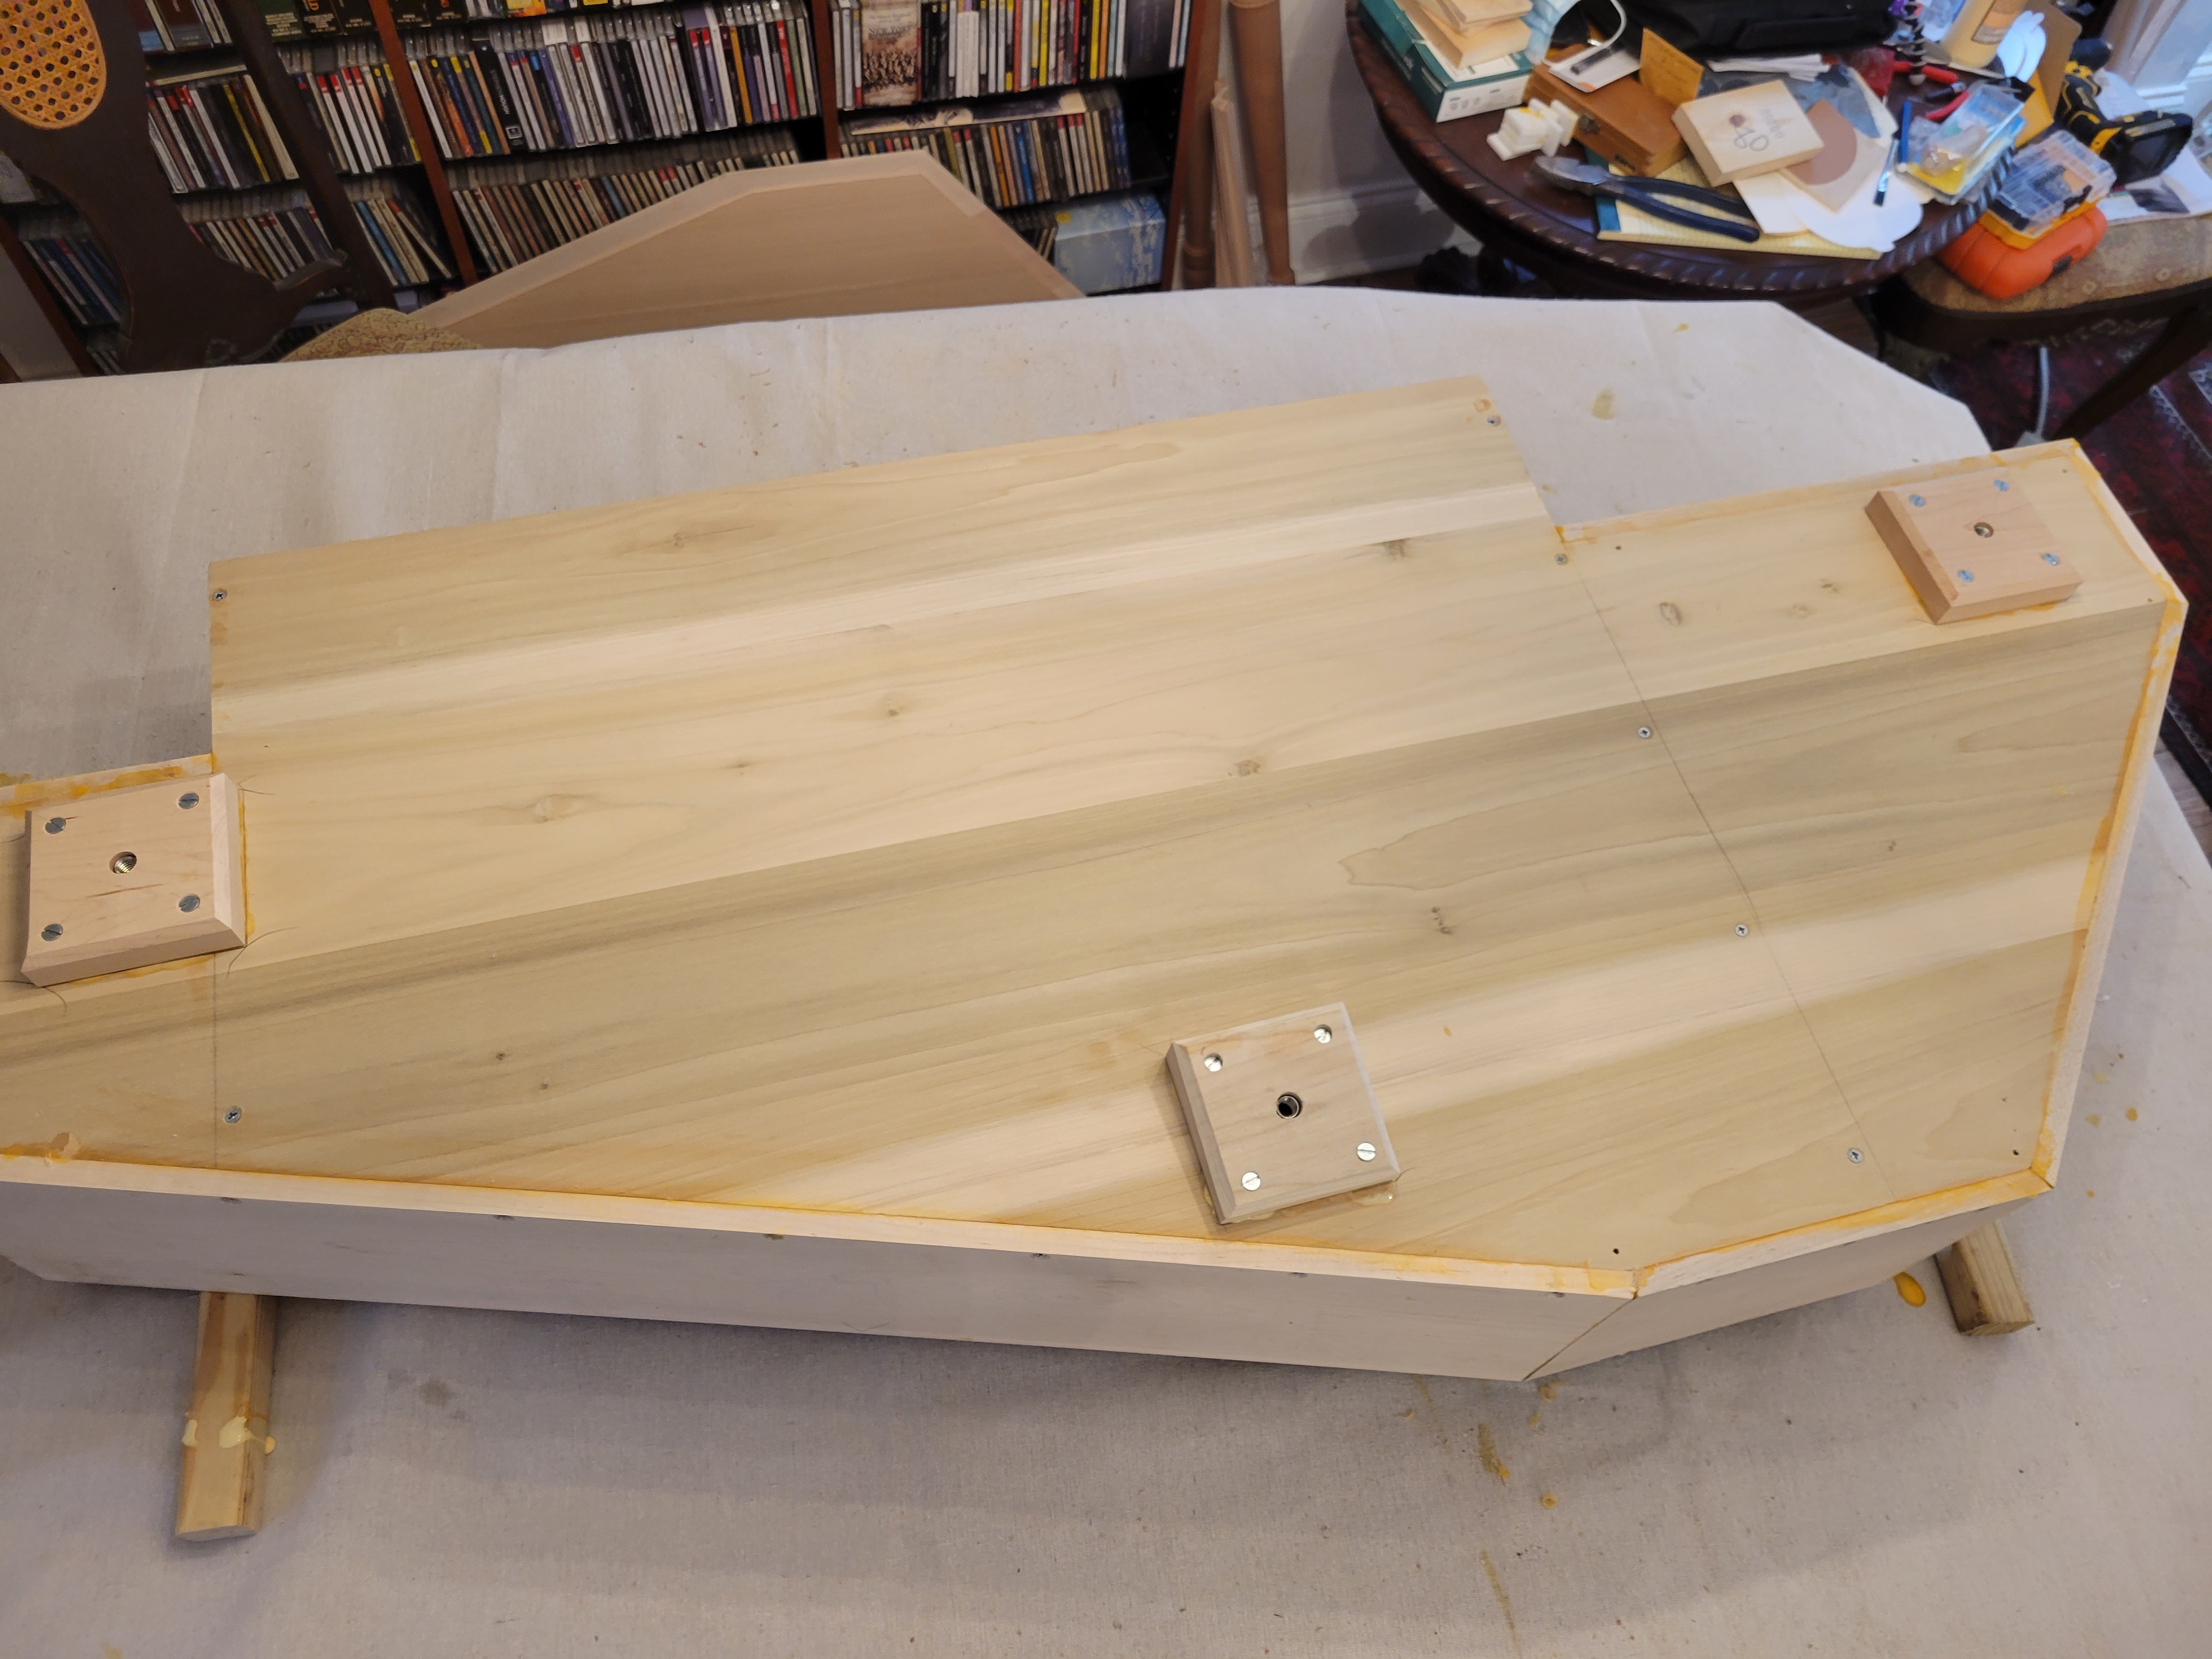
Exact positions are not specified for these. Kottick just says “on[e] at each end and one in the back, equidistant from the other two.” Of course, when I screwed on the legs and slid the keyboard assembly in, it looked like I was making real progress:
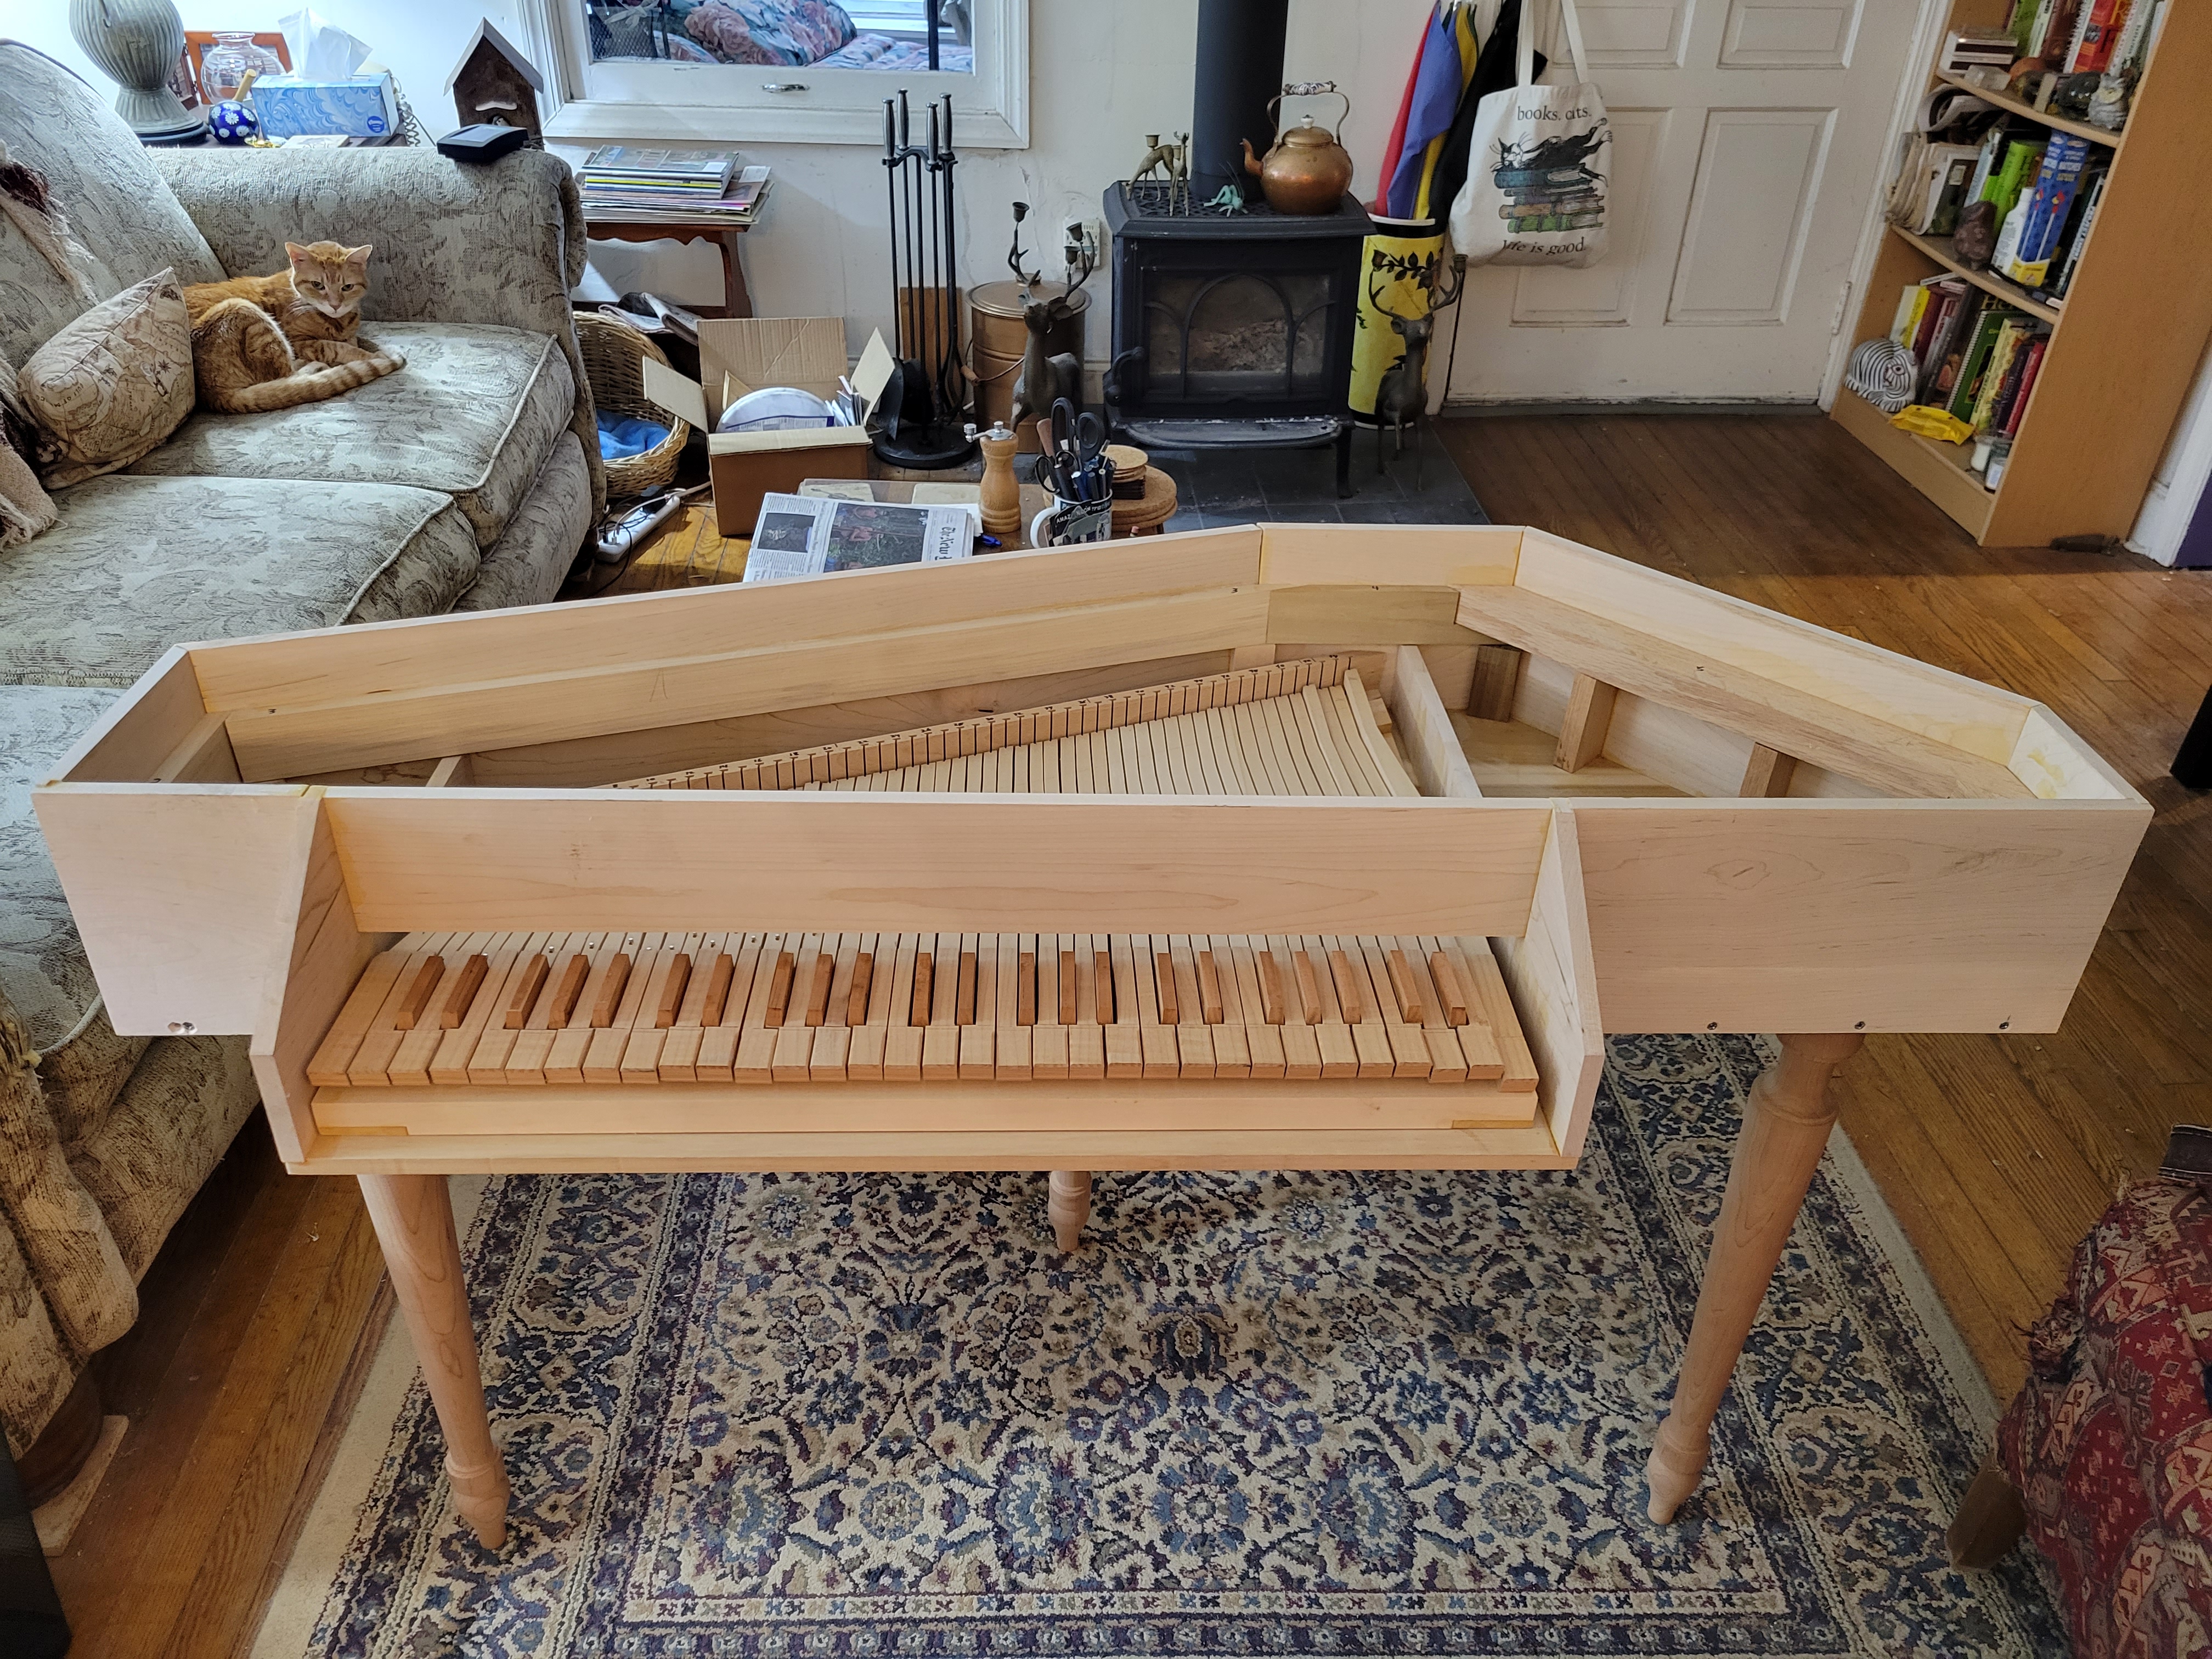
It’s always a momentous occasion when your baby first stands up on its own three legs!